
Sauces & Condiments
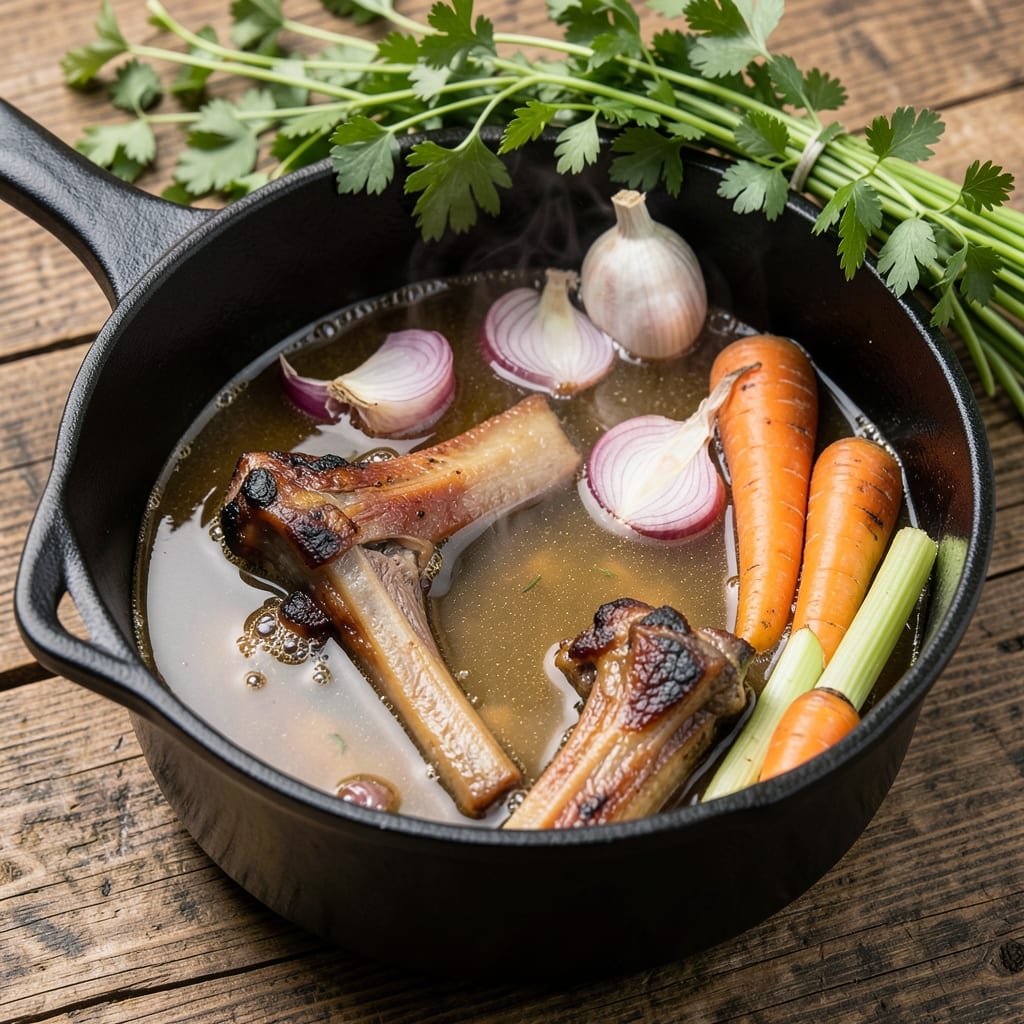
This basic beef broth recipe transforms humble ingredients into liquid gold—deep, savory, and packed with umami that elevates every dish. The secret lies in patience: slow simmering beef bones, vegetables, and herbs unlocks flavors that store-bought versions can't match. With just 15 minutes of prep and 6-8 hours of simmering, you'll have a foundation for soups, sauces, and grains that tastes like it simmered all day.
The beauty of this recipe is its simplicity: no fancy techniques, just 5 core ingredients—beef bones, onions, carrots, celery, and herbs—that build complex flavor through time. The key is browning the bones first (don't skip this step!) to create a rich, caramelized base. As it simmers, collagen releases from the bones, transforming into gelatin that gives your broth that signature velvety body.
What you end up with is a deep amber broth so flavorful it becomes the star of your meal. Strain it for clarity or leave it cloudy for extra body, then reduce it further for sauces or freeze it in ice cube trays for instant flavor boosts. This isn't just broth—it's the secret weapon that turns simple meals into restaurant-quality dishes.
Perfect for meal prep, freezer storage, or last-minute cooking, this recipe delivers restaurant-quality depth with minimal effort. The best part? Every batch tastes better than the last as flavors develop over time. Let's get started with the foundation of great cooking.
Ingredients for basic beef broth
Five core ingredients and patience unlock restaurant-quality depth in this humble beef broth.
| Ingredient | Amount | Notes |
|---|---|---|
| Beef Bones 🦴 | 4 lb | Marrow-rich knuckle or neck bones preferred |
| Yellow Onions 🧅 | 2 whole | Medium size, roughly chopped |
| Carrots 🥕 | 4 whole | Medium size, cut into 2-inch chunks |
| Celery Stalks 🧅 | 4 whole | Cut into 2-inch pieces |
| Garlic Cloves 🧄 | 8 cloves | Smashed with side of knife |
| Fresh Parsley Stems 🌿 | 4 whole | Tied with twine for bundle |
| Fresh Thyme Sprigs 🌿 | 4 whole | With leaves attached |
| Black Peppercorns 🌶️ | 1 tbsp | Crushed with mortar and pestle |
| Bay Leaves 🌿 | 2 whole | Dried, standard size |
| Apple Cider Vinegar 🍎 | 1 tbsp | For acidity balance |
| Cold Water 💧 | 16 cups | Filtered preferred |
The bones are non-negotiable—marrow-rich knuckles or neck bones from Whole Foods or your local butcher deliver the richest gelatin release. Look for bones with visible marrow cavities and minimal meat clinging. Costco often carries these in bulk, which is ideal for larger batches. If you can't find marrow bones, beef soup bones work as a secondary option, though they'll yield slightly less depth. The vegetables form the aromatic base, so organic produce with vibrant color ensures maximum flavor extraction—no need for fancy brands, just freshness. The celery, onion, and carrots should be roughly chopped to maximize surface area for browning.
No fresh herbs? Dried thyme at one-third the amount works in a pinch, but fresh delivers superior aroma. Running short on vinegar? Lemon juice at the same quantity provides similar acidity. The water should be cold to prevent immediate cooking and allow for proper flavor extraction during the simmer. For an even deeper flavor profile, consider adding a splash of red wine (about 1/4 cup) during the simmering process, though it's not essential. The key to substitutions is maintaining the balance of sweetness (carrots), acidity (vinegar), and umami (bones)—adjust other components accordingly if you swap any single element.
This broth develops flavor over time, so simmer uncovered for 6-8 hours—longer simmers yield deeper color and more gelatin. Store in glass jars or airtight containers in the refrigerator for up to 5 days, or freeze for up to 6 months. For portion control, freeze in ice cube trays—each cube equals roughly 1/4 cup of concentrated broth perfect for sauces. The longer it sits, the more complex the flavor becomes, so don't rush the process. Strain before using for clarity, or leave it cloudy for extra body in soups and stews.
Why You'll Love This Recipe
- No Chopping Chaos: I swear by this method—just rough-chop the onions, carrots, and celery (no peeling needed) and toss them in. The bones do all the work while you sip wine and pretend you’re not cooking.
- Deep Umami Magic: That first sip? Rich, savory, and actually meaty—thanks to the bones and garlic simmering low and slow. It’s the kind of broth that makes you pause mid-slurp and think, “Wait, is this really just beef and veggies?”
- Weeknight Workhorse: Freeze half the batch for future soups, stews, or even risotto. I’ve used it to deglaze pans, revive dry rice, and even make a quick pasta sauce when I’m too tired to think.
- Budget-Friendly Goldmine: Beef bones are cheap at the grocery store, and this recipe stretches them into way more than you’d get from pre-made. Honestly? It’s the closest thing to a freezer staple that doesn’t involve sad leftovers.
Step-by-step instructions for basic beef broth
A simple yet profound technique that transforms humble ingredients into deeply flavorful stock.
Prepare the Bones and Aromatics
Begin by examining the 4 lb beef bones for any remaining meat or marrow. Use a sharp knife to scrape off any excess tissue, leaving just the clean bone structure. This ensures your broth develops maximum clarity and flavor without cloudiness. Place the bones in a large stockpot.
Next, prepare the aromatic vegetables. Roughly chop the 2 whole yellow onions into large chunks—no need for precision here. Cut the 4 whole carrots into 2-inch chunks and the 4 whole celery stalks into similar pieces. Smash the 8 garlic cloves with the side of your knife to release their oils without mincing them. Tie the 4 whole fresh parsley stems together with kitchen twine to form a bundle, and do the same with the 4 whole fresh thyme sprigs. Crush the 1 tbsp black peppercorns in a mortar and pestle for even distribution.
Roast the Bones for Depth of Flavor
Preheat your oven to 450°F. Spread the beef bones on a baking sheet in a single layer, ensuring they don't overlap. Roast for 20-25 minutes until they develop a deep golden-brown crust. This caramelization creates complex flavors that will infuse your broth. Turn the bones occasionally for even browning.
While the bones roast, add the chopped onions, carrots, celery, smashed garlic, crushed peppercorns, and 2 whole bay leaves to the same baking sheet. Toss everything together and roast for an additional 10 minutes until the vegetables soften slightly and begin to caramelize. This step enhances the umami profile of your broth significantly.
Simmer the Broth Low and Slow
Transfer the roasted bones and vegetables to your stockpot. Add the 1 tbsp apple cider vinegar and pour in the 16 cups cold water. The vinegar helps extract collagen from the bones, resulting in a richer, more gelatinous broth. Bring the mixture to a boil over medium-high heat, then immediately reduce the heat to low.
Once the broth begins to simmer, skim off any foam or impurities that rise to the surface using a fine-mesh skimmer or ladle. This ensures your final broth is crystal clear. Maintain a gentle simmer—never a rolling boil—as this can cause the broth to become cloudy and prevent proper collagen extraction. Cover the pot and cook for 3-4 hours, partially uncovered, allowing some moisture to evaporate and intensify the flavors.
Strain and Finish the Broth
After simmering, remove the pot from heat and let the broth sit for 10 minutes. This resting period allows any settled particles to sink to the bottom. Line a fine-mesh strainer with cheesecloth or a coffee filter to catch any fine particles that might slip through. Carefully strain the broth into a large bowl or clean pot, discarding the solids.
Return the strained broth to the pot and taste for seasoning. The broth should have a deep, savory flavor with notes of caramelized onions, garlic, and thyme. If needed, adjust the seasoning with additional salt or a splash of vinegar. The broth is now ready to use immediately or can be refrigerated for up to 5 days or frozen for up to 3 months. For best results, skim off any solidified fat that rises to the top before reheating.
Pro Tips For Making Basic Beef Broth
- BLANCH BONES FIRST: I learned this the hard way—skipping the quick sear and boil in water first means your broth will taste like a butcher shop instead of a restaurant. Toss bones in boiling water for 5 minutes, drain, then start your broth. This removes impurities and gives you a cleaner, richer base.
- CHAR THE VEGETABLES: Don’t just toss chopped onions, carrots, and celery into the pot—they need color. Sear them in batches over medium-high heat until deeply browned (about 10 minutes total). That caramelization adds depth the slow simmer can’t replicate.
- SKIP THE GARLIC SKINS: I used to crush whole garlic cloves and leave the skins in, thinking it didn’t matter. Wrong. Peel them first, then smash them flat with the side of your knife—this releases more flavor without bitterness. (Yes, even if you’re impatient like me.)
- STRAIN TWICE IF NEEDED: After simmering, some people swear by lining a fine-mesh strainer with cheesecloth for ultra-clear broth. I skip this unless I’m making it for a fancy sauce, but if you do, give the first strain a squeeze—you’ll catch extra collagen and flavor. (Your future self will thank you.)
Pro cooking tips for perfect results
Roasting Secrets
The oven is your secret weapon for deep flavor—roast bones at 450°F for 20-25 minutes until they develop a dark mahogany crust. This Maillard reaction creates hundreds of flavor compounds that infuse your broth. I like to flip bones halfway to ensure even browning—uneven spots mean uneven flavor. 🔥
Don't skip roasting the aromatics! Toss chopped onions, carrots, and celery onto the same sheet after the bones go in. Their caramelized sugars add sweetness that balances the savory bones. I add a pinch of salt to the vegetables before roasting to enhance their natural sweetness.
Simmer Control
Low and slow wins every time—maintain a gentle simmer (tiny bubbles, not rolling) to extract collagen without breaking down proteins. I use a large stockpot because shallow depth helps maintain even heat. Skim foam for the first 30 minutes to remove impurities that would otherwise cloud your broth.
Never let it boil vigorously—this causes proteins to emulsify, turning your clear broth cloudy. If you hear popping sounds, reduce heat immediately. The goal is 6-8 hours of steady simmering for maximum gelatin release. I set my timer and check every 2 hours to ensure consistent temperature.
Vinegar's Role
The 1 tbsp apple cider vinegar isn't just for acidity—it helps break down collagen in the bones, creating more gelatin for that signature velvety texture. I add it with the cold water to distribute evenly. If you're concerned about tanginess, use white wine vinegar instead—it's milder but equally effective.
For an extra umami boost, add 1 tbsp soy sauce or 1 tsp fish sauce during the final 30 minutes of simmering. These ingredients add depth without overpowering the natural beef flavor. Just be sure to strain them out if you prefer crystal-clear broth.
Straining Techniques
For the clearest broth, line your strainer with double-layered cheesecloth or a coffee filter. I use a fine-mesh tamis strainer for the first pass, then a paper coffee filter for final clarity. Don't rush this step—let the liquid drip slowly to catch all fine particles. The result is a beautifully clear, restaurant-quality broth.
Want cloudy broth for soups? Skip the cheesecloth and strain through a regular mesh sieve. The tiny particles add body and richness that's perfect for hearty dishes. I often make two batches—one clear for sauces and one cloudy for soups—using the same base ingredients. ✨
Nutrition facts
Frequently asked questions about homemade beef broth
Can I use beef chuck roast instead of bones?
Yes, but the results will be different. Beef chuck roast contains more meat and fat, which will create a richer, more opaque broth with less gelatin. For a true broth (rather than a stock), use 1 lb chuck roast per 4 cups water and simmer for 3-4 hours. The flavor will be heartier but less velvety than bone broth.
How do I know when my beef broth is done?
Your broth is ready when it develops a deep amber color and a rich, savory aroma. The bones should be soft enough to crumble between your fingers. For maximum gelatin extraction, simmer for 6-8 hours. If you're short on time, 4 hours will still yield good flavor, though with slightly less body.
What's the best way to store leftover beef broth?
For short-term storage, keep broth in airtight containers in the fridge for up to 5 days. For long-term storage, freeze in glass jars or ice cube trays (each cube = 1/4 cup). Label with the date—frozen broth keeps for 3-6 months. Always remove solidified fat before reheating for the best flavor.
Can I make this broth in a slow cooker? Follow the same roasting step, then transfer everything to your slow cooker. Use low heat for 8-10 hours (or high for 6-7 hours). The slow cooker's gentle heat is perfect for collagen extraction. Just
Why does my broth look cloudy?
Cloudiness usually means proteins have emulsified from boiling too vigorously. For crystal-clear broth, maintain a gentle simmer and skim foam regularly. If it's already cloudy, strain through double-layered cheesecloth or a coffee filter. Cloudy broth is still delicious—it just has more body, perfect for soups and stews!