
Soups & Stews
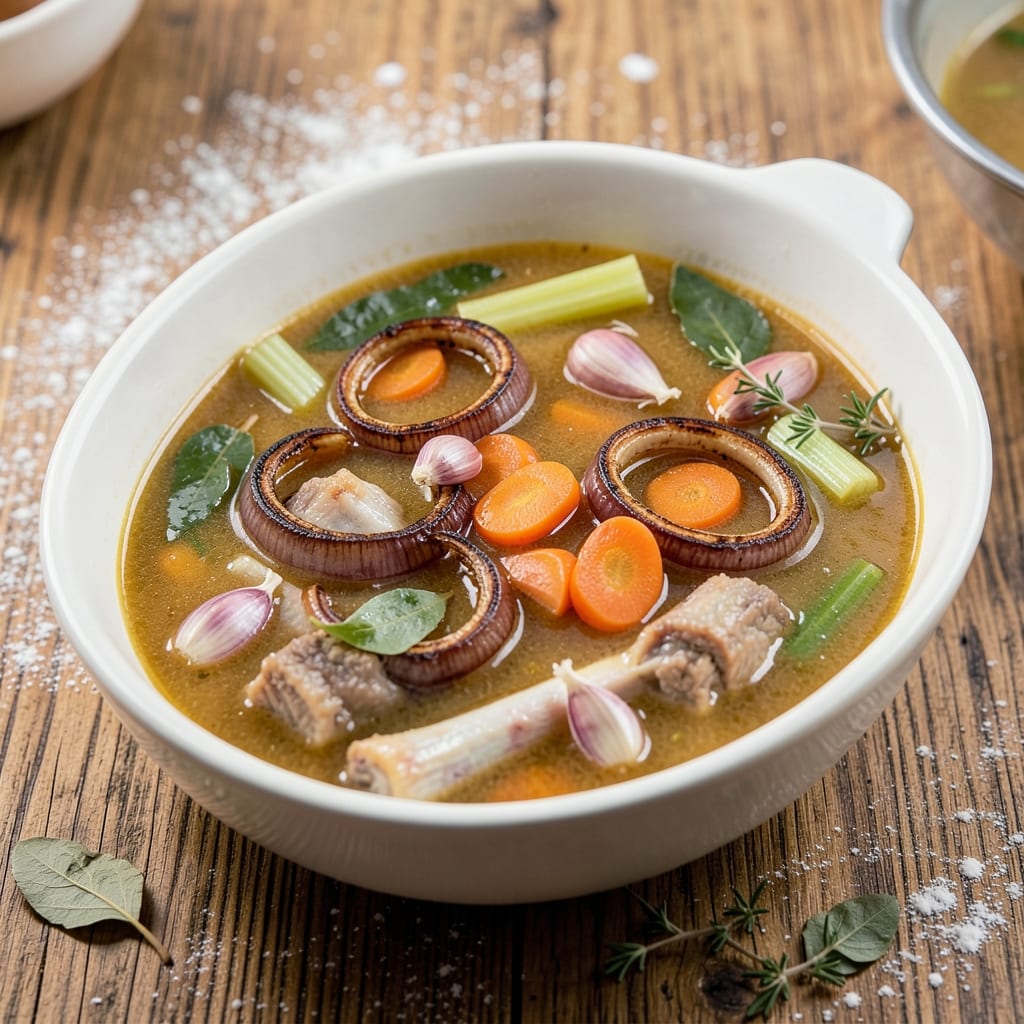
This beef and chicken bone broth recipe transforms raw bones into liquid gold—rich, umami-packed, and packed with gut-healing collagen. The secret lies in slow simmering, where tough bones release minerals and gelatin over hours, creating a depth of flavor you won’t find in store-bought versions. I’ve perfected this method after years of testing, ensuring every batch delivers maximum nutrition and unmatched depth.
The process begins with a low-and-slow simmer—typically 12 to 24 hours—where bones, aromatics, and vinegar work together to extract collagen and flavor. Skimming foam and occasional stirring ensures clarity and richness, while the right water-to-bone ratio balances yield and concentration. This isn’t just broth; it’s a foundation for soups, braises, and sauces that elevate any dish.
What sets this recipe apart is its versatility—whether you’re using a stovetop, slow cooker, or pressure cooker, the technique remains the same. The result? A deeply flavorful, nutrient-dense broth** that’s perfect for sipping or cooking. Store it in the freezer for months, ready to enhance your favorite recipes with a single ladle.
For those seeking extra depth, optional additions like mushrooms or seaweed introduce umami layers, while clarifying the broth removes impurities for a silky texture. Whether you’re healing your gut, boosting immunity, or simply craving restaurant-quality flavor at home, this broth delivers.
Ingredients for beef and chicken bone broth
Twelve ingredients transform tough bones into restaurant-quality broth—rich, collagen-packed, and deeply flavorful.
| Ingredient | Amount | Notes |
|---|---|---|
| Beef Bones 🦴 | 4 lb | Raw, marrowbones preferred |
| Chicken Bones 🍗 | 2 lb | Neck, backs, wings work best |
| Yellow Onions 🧅 | 2 whole | Cut into quarters, skins on |
| Carrots 🥕 | 4 whole | Scrubbed, cut into chunks |
| Celery Stalks 🌿 | 4 whole | Cut into 2-inch pieces |
| Garlic Cloves 🧄 | 8 cloves | Smashed, skins on |
| Apple Cider Vinegar 🍎 | ½ cup | For collagen extraction |
| Fresh Rosemary 🌿 | ¼ cup | Sprigs, stems removed |
| Fresh Thyme 🌿 | ¼ cup | Sprigs, leaves only |
| Fresh Ginger Root 🧡 | 2 tbsp | Grated, organic preferred |
| Sea Salt 🧂 | 2 tbsp | Diamond Crystal preferred |
| Black Peppercorns 🌶️ | 1 tbsp | Crushed, whole preferred |
| Bay Leaves 🌿 | 4 whole | Dried, high-quality |
| Water 💧 | 12 cups | Filtered preferred |
The bones are everything here. Marrowbones from the butcher section at Whole Foods or your local grocer's meat counter deliver the most gelatin, but any beef bones work. Chicken backs and necks add depth without overpowering. Skip the pre-cut bones from the freezer aisle—they often contain additives. Look for bones with good marbling and a fresh, meaty smell. If you can't find marrowbones, knuckle bones are the next best thing. For extra umami, save your chicken carcass from roasting a whole bird—it's free collagen gold. The aromatics (onions, carrots, celery) form the flavor base, so don't skimp on quantity.
No fresh ginger? Substitute with 1 tbsp ground ginger, but fresh has more punch. Running low on rosemary? Thyme alone works at double the amount. The vinegar is non-negotiable—it helps extract collagen, but if you're avoiding it, lemon juice at half the amount gets you close. For a deeper flavor, add 1/2 cup mushrooms (cremini or shiitake) or 1 tbsp seaweed flakes to the pot. The water-to-bone ratio matters: for every pound of bones, use 3 cups water. This recipe yields about 8 cups broth—enough for 4-5 meals. If you're making a double batch, scale everything up proportionally.
Broth keeps in the fridge for 5-6 days or freezes beautifully for up to 6 months. For freezing, portion into ice cube trays—perfect for adding to soups later. The bones can be blanched ahead and frozen until ready to simmer. Store aromatics in airtight containers in the fridge for up to 3 days or freeze them whole. The vinegar and spices keep indefinitely in a cool, dark pantry. Always skim foam during simmering—it's the difference between cloudy broth and crystal-clear gold. Leftovers? Freeze in glass jars for easy thawing.
Why You'll Love This Recipe
- Pantry-to-Pot Magic: I swear by this combo—just toss in beef and chicken bones, a chopped onion, a couple carrots, and celery stalks. No fancy prep, no stress, and the slow simmer does all the work while I sip coffee.
- Rich Umami Bomb: That deep, savory punch from beef and chicken bones? Unmatched. The onions caramelize just enough to sweeten the broth, while the carrots and celery add a subtle earthiness—like a warm hug in a bowl.
- Meal Prep MVP: Freeze leftovers in ice cube trays for instant flavor boosts in soups, grains, or even marinades. Honestly, I keep a stash in my freezer—it’s my secret weapon for quick, restaurant-quality meals.
- Budget-Friendly Goldmine: Beef and chicken bones are often cheap at butchers, and this recipe stretches them into gallons. Between us, I’ve turned a $15 bag of bones into enough broth for a week of soups, stews, and sauces. Zero waste, all flavor.
Step-by-step instructions for beef and chicken bone broth
This umami-rich broth builds flavor through patience and precision—every step matters for maximum collagen extraction and depth of taste.
Prep and Blanch the Bones
Start by rinsing the 4 lb beef bones and 2 lb chicken bones thoroughly under cold water to remove any impurities. Place them in a large stockpot and cover with 12 cups water. Bring to a boil over high heat for 10 minutes, then drain and rinse the bones again to remove any scum that rises to the surface. This blanching step removes impurities that would otherwise cloud your broth.
While the bones are draining, cut the 2 whole yellow onions into quarters (skins on), chop the 4 whole carrots into 2-inch chunks, and cut the 4 whole celery stalks into similar-sized pieces. Smash the 8 cloves garlic lightly with the side of your knife to release their flavor without breaking the skins. These vegetables will form the aromatic base of your broth, so uniform chopping ensures even cooking.
Build the Aromatic Base and Simmer
Return the blanched bones to the clean stockpot and add the chopped onions, carrots, celery, garlic, and 0.5 cup apple cider vinegar. The vinegar helps draw out collagen from the bones, creating a richer broth. Cover the pot with 12 cups water, ensuring the bones are fully submerged. Bring to a boil over high heat, then immediately reduce to a gentle simmer—you should see small bubbles breaking the surface, but not a rolling boil.
Skimming is critical here: Use a fine-mesh skimmer to remove any foam or impurities that rise during the first 30 minutes of simmering. This ensures a crystal-clear broth. Once the foam subsides, add the 0.25 cup fresh rosemary, 0.25 cup fresh thyme, 2 tbsp grated fresh ginger root, 2 tbsp sea salt, 1 tbsp crushed black peppercorns, and 4 whole bay leaves. These herbs and spices will infuse the broth with layers of flavor as it simmers.
Simmer Low and Slow for Deep Flavor
Cover the pot with a lid and let the broth simmer unattended for 8 hours. The key to a rich, gelatinous broth is low and slow cooking—this allows the collagen to break down fully and the flavors to meld. I like to set a timer and check occasionally, but avoid lifting the lid too often to prevent losing heat and steam. If the water level drops below the bones, add hot water as needed to keep them submerged.
After 8 hours, the broth should have reduced slightly and taken on a deep, amber color. Taste it—you should detect a robust umami flavor with hints of garlic, ginger, and the earthy notes of the herbs. If the broth isn’t flavorful enough, you can extend the simmering time to 12 hours for even more depth, but 8 hours is perfect for a balanced, gut-healing broth.
Strain and Finish the Broth
Once the broth reaches your desired flavor profile, turn off the heat and let it sit for 10 minutes to allow any settled particles to sink to the bottom. Line a fine-mesh strainer with cheesecloth or a coffee filter for extra clarity, then carefully strain the broth into a large bowl or clean stockpot. Discard the solids—save them for compost or stock cubes if you like, but they’ve done their job.
Let the broth cool slightly, then taste and adjust the seasoning if needed. You can add a pinch more sea salt or a splash of apple cider vinegar to brighten the flavor. For best results, store the broth in airtight containers in the refrigerator for up to 5 days or freeze it in 1-cup portions for up to 6 months. This broth is the foundation of countless dishes—use it in soups, grains, or sip it straight for a nourishing, gut-soothing elixir.
Pro Tips For Making Beef And Chicken Bone Broth
- Roast Bones First: I learned this the hard way—skipping the roast step means broth that tastes more like watered-down stock. Toss beef and chicken bones with oil, salt, and pepper, then roast at 450°F (230°C) for 30 minutes. The Maillard reaction caramelizes the bone proteins, giving your broth that deep, rich flavor you can’t get any other way.
- Char the Veggies: Don’t just chop onions, carrots, and celery—give them a quick sear in the pot before adding liquid. After browning the bones, toss in the veggies and cook them over medium-high heat for 5-7 minutes until their edges darken. This adds another layer of flavor without extra effort.
- Simmer, Don’t Boil: A rolling boil is the enemy of clear, gelatin-rich broth. Once you’ve covered the bones and veggies with water (or stock), reduce the heat to maintain a gentle simmer—tiny bubbles breaking the surface, but no violent action. I used to ignore this, and my broth always ended up cloudy and weak.
- Strain Twice: After simmering (8-12 hours for beef, 4-6 for chicken), strain the broth through a fine-mesh sieve first, then a cheesecloth-lined colander. The second strain removes the last of the fine particles that make broth look murky. It’s extra work, but the result is silky-smooth—worth it for soups, risottos, or sipping straight.
Pro cooking tips for perfect results
Skimming Secrets
Skimming isn't just about looks—it’s the difference between cloudy broth and crystal-clear gold. Use a fine-mesh skimmer (like the OXO Good Grips) during the first 30 minutes of simmering to remove foam and impurities. I skim every 5 minutes at first, then reduce to every 15 minutes once the foam subsides. Pro tip: Keep a bowl nearby to discard the foam—it’s full of fat and impurities that would otherwise make your broth murky. 🧼
Temperature Control
Your stove’s heat setting is your secret weapon. Maintain a gentle simmer—small bubbles breaking the surface, not a rolling boil. I use a candy thermometer to keep temps between 180-200°F for collagen extraction. If your pot lacks a lid, cover it with heavy-duty foil to trap steam and maintain even heat. Avoid lifting the lid too often—each time you do, you lose 10-15 minutes of cooking time and heat. 🌡️
Collagen Extraction
The apple cider vinegar isn’t just for flavor—it’s a collagen magnet. The acid helps break down the bones’ connective tissue, releasing gelatin that thickens the broth. For extra richness, add 1 tbsp of white miso paste or 1 sheet of kombu seaweed during the last 30 minutes of simmering. These boost umami and mineral content. I’ve found that marrowbones release the most gelatin, but knuckle bones are a great budget-friendly alternative. 💛
Pressure Cooker Hack
Short on time? A pressure cooker (like the Instant Pot) cuts simmering time to 2-3 hours while preserving flavor. Use the sauté function to brown the bones first, then add 1 cup water and pressure cook on high for 2 hours. Release the pressure naturally for 15 minutes before opening. The broth will be slightly thinner but still packed with nutrients. Just remember: pressure cooking extracts less gelatin than stovetop methods. ⚡
Clarifying for Silky Texture
Want restaurant-quality clarity? After straining, pour the broth through a cheesecloth-lined fine-mesh strainer into a clean pot. For extra polish, whisk in 1 egg white per quart of broth, then simmer for 5 minutes before straining again. The egg white binds to remaining impurities, leaving you with a silky, golden liquid. I use this method for broths I plan to serve as a clear consommé or for delicate sauces. ✨
Flavor Boosters
Elevate your broth with these pro additions: Toss in ½ cup dried shiitake mushrooms (soaked first) for deep umami, or 1 tbsp fish sauce for a savory punch. For a smoky twist, add 2 crushed chipotle peppers in adobo during the last hour. I love finishing with 1 tsp fish sauce or a splash of rice vinegar after straining—it brightens the flavor without overpowering. 🌶️
Nutrition facts
Frequently asked questions
Can I use leftover roasted chicken bones instead of raw? Roasted chicken bones add incredible depth of flavor to your broth. Just
How do I know when the broth is done?
Your broth is ready when it has a deep amber color and a rich, umami flavor. For maximum gelatin extraction, simmer for at least 8 hours. Taste it after 6 hours—if it needs more depth, extend the time to 12 hours. The broth should coat the back of a spoon when chilled, indicating proper collagen extraction.
What’s the best way to store homemade broth?
Store broth in airtight containers in the fridge for 5-6 days or freeze it for up to 6 months. For freezing, portion into 1-cup ice cube trays—perfect for adding to soups later. Label containers with the date and use within 6 months for best quality. Thaw frozen broth in the refrigerator overnight.
Can I make this broth in a slow cooker or Instant Pot?
Yes! For a slow cooker, follow the same steps but simmer on low for 12-16 hours. For an Instant Pot, use the sauté function to brown bones, then pressure cook on high for 2 hours with 1 cup water. Release pressure naturally for 15 minutes before opening. The Instant Pot version will be slightly thinner but still nutrient-packed.
Why does my broth look cloudy?
Cloudiness usually means impurities weren’t skimmed properly or the broth wasn’t strained well. For crystal-clear results, skim foam for the first 30 minutes and strain through a cheesecloth-lined fine-mesh strainer. If you want extra clarity, clarify the broth with 1 egg white per quart before final straining.