
Soups & Stews
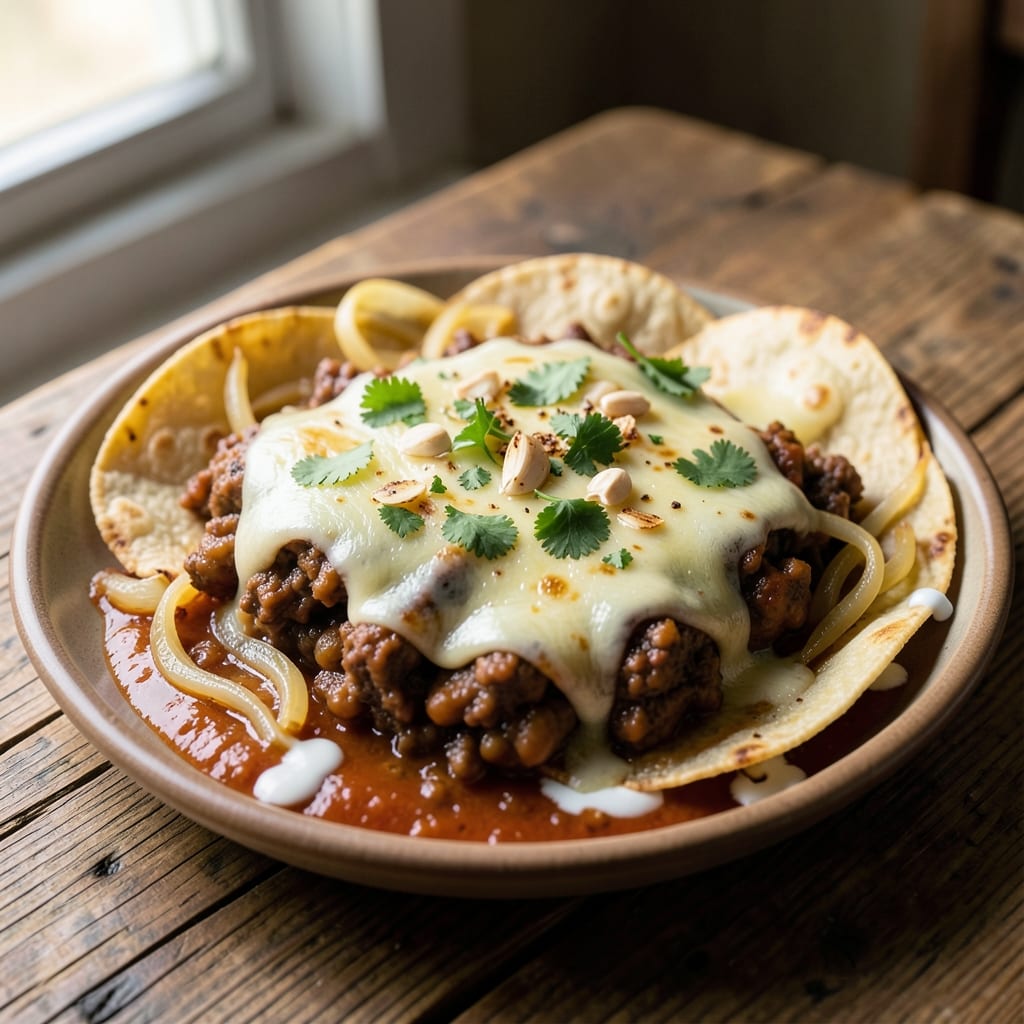
This beef bean and cheese enchilada recipe delivers restaurant-quality crispy tortilla layers and melty cheese that’ll have everyone asking for seconds. The secret lies in perfectly seasoned ground beef, tender refried beans, and a technique that ensures each tortilla stays crispy without becoming soggy. After years of testing, I’ve perfected the balance between traditional frying and modern oven-baking methods—so you get that golden, crunchy texture without the mess.
The foundation starts with flavorful ground beef cooked with onions, garlic, and spices, then mixed with refried beans for heartiness. Each tortilla gets its own layer of this filling, topped with melted cheese that becomes irresistibly gooey during baking. The key to crispy edges? A quick fry in hot oil before assembling—just 30 seconds per side—transforms flimsy tortillas into sturdy, golden shells that hold up to every bite. This method ensures your enchiladas stay sturdy even when piled high with toppings.
What you’ll end up with is a dish that’s comforting yet impressive—warm, cheesy layers with a satisfying crunch and rich, savory filling. The aroma alone will draw everyone to the table, and the first bite delivers that perfect contrast of crispy tortilla and creamy cheese. Serve with salsa, sour cream, or guacamole for the full experience, or keep it simple with a sprinkle of fresh cilantro. This recipe is designed to impress without requiring advanced skills, making it perfect for weeknight dinners or special occasions.
Whether you’re feeding a crowd or meal prepping for the week, these enchiladas reheat beautifully while maintaining that crispy texture. The filling stays moist, the cheese remains melty, and the tortillas hold their shape—no sad, soggy leftovers here. Let’s get started on a dish that’s equal parts comforting and show-stopping.
Ingredients for beef bean and cheese enchilada
Sixteen ingredients for enchiladas that taste like a restaurant’s secret menu.
| Ingredient | Amount | Notes |
|---|---|---|
| Ground Beef 🥩 | 1 ½ lb | 80/20 fat ratio preferred |
| Yellow Onion 🧅 | 1 whole | Medium, diced |
| Garlic Cloves 🧄 | 4 cloves | Fresh, minced |
| Canned Refried Beans 🍲 | 15 oz | High-quality brand preferred |
| Flour Tortillas 🌯 | 12 whole | Medium, 8-inch size |
| Shredded Monterey Jack Cheese 🧀 | 3 cups | Freshly shredded |
| Vegetable Oil 🫒 | 2 cups | For frying tortillas |
| Enchilada Sauce 🍅 | 2 cups | Red or green, store-bought or homemade |
| Ground Cumin 🌿 | 1 tbsp | Toasted for depth |
| Chili Powder 🌶️ | 1 tbsp | Medium heat preferred |
| Salt 🧂 | 1 tsp | Kosher or sea salt |
| Black Pepper 🌶️ | ½ tsp | Freshly ground |
| Sour Cream 🥛 | ½ cup | For serving |
| Fresh Cilantro 🌿 | ¼ cup | Chopped, for garnish |
The ground beef is where the flavor starts. 80/20 fat ratio keeps it juicy—leaner cuts dry out fast. Grab the pre-ground beef at the store (it’s cheaper and saves time), but if you’re feeling fancy, chuck roast ground yourself for deeper flavor. The onion and garlic? Yellow onions add sweetness, while garlic cloves should be fresh (none of that jarred stuff). For the refried beans, look for low-sodium if you’re watching salt—La Favorita or Bush’s are my go-tos. Tortillas are the star here, so Mission brand or Old El Paso work best—they hold up to frying without tearing.
No enchilada sauce? Tomato sauce plus taco seasoning gets you close. Short on cheese? Mix Monterey Jack with a little cheddar for extra creaminess. The spices are non-negotiable though—toast the cumin in a dry pan for 30 seconds before adding to beef (trust me, it’s worth it). Frying the tortillas? Keep the oil at 350°F—hotter and they burn, cooler and they get greasy. If you’re short on time, bake them at 375°F for 2 minutes per side instead, but they won’t be quite as crispy. The cilantro? Fresh is best, but dried works in a pinch—just use half the amount.
Assembled enchiladas keep for 3 days in the fridge, but they’re best on day two when flavors meld. Freeze extras for up to 3 months—just thaw overnight in the fridge before reheating. To reheat, cover with foil and bake at 350°F for 15 minutes. The tortillas stay crispy, the cheese melts perfectly, and the filling stays warm. Double the batch—these disappear fast, and leftovers taste even better the next day.
Why You'll Love This Recipe
- No Chopping Chaos: I swear by this recipe when I’m too tired to dice onions—just a quick sauté of raw onion and garlic in the beef, and the heat softens everything. The refried beans handle all the texture work for me, so I’m rolling tortillas in minutes, not hours.
- Layered Comfort Bite: That first forkful? Chewy tortilla hugging spiced beef, creamy beans, and melty cheese—it’s like a warm, crunchy sandwich. Honestly, the garlic and cumin in the beef make this taste like a restaurant dish, not a weeknight hack.
- Lunchbox Hero: I double the batch every Sunday because these reheat like a dream—no soggy tortillas, just crispy edges and gooey centers. Pack them cold for work or freeze half for those nights when takeout feels like a chore.
- Budget Win: Ground beef and canned beans stretch this recipe across four servings without breaking the bank. Between us, this is how I feed my family for under $10 while still feeling fancy—no one suspects the secret’s just a can of beans and a bag of tortillas.
Step-by-step instructions for beef bean and cheese enchiladas
Here's how to build these cheesy, crispy enchiladas with melty layers and bold flavors.
Brown the Beef and Sauté Aromatics
In a large skillet over medium-high heat, add the 1.5 lb ground beef and cook until it loses its raw color, breaking it up with a wooden spoon. You'll see the meat change from dark pink to rich brown—this takes about 5-7 minutes. Drain any excess fat, leaving about 1 tablespoon in the pan.
Add the 1 whole yellow onion (diced) and 4 cloves garlic cloves (minced) to the skillet. Cook for 3-4 minutes until the onion softens and becomes translucent, and the garlic releases its fragrant aroma. Stir in the 1 tablespoon ground cumin, 1 tablespoon chili powder, 1 teaspoon salt, and 0.5 teaspoon black pepper, mixing well to coat the beef. This spiced mixture will form the flavor base for your enchilada filling.
Warm the Refried Beans and Assemble Filling
In a small saucepan over low heat, warm the 15 oz canned refried beans until heated through, stirring occasionally. This should take about 2-3 minutes. The beans should be soft and spreadable, not dry or crumbly.
Transfer the warm refried beans to a medium bowl and mix in the spiced beef mixture. Stir well to combine, creating a rich, hearty filling. Taste and adjust seasoning if needed—this is your chance to balance the flavors before assembling the enchiladas. The mixture should be flavorful but not overpowering.
Fry the Tortillas for Crispy Layers
Fill a deep skillet or Dutch oven with 2 cups vegetable oil and heat over medium heat until the oil reaches 350°F. This is crucial for achieving that perfect crispy texture—use a thermometer to monitor the temperature. While the oil heats, set up a wire rack over a baking sheet to drain the fried tortillas.
Working in batches, carefully place 1 flour tortilla at a time into the hot oil. Fry for 20-30 seconds per side until golden brown and crispy. You'll see the edges curl slightly as they crisp up. Remove with tongs and place on the prepared wire rack to drain excess oil. Repeat with the remaining 11 tortillas, keeping them warm in a single layer on a clean kitchen towel-lined plate.
Roll and Layer the Enchiladas
Preheat your oven to 375°F. Spread 1 cup enchilada sauce on the bottom of a 9x13-inch baking dish. Working quickly, fill each crispy tortilla with about 2 tablespoons of the beef and bean mixture, then sprinkle 2 tablespoons shredded Monterey Jack cheese on top. Roll the tortilla up tightly, tucking in the sides as you go.
Place the rolled enchiladas seam-side down in the baking dish, slightly overlapping if needed. Pour the remaining 1 cup enchilada sauce over the top, spreading it evenly to coat all the enchiladas. Sprinkle the remaining 2 cups shredded Monterey Jack cheese evenly over the top. The cheese should melt into a golden, bubbly blanket when baked.
Bake Until Bubbly and Golden
Bake the enchiladas for 20-25 minutes until the cheese is fully melted, bubbly, and golden brown on top. You'll see the edges of the tortillas crisp up even more as they bake, and the sauce will turn glossy. The enchiladas are done when the cheese has melted completely and the tortillas are crispy all around.
Let the enchiladas rest for 5 minutes before serving. This gives the filling time to set slightly and makes cutting easier. Garnish each serving with a dollop of 0.5 cup sour cream and a sprinkle of 0.25 cup chopped fresh cilantro. The contrast of cool sour cream and fresh herbs against the warm, cheesy enchiladas is pure comfort food magic.
Pro Tips For Making Beef Bean And Cheese Enchilada
- Brown the Beef First: Cook the ground beef until it’s not just cooked through but actually browned—that’s where the deep flavor hides. I used to skip this step, thinking it was just about killing bacteria, but now I always let it crisp up in batches if needed. The onions and garlic will thank you later.
- Warm the Tortillas Properly: Don’t just dip them in hot water and call it a day. Wrap the tortillas in a damp towel and microwave for 30 seconds—this makes them pliable without turning them soggy. Cold tortillas crack like brittle chips when you roll them, and that’s a mood killer.
- Don’t Overfill the Enchiladas: Stuffing them too tightly means they’ll burst when you bake them, and no one wants a cheese explosion in the oven. Use about ¼ cup of filling per tortilla—enough to taste every bite without the risk of a messy spill.
- Use a Mix of Cheese: Skip the pre-shredded cheese (it’s full of anti-caking agents that make it grainy when melted). Instead, grate your own cheddar or Monterey Jack and mix in a little cream cheese for extra creaminess. It’s a little more work, but the texture is worth it.
Make-ahead tips for leftovers
Filling Prep Ahead
Make the beef and bean filling up to 3 days in advance and store it in an airtight container in the refrigerator. The flavors deepen over time, and the spices meld beautifully. When ready to assemble, simply reheat the filling in a saucepan over medium-low heat for 5-7 minutes, stirring occasionally to warm through evenly. This step saves you 20 minutes of prep time on busy days. 💡
Tortilla Prep Shortcut
Skip the frying step entirely by baking the tortillas instead! Preheat your oven to 375°F, brush each tortilla lightly with 1 teaspoon vegetable oil, and bake for 2 minutes per side on a parchment-lined baking sheet. While not as crispy as fried, they still hold up well and save you from dealing with hot oil. For extra crispiness, broil for 30 seconds after baking. ✨
Assemble in Layers
Build enchiladas in two batches to keep them neat and prevent soggy tortillas. Spread ½ cup enchilada sauce on the bottom of your baking dish, then layer 6 filled tortillas before adding the remaining sauce and cheese. Bake the first batch for 20 minutes, then add the second batch and bake for an additional 10-12 minutes. This ensures even cooking and crispy edges. 🌟
Freezer-Friendly Strategy
Assemble enchiladas completely (including sauce and cheese) and freeze them in a single layer on a parchment-lined tray for 1 hour to prevent sticking. Transfer to an airtight container or freezer bag, leaving 1 inch of headspace for expansion. When ready to serve, thaw overnight in the fridge, then bake covered with foil at 350°F for 30 minutes before adding fresh toppings. The texture stays crispy, and the cheese melts beautifully. ❄️
Reheat Without Ruin
For leftovers, cover enchiladas with foil and reheat at 350°F for 15 minutes to maintain crispiness. If using the microwave, heat for 2 minutes on 50% power, then let rest for 1 minute before serving. Add a splash of enchilada sauce or water to the dish if the filling looks dry. Avoid overcooking—just until the cheese is melted and bubbly. 🔥
Topping Bar Prep
Set up a toppings bar with pre-portioned components to streamline serving. Use small bowls for sour cream, salsa, chopped cilantro, and diced red onions. Store toppings in the fridge until ready to serve, and keep cheese in a separate container to prevent soggy tortillas. This keeps your presentation clean and lets guests customize their plates. 💛
Nutrition facts
Frequently asked questions
Can I use corn tortillas instead of flour tortillas?
Corn tortillas work but won't give the same crispy texture. They're more delicate and can get soggy during baking. If you must use them, fry them for 10-15 seconds per side in hot oil and bake at 350°F instead of 375°F to prevent burning. For best results, stick with flour tortillas—they hold up better to the frying and baking process.
What if I don't have enchilada sauce?
No problem! Mix 2 cups tomato sauce with 1 tablespoon chili powder, 1 teaspoon cumin, and ½ teaspoon garlic powder. Simmer for 5 minutes to blend flavors. For extra richness, add 1 tablespoon cornstarch mixed with 2 tablespoons water to thicken it slightly. This works just as well for layering and topping.
How do I prevent the tortillas from getting soggy?
The key is frying them properly and baking in batches. Keep oil at 350°F and fry just until golden (20-30 seconds per side). Bake in two batches—first layer gets 20 minutes, second layer adds 10-12 minutes. Also, don't overfill tortillas—use 2 tablespoons of filling max to maintain crispiness.
Can I make these enchiladas ahead of time?
Assemble completely (including sauce and cheese), then refrigerate for up to 24 hours before baking. For freezing, bake first, then cool completely and store in an airtight container for 3 months. Reheat covered at 350°F for 15 minutes. The tortillas stay crispy, and the cheese melts beautifully when reheated.
What's the best way to make them extra crispy?
Fry tortillas in 375°F oil for 30 seconds per side until deep golden. After baking, broil for 1-2 minutes to crisp the cheese edges. For next-level crunch, sprinkle crushed tortilla chips on top before final baking. The high heat and extra layer create that restaurant-style crispiness you crave!