
Soups & Stews
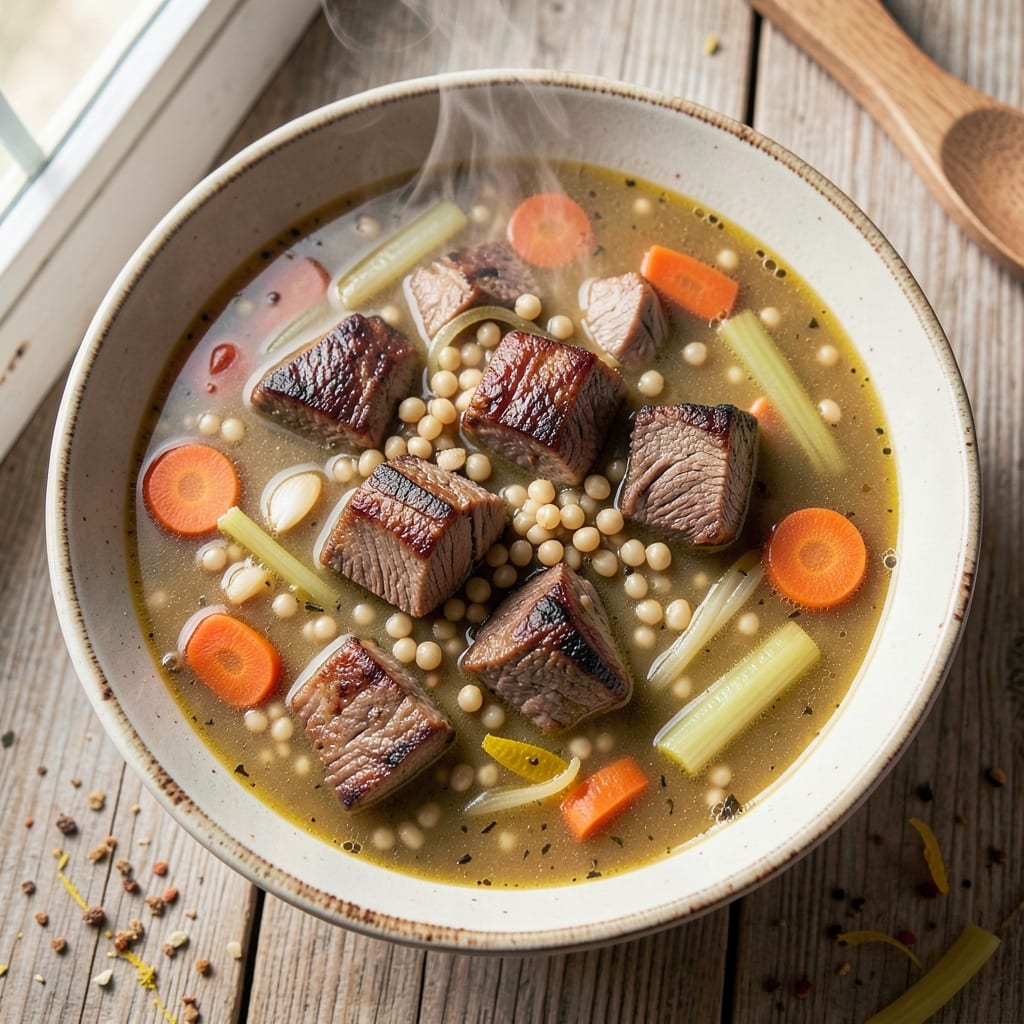
This beef barley soup pressure cooker recipe transforms tough cuts of beef into tender, flavorful bites while developing deep umami richness in just 35 minutes. The pressure cooker's magic lies in its ability to break down collagen and meld flavors efficiently, creating a hearty soup that's perfect for chilly evenings or meal prep. I've refined this method over years to ensure every spoonful delivers that perfect balance of savory beef, chewy barley, and aromatic vegetables.
The secret to restaurant-quality results at home begins with browning the beef—this step develops the Maillard reaction, creating deep, caramelized flavors that form the foundation of the soup. Aromatic vegetables like carrots and celery release their natural sweetness as they simmer, while the barley absorbs the rich broth and becomes tender without turning mushy. The pressure cooker's high heat and pressure work together to infuse every ingredient with maximum flavor in a fraction of the time traditional stovetop methods require.
What you'll end up with is a soup that's hearty enough to stand alone but light enough to pair with crusty bread. The beef becomes fork-tender, the barley plump and satisfying, and the broth packed with umami depth that lingers on your palate. This recipe is designed to be your go-to for weeknight dinners or make-ahead meals that taste even better the next day. The pressure cooker makes it possible to create this comforting classic without spending hours in the kitchen.
Whether you're using an Instant Pot or a stovetop pressure cooker, this method delivers consistent results. The recipe includes adjustments for high-altitude cooking and optional additions like mushrooms or kale to customize it to your taste. Let's get started on creating a soup that's as nourishing as it is delicious.
Ingredients for beef barley soup pressure cooker
These pantry staples and a few fresh veggies create the perfect hearty pressure cooker soup.
| Ingredient | Amount | Notes |
|---|---|---|
| Chuck Roast 🥩 | 1 ½ lb | Cut into 1-inch cubes |
| Pearl Barley 🌾 | 1 cup | Uncooked, rinsed well |
| Carrots 🥕 | 3 medium | Peeled, cut into chunks |
| Celery Stalks 🧅 | 3 whole | Trimmed, cut into pieces |
| Yellow Onion 🧅 | 1 whole | Peeled, chopped |
| Garlic Cloves 🧄 | 4 cloves | Peeled, smashed |
| Beef Broth 💧 | 4 cups | Low-sodium preferred |
| Tomato Paste 🍅 | 2 tbsp | Squeeze tube works fine |
| Dried Thyme 🌿 | 1 tsp | Or 1 tbsp fresh |
| Dried Bay Leaves 🌿 | 2 whole | Remove after cooking |
| Salt 🧂 | 1 ½ tsp | Kosher or sea salt |
| Black Pepper 🌶️ | ½ tsp | Freshly ground |
| Olive Oil 🫒 | 1 tbsp | For browning beef |
The chuck roast is your secret weapon here—it's tough enough to handle pressure cooking but breaks down into tender, flavorful bites. Costco or Walmart usually have it pre-cut in 1-inch cubes, which saves time. If you're buying a whole roast, ask the butcher to cut it for you. Look for good marbling—those little fat streaks melt during cooking and keep the meat juicy. The pearl barley? Bob's Red Mill is my go-to brand, but any pearl barley works. Rinse it well before adding to the pot to remove excess starch, which can make the soup gummy.
No beef broth? Vegetable broth with 2 tbsp soy sauce gets you close. Fresh thyme is ideal, but dried works at one-third the amount. The tomato paste can be skipped if you're not a fan, but it adds that deep umami richness. Trader Joe's sells those little squeeze tubes that are perfect for this—no waste, keeps forever. Carrots and celery can be prepped ahead and stored in the fridge for up to 5 days. The bay leaves are non-negotiable—they add that subtle earthy depth that separates homemade soup from canned. Want more flavor? Add a dash of Worcestershire sauce at the end.
This soup tastes even better the next day as flavors meld. Keeps for 4-5 days in the fridge, freezes for 3 months. I always make a double batch—one for dinner, one for lunches. Store in airtight containers. The barley thickens as it cools, so add a splash of broth when reheating if it's too thick. For high-altitude cooking, increase pressure cook time by 2-3 minutes. Want to customize? Stir in mushrooms or kale at the end.
Why You'll Love This Recipe
- Dump-and-Go Magic: I swear, this recipe is the closest thing to food alchemy I’ve found. Chuck it all in—raw chuck roast, barley, veggies—hit start, and let the pressure cooker do the heavy lifting. No stirring, no babysitting, no stress.
- Deep, Rich Payoff: That chuck roast turns tender enough to melt, while the barley soaks up all the savory broth like a sponge. Here’s what sold me—the way the carrots stay just crisp enough to cut through the richness. It’s the kind of soup that makes you slow down and savor every bite.
- Weeknight Workhorse: Between us, this is my go-to when I’ve got a house full of people or zero energy. The barley makes it hearty enough for a cold evening, but it’s light enough for a quick lunch the next day. (Yes, even on a Tuesday night.)
- Budget Bulk for Days: A single chuck roast stretches into four or five meals—perfect for when you’re trying to stretch groceries or just don’t want to cook every night. Honestly, the leftovers taste even better the second day, if you can believe it.
Step-by-step instructions for pressure cooker beef barley soup
Here's how to transform tough chuck roast into fork-tender perfection with chewy barley and rich broth.
Sear the Chuck Roast for Maximum Flavor
Heat the pressure cooker on medium-high heat and add the 1 tablespoon olive oil. Once hot, add the 1.5 lb chuck roast cut into 1-inch cubes, working in batches if needed. Let them sear undisturbed for 2-3 minutes per side until they develop a deep golden-brown crust. This step is non-negotiable—it builds the foundation of flavor that separates good soup from great soup.
As you sear, you'll notice the meat releases its juices and the aroma fills your kitchen. That's the magic happening right there. Once all the beef is browned, remove it from the cooker and set it aside temporarily. We'll add it back later once the vegetables have softened.
Sauté Vegetables and Build the Base
In the same pressure cooker, add the 1 whole yellow onion chopped, 3 whole celery stalks cut into pieces, and 3 medium carrots cut into chunks. Cook for 3-4 minutes until the vegetables begin to soften and the onion becomes translucent. This pre-cooking step ensures your soup has proper texture and prevents the barley from turning mushy.
Next, add the 4 cloves garlic cloves that have been peeled and smashed, along with the 2 tablespoons tomato paste. Stir everything together for 30 seconds until the raw garlic smell disappears and you can detect its sweet aroma. This is when you'll also notice the tomato paste darkens slightly—this is normal and adds depth to the soup.
Combine Everything and Pressure Cook
Return the browned chuck roast to the pressure cooker. Add the 1 cup pearl barley (make sure it's rinsed well), 4 cups beef broth, 1 teaspoon dried thyme, 2 whole dried bay leaves, 1.5 teaspoons salt, and 0.5 teaspoon black pepper. Give everything a good stir to combine.
Secure the lid on your pressure cooker and set it to high pressure for 25 minutes. This is where the magic happens—your chuck roast will transform from tough to tender, and the barley will absorb all that rich flavor. The pressure cooker does most of the work for you, but don't walk away completely. You'll want to check on it after 15 minutes to ensure everything is cooking properly.
Finish and Rest the Soup
Once the cooking time is complete, allow the pressure to release naturally for 10 minutes before using the quick-release function. This gradual release helps prevent the barley from becoming mushy. Carefully open the lid and give the soup one final stir. The beef should be fork-tender, the barley should have a pleasant chewiness, and the vegetables should be soft but still hold their shape.
Remove and discard the bay leaves. Taste the soup and adjust the seasoning if needed—you might want to add a bit more salt or pepper to your preference. Let the soup sit covered for 5 minutes before serving. This resting period allows all the flavors to meld together and the soup to thicken slightly, giving you that perfect consistency.
Pro Tips For Making Beef Barley Soup Pressure Cooker
- SEAR THE ROAST FIRST: Skip the "just throw it in" approach—browning that chuck roast in the pressure cooker (or a skillet first) builds flavor that steaming alone can’t match. I used to skip this and ended up with soup that tasted more like watered-down beef broth. Two minutes on high heat with a little oil makes a real difference.
- RINSE THE BARLEY: Pearl barley’s starchy coating makes it gummy if you don’t rinse it first. Toss it in a fine-mesh strainer under cold water for 10 seconds—just enough to wash off the excess. I learned this the hard way when my soup turned into a gluey mess. Trust me, your spoon will thank you.
- DON’T OVERFILL THE POT: Pressure cookers need space to build steam. Fill yours only halfway with liquid before adding the roast, veggies, and barley—otherwise, you’ll end up with a sad, half-cooked disaster. I crammed mine once and spent 20 minutes troubleshooting why it wouldn’t pressurize. Measure first, then add.
- SALT THE WATER LIBERALLY: The broth starts with the water, so don’t be shy—add 1.5 teaspoons of salt (or more if you’re using low-sodium ingredients) right at the beginning. I used to wait until the end, and the soup always tasted bland, no matter how much I seasoned later. Get it right from the start.
Essential equipment for this recipe
Instant Pot Essentials
For this recipe, your Instant Pot (or any multi-cooker with pressure function) is the star. I use my Instant Pot Duo 6-quart—it's the gold standard for soup making. The steel inner pot distributes heat evenly, and the safety valve makes pressure cooking foolproof. If you're using a stovetop pressure cooker, opt for a Presto 03244—it's affordable and reliable. 🔥
Pro tip: Always use the heavy-duty silicone sealing ring that comes with your Instant Pot. Over time, these rings can degrade, so replace it every 6-12 months for optimal sealing. I keep mine in the freezer to sanitize and prevent bacterial growth. The pressure valve should always point upward during cooking to ensure proper pressure buildup.
Searing Tools
A 12-inch stainless steel skillet is ideal for browning beef outside the pressure cooker if you're not using an Instant Pot with a stainless steel pot. I prefer All-Clad for its even heat distribution, but any high-quality stainless steel works. If you're browning directly in the Instant Pot, use a heat-resistant silicone spatula to avoid scratching the pot. 🍳
For stovetop pressure cookers, a cast iron skillet works well for searing. Just
Measuring Precision
An accurate kitchen scale is worth its weight in gold for this recipe. I use a OXO Good Grips digital scale to measure the 1.5 lb chuck roast and 1 cup pearl barley precisely. For liquids, a liquid measuring cup with clear markings ensures you add exactly 4 cups beef broth. The 1 tablespoon olive oil for searing should be measured with a precision measuring spoon—too little oil and the beef won't brown properly. ✨
For spices, a spice grinder keeps dried thyme and pepper fresh, but pre-ground works fine. The 2 bay leaves can be measured using a small kitchen scale (they're lightweight) or by counting them out. A fine-mesh strainer comes in handy for rinsing the barley thoroughly before adding it to the pot.
Safety First
Never ignore the pressure release valve—always let the pressure release naturally for 10 minutes before quick-releasing. This prevents the barley from turning mushy and keeps your kitchen safe. I also recommend wearing heat-resistant gloves when handling the pressure cooker after cooking. The Instant Pot's automatic release feature is a lifesaver, but manual control gives you more precision. 💪
A timer (even your phone works) is essential for tracking the 25-minute high-pressure cook time. Set it before you start so you can focus on other tasks. Keep a dish towel nearby—condensation forms quickly when opening the lid, and it's hot! For stovetop models, ensure your venting pipe is clear and properly attached before sealing.
Nutrition facts
Frequently asked questions
Can I use a different cut of beef instead of chuck roast?
Yes! Brisket or stew meat work beautifully—they're both well-marbled cuts that become tender under pressure. Avoid lean cuts like sirloin, as they won't break down as nicely. If using brisket, trim any large fat pieces first for cleaner soup.
Why does my barley turn mushy in the pressure cooker?
This happens when the barley absorbs too much liquid or overcooks. Always rinse the barley well before adding, and never skip the 10-minute natural pressure release. For extra insurance, reduce the cook time by 2-3 minutes and check the barley's texture at the end.
Can I make this soup in a regular pot instead?
but it'll take 2-3 hours instead of 35 minutes. Simmer the beef and vegetables uncovered for 1.5 hours, then add the barley and cook another 30-45 minutes until tender. The pressure cooker's high heat and pressure are what create that restaurant-quality depth of flavor so quickly.
What can I add to make it gluten-free?
This recipe is already gluten-free! Pearl barley is naturally gluten-free, but if you're avoiding all barley, substitute with quinoa or wild rice. Use 1.5 cups quinoa (uncooked) and reduce the broth to 3.5 cups to maintain the same texture. The cooking time will be 20 minutes instead of 25.
How do I adjust this for high-altitude cooking?
Increase the pressure cook time by 5-7 minutes (total 30-32 minutes) and add 1 extra cup of broth to compensate for the lower boiling point. The natural pressure release time remains 10 minutes. Always monitor your pressure cooker closely at high altitudes.