
Soups & Stews
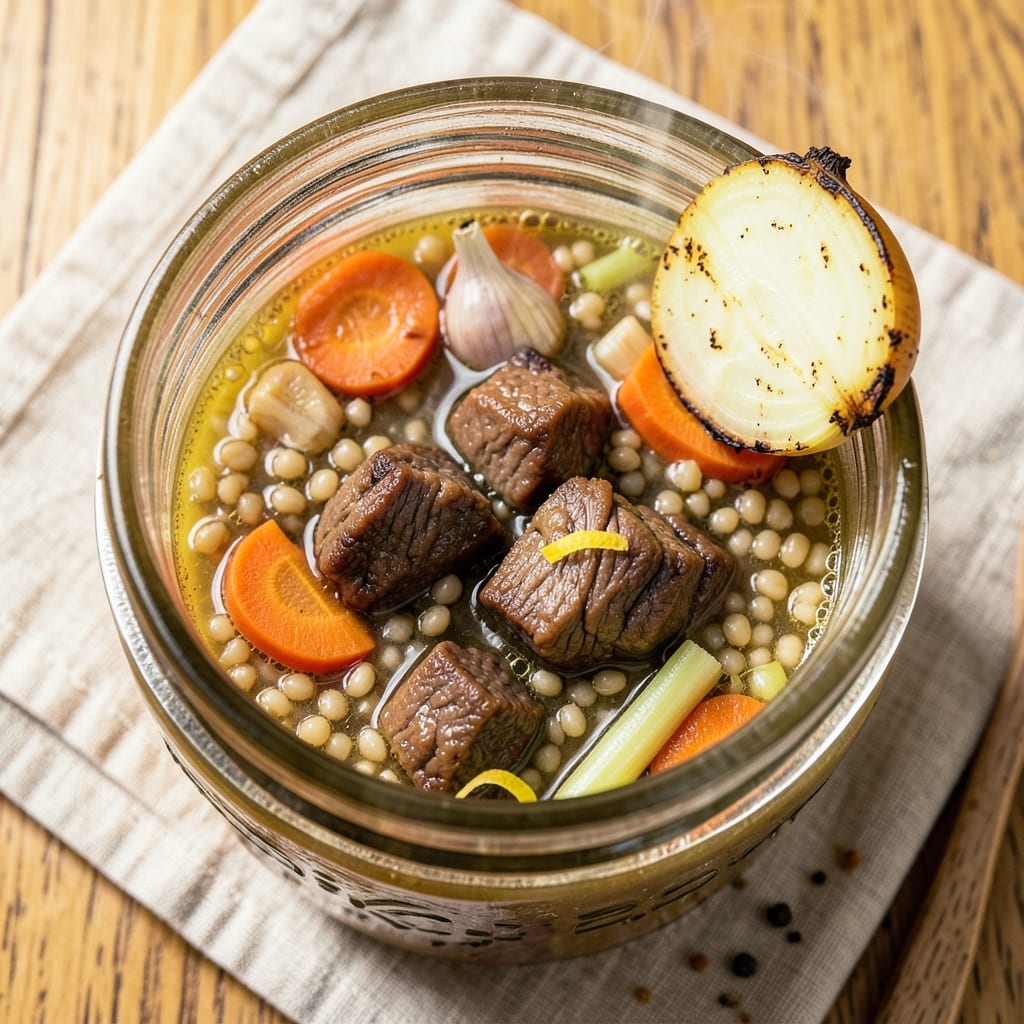
This beef barley soup canning recipe transforms simple pantry ingredients into a hearty, flavorful staple that lasts for months. The rich beef broth, tender barley, and aromatic vegetables create a comforting meal perfect for cold days or emergency pantries. Safety comes first—proper pressure canning ensures your soup stays delicious and free from spoilage.
The secret to great canned soup lies in balancing flavors early: browning the beef deeply develops rich umami, while herbs and spices infuse the broth during simmering. Barley absorbs liquid beautifully, making every spoonful satisfying. This method preserves texture and taste better than store-bought versions, giving you restaurant-quality flavor in a jar.
With just 30 minutes of active prep and 2 hours of simmering, you'll have enough soup to fill your pantry shelves. Each jar delivers a complete meal—protein-rich, fiber-packed, and packed with seasonal vegetables. The pressure canning process is straightforward once you understand the key steps: sterilized jars, proper sealing, and accurate processing times.
Perfect for meal prepping, emergency supplies, or gifting, this soup keeps its quality for up to 12 months when stored properly. The first spoonful will remind you why homemade always tastes better. Let's get started on creating your pantry essentials.
Ingredients for beef barley soup canning
Simple pantry staples transform into a hearty, canned beef barley soup staple perfect for cold days or emergency supplies.
| Ingredient | Amount | Notes |
|---|---|---|
| Chuck Roast 🥩 | 4 lb | Cut into 1-inch cubes for even cooking |
| Pearl Barley 🌾 | 2 cups | Uncooked, rinsed well |
| Yellow Onion 🧅 | 2 whole | Chopped into 1/2-inch pieces |
| Carrots 🥕 | 4 medium | Peeled, sliced into 1/2-inch rounds |
| Celery Stalks 🧅 | 4 whole | Chopped into 1/2-inch pieces |
| Garlic Cloves 🧄 | 6 cloves | Minced for deep flavor infusion |
| Tomato Paste 🍅 | ½ cup | High-quality, no sugar added |
| Beef Broth 💧 | 8 cups | Homemade or low-sodium store-bought |
| Bay Leaves 🌿 | 2 whole | Fresh for best aroma |
| Dried Thyme 🌿 | 1 tbsp | Or 1 tbsp fresh thyme |
| Black Peppercorns 🌶️ | 1 tbsp | Freshly cracked for intensity |
| Salt 🧂 | 2 tsps | Diamond Crystal kosher salt |
| Canning Jars 🥫 | 12 quart | Mason jars with new lids |
| Canning Lids 🔒 | 12 pieces | New, never reused |
| Canning Bands 🔗 | 12 pieces | For proper jar sealing |
The chuck roast is your flavor foundation—look for well-marbled cuts at Costco or your local butcher. Pearl barley needs rinsing to remove excess starch, which prevents gummy texture. For the vegetables, organic carrots and celery from the store's produce section keep best during storage, but conventional works too. The tomato paste? Mutti or Rao's are my go-to brands—they've got that rich, concentrated flavor that stands up to canning. Fresh bay leaves are a game-changer here, but if you're using dried, halve the amount. For the beef broth, homemade is ideal, but Pacific Foods or Swanson low-sodium work in a pinch.
No chuck roast? Brisket or short ribs work beautifully—just adjust cooking time. Swapping barley for wild rice blend gives a different texture but same hearty vibe. Fresh thyme unavailable? Dried oregano at half the amount works, though it's not identical. The canning jars must be sterilized—boil them 10 minutes before filling. For the lids, always use new ones—Ball or Kerr brands are reliable. If you're worried about the soup being too thin after canning, add an extra 1/2 cup of barley to the jars before processing. The soup thickens as it sits, so don't worry about it being perfect before canning.
Once canned, these jars keep for 12 months in a cool, dark pantry. The first spoonful after opening? Worth every minute—that deep umami from the beef and rich barley flavor shine through. Store unopened jars upright, and once opened, transfer to the fridge where they'll last 5-7 days. I always make extra—these make perfect gifts for neighbors or holiday hosts. The soup reheats beautifully, though it's even better straight from the jar after canning. For extra safety, write the canning date on each jar with a marker.
Why You'll Love This Recipe
- One-Pot Magic: I swear by this—just toss everything into a pot, add water, and walk away. No fancy techniques, no chopping stress. The chuck roast practically melts into tender shreds while the barley soaks up all the flavor like a sponge.
- Rich, Hearty Depth: That slow-cooked beef? Pure satisfaction. The onions caramelize just enough to add sweetness, while the celery and carrots stay crisp enough to bite into. Honestly, it’s the kind of soup where you forget you’re eating something simple.
- Meal Prep Goldmine: Make a big batch on Sunday, and you’ve got lunches for the week. The barley thickens just enough to stay hearty when reheated, and the flavors only get better as it sits. (Yes, even on a Tuesday night.)
- Budget-Friendly Powerhouse: Chuck roast is cheap, barley lasts forever, and veggies stretch across multiple servings. I’ll be real: this is the kind of recipe that makes grocery day feel like a win. Plus, it’s one of those dishes where leftovers taste better the next day.
Step-by-step instructions for beef barley soup canning
Here's how to transform your hearty soup into pantry staples that taste fresh for months.
Prepare the Soup Base
In a large stockpot, combine the 4 lb chuck roast cut into 1-inch cubes, 2 whole yellow onion chopped into ½-inch pieces, 4 medium carrots sliced into ½-inch rounds, and 4 whole celery stalks chopped into ½-inch pieces. This vegetable medley forms the flavor foundation.
Add 6 cloves minced garlic, 0.5 cup tomato paste, 8 cups beef broth, 2 whole bay leaves, 1 tbsp dried thyme, 1 tbsp cracked black peppercorns, and 2 tsps salt. Bring to a boil over medium-high heat, then reduce to a gentle simmer. Let it cook uncovered for 2 hours, stirring occasionally to prevent sticking.
After 2 hours, add the 2 cups uncooked pearl barley that's been rinsed well. Continue simmering for another 30-40 minutes until the barley is tender and the beef is fork-tender. The soup should have a thick, hearty consistency with all ingredients fully integrated.
Complete the Cooking Process
Once the barley is tender and the beef easily pulls apart, remove the 2 whole bay leaves and discard them. Taste the soup and adjust seasoning if needed—this is your chance to perfect the flavor before canning. The soup should be rich, savory, and well-balanced with all the aromatic vegetables.
Let the soup cool to room temperature before proceeding. This cooling step is crucial for safe canning—rushing this process can lead to improper sealing. I recommend transferring the soup to a large bowl and stirring occasionally as it cools to prevent a skin from forming.
Prepare for Canning
While the soup cools, prepare your canning setup. Fill a large pot with 2-3 inches of water and place it on the stove over medium heat. This will become your water bath canner. Prepare 12 quart canning jars by washing them thoroughly with hot, soapy water and rinsing with clean water.
Place the 12 new canning lids in a small saucepan with enough water to cover them. Bring to a gentle simmer (do not boil) to soften the sealing compound. Keep them hot until ready to use. The jars should be clean and ready—any residue can prevent proper sealing.
Fill and Seal the Jars
Using a ladle or large spoon, carefully fill each of the 12 quart canning jars with the cooled beef barley soup, leaving about 1-inch headspace at the top. This space allows for proper expansion during processing. Use a clean, non-metallic utensil to remove any air bubbles by gently tapping the side of the jar.
Wipe the rims of the jars with a clean, damp cloth to ensure a proper seal. Place the hot lids on each jar and screw on the canning bands until they're fingertip-tight—don't overtighten, as this can prevent proper sealing. The jars should be filled and ready for processing.
Process in a Water Bath
Carefully lower the filled jars into the water bath canner using a jar lifter, ensuring they're completely submerged by at least 1 inch of water. Bring the water to a rolling boil over medium-high heat. Once boiling, process the jars for 90 minutes for quart-sized jars.
During processing, maintain a rolling boil—this is critical for creating the vacuum seal that preserves your soup. After 90 minutes, remove the jars using the jar lifter and place them on a clean towel or cooling rack. Let them cool undisturbed for 12-24 hours. You'll hear the satisfying "ping" as the jars seal.
After cooling, check the seals by pressing on the center of each lid. If the lid doesn't pop back up, the jar is properly sealed. Store the sealed jars in a cool, dark place for up to 1 year. Your homemade beef barley soup is now ready to enjoy whenever you need a comforting meal.
Pro Tips For Making Beef Barley Soup Canning
- Sear the Chuck Roast: Don’t just toss the raw chuck roast into the pot—get it screaming hot in a dry skillet first. After patting it dry, sear it on all sides until it develops a deep crust (about 3-4 minutes per side). That crust locks in flavor and keeps the meat from turning mushy during the long simmer.
- Soak the Barley: Pearl barley absorbs liquid like a sponge, and skipping the soak means it’ll stay stubbornly firm. Toss it in cold water for at least 30 minutes before adding to the pot—this guarantees it softens evenly during canning. (Yes, even if you’re impatient like me.)
- Trim the Celery Right: Celery stalks hide tough strings that turn to mush and make the soup gritty. Run each stalk under cold water, then use a paring knife to score the tough outer fibers lengthwise before chopping. This isn’t the prettiest method, but it’s the tastiest.
- Pressure-Check the Carrots: If your carrots end up rubbery or undercooked after canning, you’re probably not accounting for the extra time needed in jars. Test a raw carrot in the pressure canner first—when it’s tender enough to pierce with a fork, your soup’s ready. No guessing.
Essential equipment for this dish
Pressure Canner Essentials
For safe canning, a pressure canner is non-negotiable—water bath canning won't cut it for this hearty soup. I swear by the All American 921 Pressure Canner for its durability and dial gauge accuracy. If you're on a budget, the Presto 23-Quart works too, but always use a canner with a weighted gauge for foolproof results. Never use a regular pot or slow cooker—safety first! 🌡️
Jar Lifter & Tools
A jar lifter is your best friend during processing—those jars get heavy! The Ball Mason Jar Grabber is my go-to with its ergonomic grip. You'll also need a magnetic lid lifter to remove hot lids from boiling water safely. Pro tip: Keep a clean kitchen towel nearby to wipe jar rims before sealing—any residue can ruin your seal.
Headspace & Bubble Remover
Leave 1-inch headspace in each jar—this prevents overflow during processing. Use a non-metallic utensil (like a plastic or wooden spoon) to gently tap the side of the jar and release trapped air bubbles. I keep a clean chopstick in my canning station for this purpose. Never overfill, as the soup expands when heated.
Lid Warmers & Storage
Keep new lids warm in simmering (not boiling) water until ready to use—this prevents premature sealing. Store extra lids in a dry, cool place (like a pantry) where they won’t corrode. I label my lids with the date using a permanent marker to track freshness. Never reuse lids—they lose their sealing ability after one use.
Thermometer for Accuracy
A canning thermometer ensures your water reaches 212°F for proper processing. The Thermoworks Dial Thermometer is my top pick—it’s precise and easy to read. Place it in the canner during processing to monitor temperature. Without this, you risk underprocessing, which can lead to spoilage. Safety isn’t worth cutting corners here! ⚡
Nutrition facts
Frequently asked questions
Why does my canned beef barley soup turn out too thin after processing?
The barley absorbs liquid during canning, so the soup thickens as it sits. Leave 1-inch headspace in jars to prevent overflow, and add ½ cup extra barley per quart jar before processing. The soup will naturally thicken within 24 hours of sealing. If it's still too thin after opening, simmer uncovered for 10-15 minutes to reduce.
Can I use regular pasta instead of barley in canned soup?
Not recommended! Pasta becomes mushy during canning and won't hold its shape. Barley's firm texture survives processing beautifully. For a different texture, try wild rice blend or quinoa—both work well in canned soups. The key is using grains that maintain structure when heated for 90 minutes in a pressure canner.
How do I know if my canned soup is properly sealed?
After cooling 12-24 hours, press the center of each lid. If it doesn't pop back up, the jar is sealed. Also check for a slight concave shape (lid curves inward). If any lids flex up/down when pressed, reprocess those jars immediately. Unsealed jars may have liquid inside the lid or bubbles along the seal line.
What's the best way to reheat canned beef barley soup?
Transfer the soup to a pot and heat over medium-low heat, stirring frequently to prevent scorching. For best texture, bring to a gentle simmer (190°F) and cook for 10-15 minutes. Avoid high heat which can make the barley mushy. Pro tip: Add a splash of water or broth if it seems too thick after reheating. The soup tastes best within 5-7 days after opening.
Can I add fresh herbs after canning?
Fresh herbs won't survive the canning process, but you can add dried herbs (like thyme or parsley) after opening. For fresh flavor, stir in chopped parsley or chives right before serving. The canning process kills bacteria, so fresh additions are safe as long as they're added to the opened jar. Store any unused portions in the fridge for 3-4 days.