
Soups & Stews
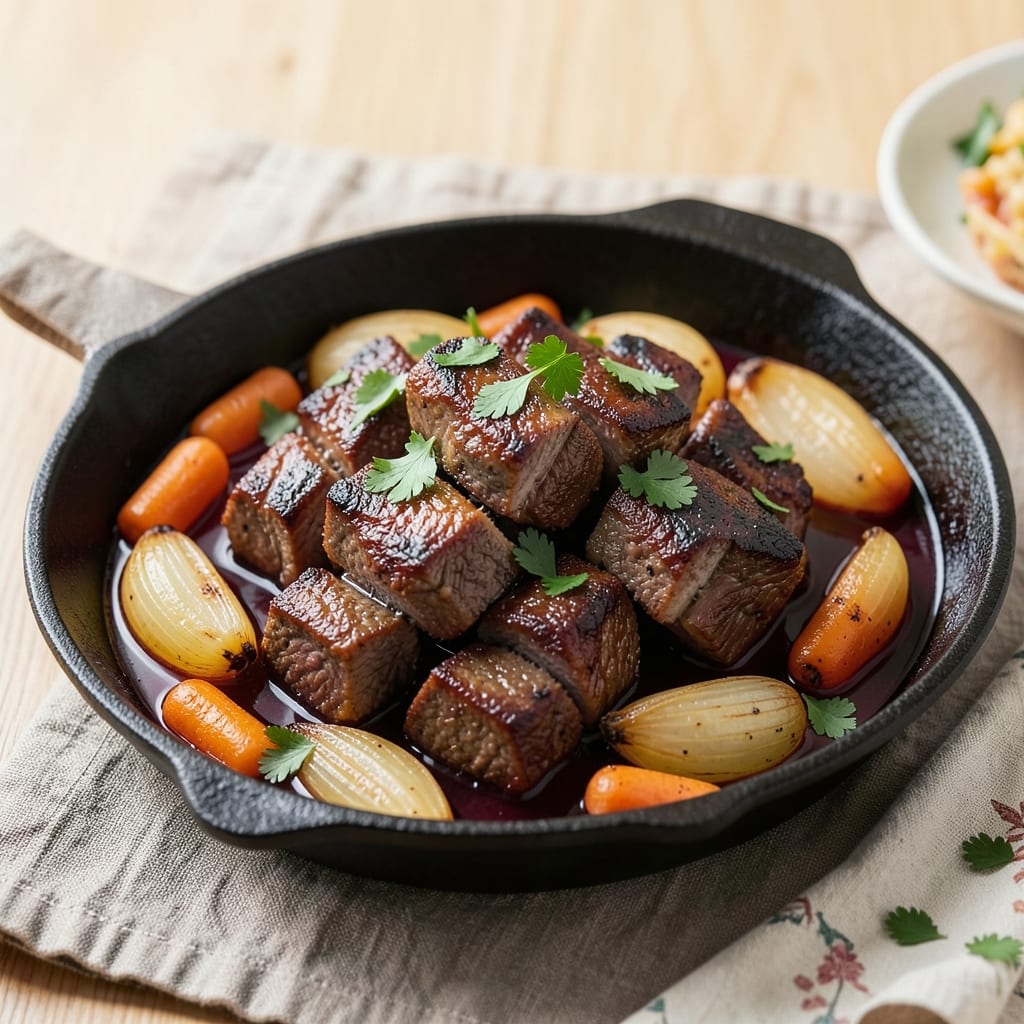
This beef bake recipe transforms tough cuts into melt-in-your-mouth tenderness with caramelized roots and deep, savory flavors. The secret lies in slow simmering—where beef shoulder breaks down beautifully while vegetables develop rich, sweet notes. Perfect for weeknight dinners or holiday gatherings, this dish delivers restaurant-quality results without the fuss.
What sets this recipe apart is the balance of textures and flavors: tender beef, caramelized onions and carrots, and a rich gravy that ties everything together. The slow cooking process infuses the beef with natural juices, ensuring every bite is succulent. With just a few simple ingredients and minimal prep, you'll create a hearty meal that feels special.
By the time it emerges from the oven, you'll have a dish that's rich, aromatic, and deeply satisfying. The caramelized roots add natural sweetness that complements the savory beef, while the gravy ensures no bite goes dry. This is comfort food at its finest—warm, inviting, and perfect for sharing.
Serve with crusty bread to soak up every last drop of the savory gravy, or pair with roasted potatoes for a complete meal. The versatility of this recipe makes it ideal for any occasion, from a cozy family dinner to a festive gathering. Let's get started on creating this timeless classic.
Ingredients for beef bake
Six ingredients transform tough beef into melt-in-your-mouth perfection with caramelized roots and rich gravy.
| Ingredient | Amount | Notes |
|---|---|---|
| Beef Chuck Roast 🥩 | 3 lb | With good marbling, cut into 1.5-inch cubes |
| Yellow Onions 🧅 | 2 whole | Sliced into 1/2-inch rounds |
| Carrots 🥕 | 4 whole | Peeled, cut into 1-inch chunks |
| Garlic Cloves 🧄 | 6 cloves | Minced or smashed |
| Beef Broth 💧 | 2 cups | Low-sodium preferred |
| Red Wine 🍷 | 1 cup | Bold dry variety like Cabernet |
| Tomato Paste 🍅 | 2 tbsp | Smooth, not chunky |
| All-Purpose Flour 🌾 | 1 tbsp | For gravy thickening |
| Fresh Thyme 🌿 | ¼ cup | Stems removed, chopped |
| Fresh Rosemary 🌿 | 1 tbsp | Chopped, plus sprigs for garnish |
| Olive Oil 🫒 | ¼ cup | Extra-virgin for richness |
| Salt 🧂 | 1 ½ tsp | Kosher or sea salt |
| Black Pepper 🌶️ | 1 tsp | Freshly ground |
| Bouquet Garni 🌿 | 1 piece | Optional, thyme + bay leaf tied |
The beef cut matters most here. Chuck roast with visible marbling breaks down beautifully during slow cooking—sirloin or ribeye won't deliver the same tenderness. Most grocery stores carry pre-cubed chuck, but if buying whole, ask the butcher to cut it into 1.5-inch cubes for even cooking. For onions and carrots, local farmers markets often have fresher, sweeter roots than the grocery store. Look for firm, unblemished carrots and onions with dry skins—those vibrant colors mean better caramelization later. The thyme and rosemary should smell fresh and aromatic when you rub the stems between your fingers.
No red wine? Dry sherry or beef broth with 1 tbsp balsamic vinegar works in a pinch. Fresh herbs wilt fast, so if you're prepping ahead, dried thyme at one-third the amount keeps the flavor. For tomato paste, Trader Joe's squeeze tubes are perfect—they're shelf-stable and portion-controlled. The bouquet garni is optional but adds depth; if skipping it, just toss in an extra bay leaf and sprig of thyme. For the flour, King Arthur all-purpose is my go-to, but any brand works. If you prefer less gravy, reduce the flour to 1 tsp—just know the sauce will be thinner. The beef broth should be low-sodium to avoid over-salting the dish.
This dish tastes even better the next day as flavors meld. Store leftovers in an airtight container for up to 5 days in the fridge, or freeze for 3 months in portions. For reheating, cover with foil and warm in a 350°F oven for 20 minutes—this prevents drying. The gravy thickens as it cools, so stir in 1-2 tbsp broth if it's too stiff when reheating. Garnish with fresh rosemary sprigs just before serving for that restaurant-quality touch. The caramelized onions and carrots keep well too—store them separately and reheat in a skillet with butter for a quick side dish.
Why You'll Love This Recipe
- One-Pot Magic: I swear by this—just toss the chuck roast, chopped onions, and carrots into a Dutch oven with garlic and broth, then walk away. No chopping boards to scrub, no multiple pans, just one pot that does all the work while you sip wine or fold laundry.
- Deep, Slow Magic: Between us, that beef broth and garlic clove mashing into the meat? It turns tough chuck into melt-in-your-mouth perfection. The onions caramelize right into the sauce—no extra steps, just ridiculously rich flavor that lingers.
- Leftovers That Save Me: This bake actually improves the next day. Cold slices for sandwiches? Yes. Reheated with a splash of broth? Even better. I make it on Sundays and eat it until Wednesday—zero waste, all satisfaction.
- Budget Beef That Feeds: A chuck roast stretches further than you’d think, especially when paired with carrots and onions that bulk it up. Honestly, I feed my family of four for under $15 and still have leftovers. That’s a win for my wallet and my taste buds.
Step-by-step instructions for slow-simmered beef with caramelized roots
This method transforms tough chuck roast into tender, flavorful beef with melt-in-your-mouth vegetables.
Sear the Beef Chuck Roast
Heat the 0.25 cup olive oil in a large Dutch oven over medium-high heat until shimmering. Working in batches if needed, add the 3 lb beef chuck roast cut into 1.5-inch cubes and sear for 3-4 minutes per side until deeply browned. You'll see the edges develop a rich, caramelized crust.
Don't overcrowd the pan—this prevents proper browning. I like to press down gently on the beef with a spatula during the first minute to ensure even contact with the hot oil. Remove the seared beef and set it aside on a plate, reserving the browned oil in the pot.
Build the Flavor Base
In the same Dutch oven, add the 2 whole yellow onions sliced into ½-inch rounds and the 4 whole carrots cut into 1-inch chunks. Cook for 8-10 minutes until the onions soften and the carrots begin to caramelize, stirring occasionally. You'll notice the vegetables release their juices and develop a golden hue.
Add the 6 cloves garlic cloves (minced or smashed) and cook for 30 seconds until fragrant. Stir in the 2 tbsp tomato paste and cook for another 1 minute to develop its deep, concentrated flavor. This step forms the aromatic foundation for your dish.
Deglaze and Simmer
Pour in the 1 cup red wine and scrape up all the browned bits from the bottom of the pot with a wooden spoon. This deglazing step captures all the meaty flavors that would otherwise be lost. Let the wine simmer for 3-4 minutes until reduced by half, concentrating its richness.
Add the 2 cups beef broth, 1.5 tsp salt, 1 tsp black pepper, 0.25 cup fresh thyme, 1 tbsp fresh rosemary, and the 1 piece bouquet garni. Return the seared beef to the pot, along with any accumulated juices. The liquid should come about halfway up the beef cubes.
Slow Cook to Tender Perfection
Bring the mixture to a gentle simmer over medium-low heat. Once simmering, reduce heat to low and cover the pot with a tight-fitting lid. The goal is to maintain a bare simmer—you should see just a few bubbles breaking the surface every few seconds.
Cook for 2.5-3 hours until the beef is fork-tender. You'll know it's ready when a knife slides in easily and the beef pulls apart with minimal resistance. The vegetables should be completely tender and caramelized, with the carrots developing a deep golden color.
Thicken the Sauce and Finish
Remove the beef and vegetables from the pot and set them aside. Strain the cooking liquid through a fine-mesh sieve into a clean saucepan to remove any herb stems or bouquet garni pieces. Return the liquid to the pot and whisk in the 1 tbsp all-purpose flour to thicken the sauce.
Simmer the sauce for 3-5 minutes until it coats the back of a spoon. If it thickens too much, whisk in a splash of water or reserved cooking liquid to reach your desired consistency. Return the beef and vegetables to the pot, tossing to coat everything in the rich sauce. Serve immediately with crusty bread to soak up every last drop.
Pro Tips For Making Beef Bake
- SEAR THE ROAST FIRST: Skip the slow start—get that chuck roast screaming hot in a dry pan for 3-4 minutes per side before adding liquid. I used to add broth too soon, and the beef turned out gray and bland. A quick crust locks in flavor and keeps it from falling apart later.
- CHOP ONIONS IN EVEN STICKS: Cut those yellow onions into ½-inch thick slices, not rings or dice. Thick sticks stay intact during baking, soaking up the beefy juices instead of turning mushy. (Yes, I’ve cried over ruined onion rings in slow-cooked dishes—learned my lesson.)
- DON’T SKIP THE GARLIC SMASH: Crush those garlic cloves with the flat side of your knife before tossing them in. It releases more flavor and prevents them from burning into bitter bits. I was skeptical until I tried it—now I double-check every time.
- USE HALF THE BROTH AT START: Pour in only about 1 cup of beef broth initially, then add the rest after the first hour. This keeps the onions and carrots from steaming into oblivion while the beef tenderizes. (Your future self will thank you when the veggies aren’t sad and limp.)
Essential equipment for this dish
Dutch Oven Essentials
A Dutch oven is your secret weapon for this beef bake—its heavy walls distribute heat evenly, creating the perfect slow-cooking environment. I recommend a 5-6 quart enameled cast iron like the Lodge 5.5 Quart or Le Creuset Stoneware for durability and even heating. The enameled coating prevents rust and makes cleanup easier than bare cast iron. 🔥
Measuring Tools
Precision matters when balancing flavors. Use a kitchen scale for the beef (aim for 3 lbs of chuck roast) and a fine-mesh measuring spoon for herbs like thyme and rosemary. A liquid measuring cup ensures accurate wine and broth additions—1 cup red wine and 2 cups beef broth make all the difference in depth of flavor. My go-to is the OXO Good Grips set for its ergonomic design.
Wooden Spoon & Spatula
A heat-resistant wooden spoon (like Ozeri Touch-Grip) prevents scratching your Dutch oven while stirring. For searing the beef, a stainless steel spatula with a silicon edge (such as Mercer Culinary Genius) gives you better control when pressing down on the meat. These tools are workhorses in my kitchen—durable and easy to clean.
Fine-Mesh Sieve
Straining the cooking liquid through a fine-mesh sieve (I use the OXO Good Grips Strainer) removes herb stems and impurities, leaving you with a silky gravy. This step is crucial for a restaurant-quality finish. If you don’t have one, a cheesecloth-lined colander works in a pinch, but it requires more effort to rinse.
Instant-Read Thermometer
An instant-read thermometer (like the ThermoWorks Thermapen ONE) ensures your beef reaches 203°F for perfect tenderness. It’s faster and more accurate than guessing with a fork. I check the temperature of the thickest piece of beef—when it hits 203°F, the meat will pull apart effortlessly. This tool saves you from overcooking or undercooking the beef. 🌡️
Optional: Meat Mallet
If your beef roast isn’t pre-cubed, a meat mallet (like the Norpro 10-Ounce) helps tenderize the chunks before searing. Giving the beef a few firm taps ensures even cooking and better flavor absorption. It’s not required, but it’s a game-changer for larger roasts or tougher cuts. Store it in your kitchen drawer for quick access when needed.
Nutrition facts
Frequently asked questions
Can I substitute red wine in this beef bake?
If you don't have red wine, use 1 cup dry sherry or mix 2 cups beef broth with 1 tbsp balsamic vinegar for similar depth. The key is acidity—avoid sweet wines or juices which can make the dish taste flat. White wine won't work as well since it lacks the tannins that complement beef flavors.
How do I know when the beef is fully tender?
Use the fork test: pierce the thickest piece of beef—it should slide in easily with minimal resistance. For extra precision, check with an instant-read thermometer at 203°F. The beef will pull apart cleanly when done. If it's still tough after 3 hours, cover and cook 30 more minutes—the slow process ensures perfect tenderness.
What's the best way to reheat leftovers?
Cover with foil and warm in a 350°F oven for 20-25 minutes to prevent drying. The sauce may thicken as it cools, so stir in 1-2 tbsp broth if needed. Microwaving works too, but it can make the beef slightly rubbery. Leftovers taste even better the next day as flavors meld!
Can I make this in an Instant Pot?
Yes! Sear the beef first, then cook on high pressure for 60 minutes with all other ingredients. Release pressure naturally, then thicken the sauce on the sauté function. The Instant Pot version cooks 50% faster but may yield slightly less tender beef than oven-baking. For best results, use the "slow cook" setting if available.
What's the secret to caramelizing the vegetables?
Low and slow is key—cook onions and carrots on medium-low heat for 15-20 minutes without stirring constantly. The sugars release best when undisturbed. Add a splash of water if they brown too quickly. For extra depth, sprinkle with 1/4 tsp sugar at the start. Patience pays off with sweet, golden vegetables!