
Soups & Stews
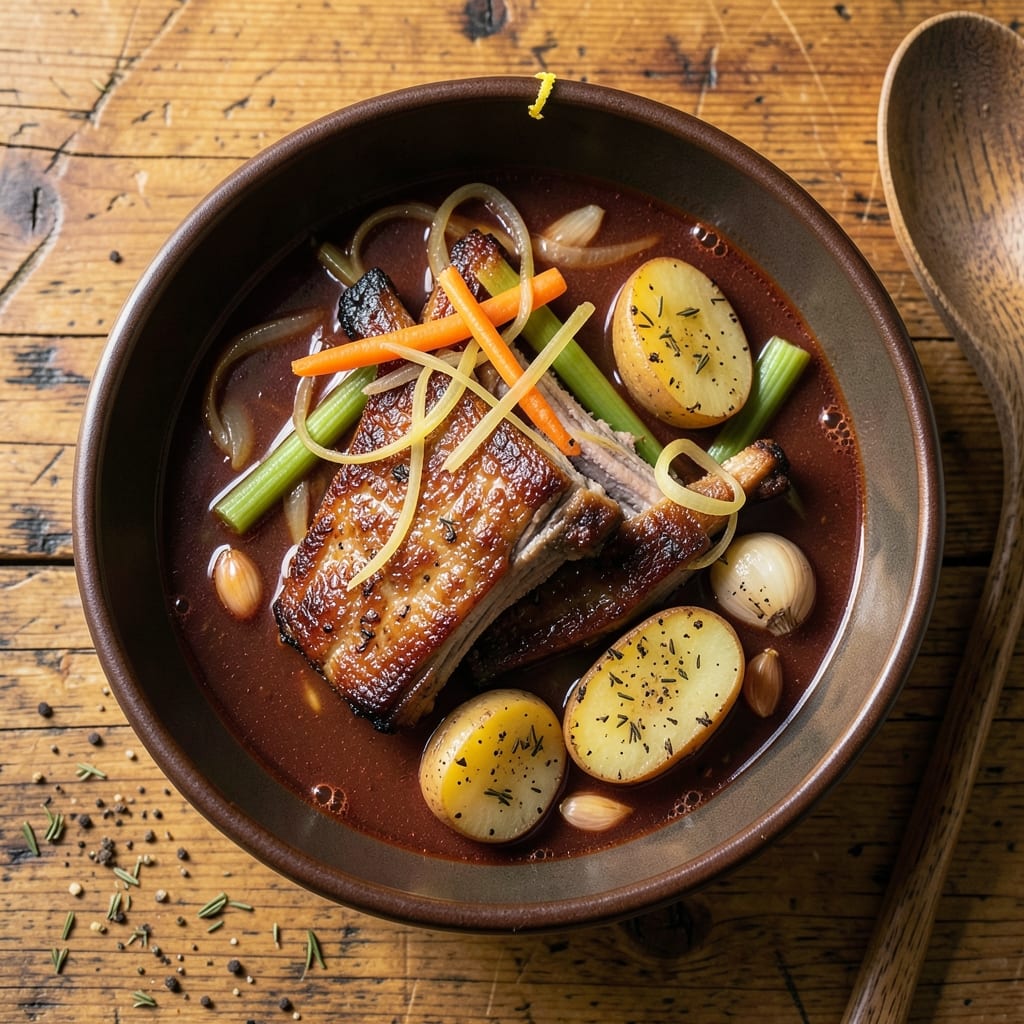
This beef back ribs soup recipe transforms tough, flavorful ribs into melt-in-your-mouth meat that practically dissolves in rich, aromatic broth. The secret lies in slow simmering—where collagen-rich connective tissue breaks down into velvety depth, while hardy vegetables and aromatic herbs build layers of umami. I developed this after years of experimenting with braising techniques, and the result is a soup so satisfying it becomes the centerpiece of any meal.
The process starts with a deep, caramelized base—browning the ribs first unlocks their natural sweetness, while onions, garlic, and celery form the aromatic foundation. A splash of red wine and a bay leaf elevate the broth to restaurant-quality depth, while carrots and potatoes add hearty texture. What you end up with isn't just soup; it's a slow-cooked masterpiece where every spoonful delivers tender meat, vibrant vegetables, and a broth so flavorful it deserves its own bowl.
This recipe delivers restaurant-quality comfort without the fuss—just 2 hours of active prep followed by 4-6 hours of hands-off simmering. The ribs fall apart effortlessly, coating each bite in savory, caramelized goodness, while the broth reduces to a perfect consistency. Serve with crusty bread to soak up every last drop, or pair it with a simple green salad to balance the richness.
Perfect for chilly evenings or meal prep, this soup tastes even better the next day as flavors meld. The technique works for any cut of beef ribs, and you can customize the vegetables to suit your preferences. Here's how to make it—your taste buds will thank you.
Ingredients for beef back ribs soup
Transform tough ribs into velvety, fall-apart meat with these rich, aromatic ingredients.
| Ingredient | Amount | Notes |
|---|---|---|
| Beef Back Ribs 🥩 | 3 lb | Bone-in, trimmed of excess fat |
| Yellow Onions 🧅 | 2 whole | Chopped into 1/2-inch pieces |
| Celery Stalks 🥬 | 4 whole | Chopped into 1/2-inch pieces |
| Garlic Cloves 🧄 | 6 cloves | Peeled and smashed |
| Russet Potatoes 🥔 | 2 lb | Peeled and cubed into 1-inch pieces |
| Carrots 🥕 | 1 ½ lb | Peeled and cut into 1-inch chunks |
| Red Wine 🍷 | 1 cup | Dry variety like Cabernet Sauvignon |
| Beef Broth 💧 | 6 cups | Homemade or high-quality store-bought |
| Bay Leaves 🌿 | 2 whole | Fresh if possible |
| Fresh Thyme 🌿 | ½ ounce | Or 2 tbsp dried thyme |
| Fresh Parsley 🌿 | ¼ cup | Chopped for garnish |
| Olive Oil 🫒 | ¼ cup | For searing ribs |
| Salt 🧂 | 1 ½ tbsp | Kosher salt preferred |
| Black Pepper 🌶️ | 1 tbsp | Freshly ground |
| Tomato Paste 🍅 | 2 tbsp | For depth of flavor |
The ribs are the star here—look for cuts with good marbling and vibrant color. Costco or your local butcher shop often carry the best quality, and buying a whole pack saves money. If you're using frozen ribs, thaw them overnight in the fridge. For the vegetables, organic produce has more flavor, but conventional works fine. The onions, celery, and carrots form the classic mirepoix base—don't skip browning them first, as this builds the soup's depth. Fresh thyme and bay leaves add aromatic complexity, but dried will work in a pinch (use half the amount).
No red wine? Dry sherry or additional beef broth works just as well. Short on thyme? Rosemary or oregano can substitute at the same quantity. For the tomato paste, Trader Joe's sells convenient squeeze tubes that keep well. If you're using pre-cut vegetables, rinse them thoroughly to remove any excess starch. The potatoes should be peeled and cut evenly so they cook uniformly—Yukon Golds add a buttery note, but Russets hold up better during long simmering. For extra richness, add a splash of Worcestershire sauce (ensure it's vegetarian if needed).
This soup tastes even better the next day as flavors meld. Store leftovers in airtight containers in the fridge for up to 5 days or freeze for 3 months. For meal prep, double the recipe and freeze portions. The broth reduces beautifully, so if you prefer it thinner, add a splash of water or more broth when reheating. Always taste as you go—adjust salt and pepper to your preference. The ribs will practically disintegrate, so use a slotted spoon to remove them before serving, then shred the meat back into the broth for maximum flavor.
Why You'll Love This Recipe
- One-Pot Magic: I swear by this recipe when I’m too tired to wash a million dishes. Toss everything—ribs, onions, celery, garlic—into one pot, add water, and let it simmer. The potatoes soften while the ribs fall apart, and suddenly, you’ve got a meal that feels fancy without the fuss.
- Deep, Savory Richness: That first bite? The ribs turn tender but stay juicy, while the potatoes soak up all the garlic-infused broth. It’s not just soup—it’s a flavor bomb where every spoonful has that meaty satisfaction you crave after a long day.
- Lunchbox Hero: Between us, this soup is my go-to for meal prep. I make a big batch on Sunday, and by Wednesday, I’m still pulling out jars of it for work lunches. The ribs stay tender for days, and the potatoes? Perfectly starchy every time—no sad, mushy leftovers here.
- Budget Meal Stretch: Honestly, beef ribs can feel splurgy, but this recipe makes them feel like a steal. A single pack of ribs feeds my family for three meals, and the veggies (onions, celery, potatoes) are pantry staples. It’s hearty, filling, and way cheaper than takeout when you’re hungry but broke.
Step-by-step instructions for slow-simmered beef back ribs soup
Here's how to transform tough ribs into melt-in-your-mouth perfection with deep umami flavor.
Sear the Ribs for Maximum Flavor
Pat the 3 lb beef back ribs completely dry with paper towels—this ensures a proper sear. Heat a large Dutch oven over medium-high heat until hot, then add the 0.25 cup olive oil. Working in batches if needed, place the ribs in a single layer and sear for 4-5 minutes per side until deeply browned. You're building that rich, caramelized crust that will infuse the broth with incredible depth.
As the ribs sear, you'll smell the fat rendering and the meat developing that irresistible crust. Don't crowd the pan—this is where the Maillard reaction happens, and you want plenty of surface contact. Once all ribs are browned, transfer them to a plate and set aside. You'll notice the pan will have beautiful browned bits stuck to the bottom—that's flavor gold we'll scrape up later.
Build the Aromatic Base
In the same Dutch oven, reduce heat to medium and add the chopped 2 whole yellow onions and 4 whole celery stalks. Cook for 5-6 minutes until softened and beginning to caramelize. Add the 6 cloves garlic cloves and cook for another 30 seconds until fragrant—this is where the foundation of your soup's flavor begins to develop.
Stir in the 2 tbsp tomato paste and cook for 1 minute until it darkens slightly. This step deepens the umami profile and gives the soup that rich, slightly sweet complexity. Pour in the 1 cup red wine and scrape up all those browned bits from the bottom of the pan with a wooden spoon. Let it simmer for 2-3 minutes until the wine reduces by half and its alcohol burns off—this prevents a harsh taste in your finished soup.
Simmer the Vegetables and Broth
Add the peeled and cubed 2 lb russet potatoes and 1.5 lb carrots to the Dutch oven. Pour in the 6 cups beef broth and bring everything to a gentle boil. Once boiling, reduce heat to low and add the 2 whole bay leaves, 0.5 ounce fresh thyme, 1.5 tbsp salt, and 1 tbsp black pepper. The broth should just barely bubble—this gentle simmer prevents the vegetables from breaking down too quickly.
Return the seared ribs to the pot, making sure they're mostly submerged in the broth. Cover and let it simmer for 1 hour until the vegetables are tender but not falling apart. You'll know it's ready when a knife slides in easily through the potatoes and carrots. The ribs should be starting to come apart at the edges but still hold their shape—this indicates they're on their way to becoming fork-tender.
Finish and Rest the Soup
Once the vegetables are tender, remove the ribs from the pot and let them rest on a plate. Strain the broth through a fine-mesh sieve into a clean pot, pressing gently on the vegetables to extract maximum flavor. Return the strained broth to the Dutch oven and bring it back to a gentle simmer over low heat. This step ensures your soup has a smooth, velvety texture without any vegetable bits.
Shred the ribs using two forks, removing any large bones. Return the shredded meat to the broth and simmer for another 10-15 minutes to allow all the flavors to meld together. Taste and adjust seasoning if needed—this is where you can really fine-tune the balance of salt, acid from the wine, and umami from the ribs. The soup should be rich but not overpowering, with the ribs falling apart at the touch of a fork.
Serve with Fresh Herbs
Ladle the hot soup into bowls, garnishing each serving with a sprinkle of 0.25 cup chopped fresh parsley. The bright green color contrasts beautifully with the deep red broth and adds a fresh finish. Serve immediately with crusty bread to soak up every last drop of that flavorful broth. Each spoonful should deliver tender, fall-apart ribs, perfectly cooked vegetables, and a broth so rich it practically sings with umami.
This soup tastes even better the next day as the flavors continue to develop, so consider making extra. The ribs will continue to tenderize, and the broth will deepen in complexity—proof that sometimes, the best meals get better with time.
Pro Tips For Making Beef Back Ribs Soup
- Blanch the Ribs First: I learned this the hard way—skipping the blanch makes the broth cloudy and the meat tougher. Drop the ribs in boiling water for 2 minutes, then shock in ice water. This loosens impurities and renders fat cleaner later.
- Cut Celery in 1-inch Chunks: I used to dice celery too small, and it turned to mush. Big chunks (about 1-inch) hold their shape and sweeten the broth as they cook. Save the scraps for stock—just don’t overcook them.
- Don’t Crowd the Pot: After burning three batches, I finally figured out: ribs need space. Start with a single layer on the bottom, then add more in batches. Overcrowding steams instead of sears, and you’ll end up with a greasy, uneven soup.
- Add Potatoes Last: My grandmother swore by this, and she was right: potatoes soak up broth like sponges. Toss them in 10 minutes before serving so they’re creamy but not falling apart. (Yes, even if you’re impatient like me.)
Perfect pairings for this beef back ribs soup
Crusty Bread Pairings
Nothing complements this rich soup like artisan sourdough or a baguette fresh from the oven. The crisp exterior soaks up the velvety broth beautifully while providing a satisfying contrast in texture. I recommend toasting slices with garlic butter—just melt 2 tbsp butter with 1 minced garlic clove and ½ tsp dried parsley, then brush generously. For extra flair, sprinkle with flaky sea salt like Maldon right before serving. 🥖
Wine Pairings
A bold Cabernet Sauvignon from Napa Valley (around $35-$50) stands up to the soup's deep umami flavors while complementing the red wine already in the recipe. For something lighter, try a Pinot Noir from Oregon—its bright acidity cuts through the richness without overpowering. If you prefer white, a full-bodied Chardonnay with oak notes (like La Crema) works surprisingly well. Always serve at 60-65°F for optimal balance. 🍷
Light Salad Balance
To offset the soup's richness, serve a sharply dressed arugula salad with lemon vinaigrette. Toss 4 cups baby arugula with 2 tbsp olive oil, 1 tbsp fresh lemon juice, 1 tsp Dijon mustard, and 1 tbsp shaved Parmigiano-Reggiano. Add ¼ cup toasted walnuts for crunch and ½ cup cherry tomatoes for juicy contrast. The peppery bite cleanses your palate between spoonfuls of soup. ✨
Pickled Vegetable Toppers
Add quick-pickled red onions or sauerkraut for tangy brightness. Thinly slice 1 red onion and soak in ½ cup apple cider vinegar, 1 tbsp sugar, and ½ tsp salt for 20 minutes. Drain before serving. For sauerkraut, heat 1 cup with 1 tbsp butter and 1 tsp caraway seeds until warm—this adds a satisfying crunch and probiotic boost. 🥬
Cheese Course Extension
Turn your meal into a full spread by serving aged cheddar cubes or blue cheese crumbles alongside the soup. The sharp, creamy notes of Point Reyes Blue (around $12/oz) pair perfectly with the ribs' richness. For a vegetarian option, offer marinated olives like Kalata and roasted garlic hummus with warm pita chips. 🧀
Herbal Tea Pairings
After a heavy meal, sip on peppermint tea or chamomile to aid digestion. For something more robust, try Rooibos with a splash of honey—its natural sweetness balances the soup's savory depth. I keep a French press of Earl Grey** on hand for a citrusy finish that complements the wine flavors in the dish. 🍵
Nutrition facts
Frequently asked questions
Why do the ribs need to be seared first?
Searing creates a flavorful crust through the Maillard reaction, which deepens the soup's richness. The browned bits (fond) at the bottom of the pan dissolve into the broth, adding layers of caramelized flavor that you won't get with just simmering. This step is non-negotiable for maximum depth!
Can I use frozen beef back ribs instead of fresh?
Yes, but thaw them completely in the fridge overnight first. Never use frozen ribs straight from the freezer—they won't sear properly and may release water into the broth, diluting flavors. For best results, pat them completely dry after thawing to ensure a good crust.
How do I know when the ribs are tender enough?
After 1 hour of simmering, the ribs should start falling apart at the edges but still hold their shape. Use two forks to test a small piece—if it shreds easily with minimal resistance, they're ready. If they're still tough, simmer 30 minutes more. Overcooking won't hurt, but the broth may become too concentrated.
What if I don't have red wine? Can I substitute?
Use 1 cup dry sherry or 1 cup beef broth + 1 tbsp balsamic vinegar for acidity. The wine adds depth, but these alternatives work well. For extra umami, add 1 tsp soy sauce or 1 tbsp Worcestershire sauce (ensure it's vegetarian if needed).
Can I make this soup in a slow cooker?
Yes! Sear the ribs first, then transfer everything (including broth and veggies) to the slow cooker. Cook on low for 6-8 hours or high for 4-5 hours. The ribs will become even more tender, and the broth will develop deeper flavor. Just skip the final straining step—slow cookers naturally create a smoother texture.