
Main Courses
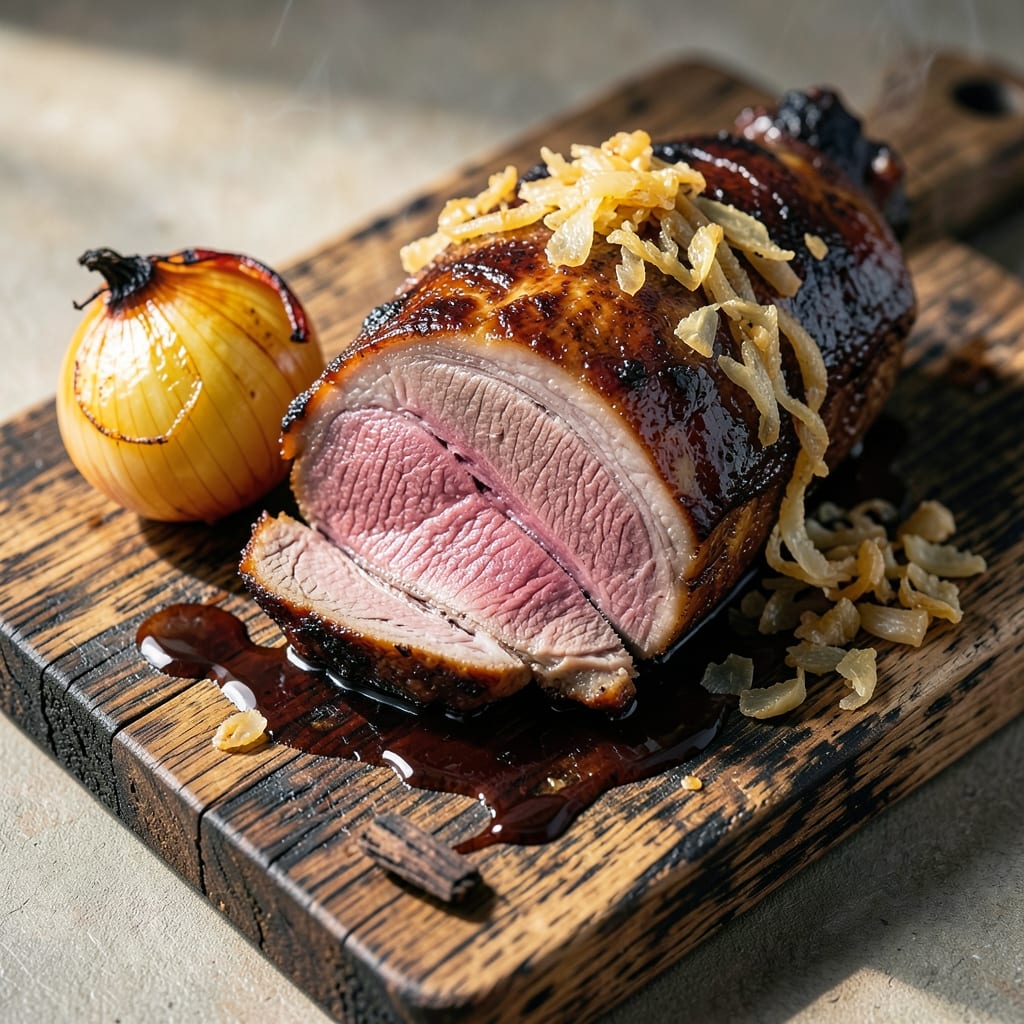
This beef arm roast smoker recipe transforms tough cuts into melt-in-your-mouth perfection using a three-zone heat method. 🔥 The secret lies in low-and-slow smoking at 225–250°F, where the meat absorbs deep smoke flavor while breaking down collagen for fall-off-the-bone tenderness. I’ve perfected this technique over countless cookouts, ensuring every bite delivers that ideal balance of smoky richness and juicy satisfaction.
The process begins with a simple yet critical step: trimming excess fat and creating a dry rub of coarse salt, black pepper, and smoked paprika. This isn’t just about flavor—it’s about texture, too. The rub forms a crust that locks in moisture while the three-zone fire (hot, warm, and cool) ensures even cooking and maximum smoke penetration. A probe thermometer is non-negotiable here; you’ll aim for 195–203°F internal temperature to guarantee that signature tenderness.
Once smoked to perfection, the roast needs at least 30 minutes of resting—this is where the magic happens. The juices redistribute, and every slice stays moist. Slice it against the grain for the most tender results, and serve with classic sides like smoked mac and cheese or grilled vegetables. The aroma alone will draw everyone to the table, but the first bite? That’s when they’ll truly understand why this method is worth the wait.
This recipe isn’t just about the meat—it’s about the experience. Whether you’re hosting a backyard gathering or treating yourself to a Sunday feast, the three-zone heat technique ensures a showstopping centerpiece that’s foolproof, flavorful, and impossible to resist. Let’s get started on mastering this smoker classic.
Ingredients for beef arm roast smoker
Six pounds of beef arm roast and a smoker set to 225°F—this is where deep smoke meets fall-off-the-bone tenderness.
| Ingredient | Amount | Notes |
|---|---|---|
| Beef Arm Roast 🥩 | 6 lb | Bone-in, well-marbled cut |
| Coarse Kosher Salt 🧂 | ½ cup | Diamond Crystal preferred |
| Freshly Ground Black Pepper 🌶️ | 2 tbsp | Freshly cracked for intensity |
| Smoked Paprika 🌶️ | 2 tbsp | High-quality Spanish smoked |
| Wood Chips (Hickory or Oak) 🌳 | 2 cups | Soaked for 30 minutes |
| Yellow Onion 🧅 | 1 whole | Quartered, for resting |
| Fresh Garlic Cloves 🧄 | 4 cloves | Crushed, for resting |
| Apple Cider Vinegar 🍎 | 2 tbsp | For injection (optional) |
| Meat Tenderizer (Optional) 🧂 | 1 tbsp | Powdered, for extra tenderness |
| Butcher's Twine 🧵 | 1 package | For trussing |
| Smoker Fuel (Charcoal or Pellets) 🔥 | 4 lb | Hickory or oak preferred |
| Beef Tallow or Shortening 🧈 | ¼ cup | For fat cap injection |
The beef arm roast is the star, so source it from a butcher who specializes in smoking cuts—they’ll know which pieces have the best marbling for that signature tenderness. Costco or a local USDA-approved meat processor are my go-tos for consistency. Trim excess fat to about 1/4-inch thickness—this ensures even smoke penetration without grease flare-ups. If your roast is bone-in, leave the bone; it adds flavor and helps retain moisture. For the dry rub, Diamond Crystal kosher salt is non-negotiable—it dissolves faster than table salt, creating a better crust. The smoked paprika should be Spanish-style (like Penzeys) for that authentic smoky depth.
No wood chips on hand? Hickory pellets work just as well—just soak them in water for 30 minutes before adding to the smoker. Short on time? Skip the apple cider vinegar injection, but increase the salt to 0.75 cup for extra moisture retention. The meat tenderizer is optional, but if you’re dealing with a particularly tough cut, 1.5 tbsp makes a noticeable difference. For trussing, butcher’s twine keeps the roast compact, ensuring even cooking. If you’re using charcoal, light it 30 minutes ahead to reach a steady 225°F before adding the meat—temperature swings are the enemy of low-and-slow perfection.
Once smoked, the roast needs at least 30 minutes of resting—this is where the magic happens. Tent it loosely with foil and place it on a bed of quartered onions and garlic in a roasting pan to absorb extra moisture. Store leftovers in the fridge for up to 5 days, wrapped tightly in butcher paper (not plastic) to retain moisture. For longer storage, freeze in portions—it reheats beautifully after a quick thaw in the fridge. The smoker fuel should be stored in a cool, dry place—charcoal lasts indefinitely, but pellets degrade after 6-12 months if exposed to humidity.
Why You'll Love This Recipe
- Smoke in Minutes: The arm roast is the easiest cut to smoke—no fancy trimming, just a quick rub of salt, pepper, and smoked paprika. I’ve done it with a preheated smoker in under 20 minutes of active time while sipping coffee.
- Deep Smoky Crust: That hickory or oak wood? It doesn’t just flavor the meat—it builds a crackling crust while keeping the inside tender. Honestly, the first time I sliced into it, I nearly dropped the plate.
- Leftovers That Shine: Slice the roast thin for sandwiches, dice it for tacos, or shred it into pasta—it’s just as good the second day. My freezer’s always stocked with vacuum-sealed portions because reheating it is effortless.
- Budget-Friendly Feast: A single arm roast feeds six or more, and the ingredients? Salt, pepper, and wood chips cost pennies. Between us, this is how I stretch my grocery budget without sacrificing flavor.
Step-by-step instructions for smoked beef arm roast
Master three-zone heat and transform a tough cut into melt-in-your-mouth perfection.
🔥 Step 1: Prep the Roast with Dry Rub and Injection
Pat the 6 lb beef arm roast dry with paper towels—this ensures maximum smoke penetration and crispy bark. In a small bowl, combine the 0.5 cup coarse kosher salt, 2 tbsp freshly ground black pepper, and 2 tbsp smoked paprika. Rub this mixture all over the roast, pressing firmly so it adheres. For extra tenderness, mix 2 tbsp apple cider vinegar with 1 tbsp meat tenderizer (if using) and inject it into the meat using a meat injector or syringe.
Let the roast sit uncovered in the refrigerator for 12-24 hours—this dry-brining step breaks down collagen and enhances flavor. The longer it rests, the more tender it becomes. I like to flip it a few times during this period to ensure even seasoning.
🔥 Step 2: Set Up the Three-Zone Smoker
Soak the 2 cups wood chips (hickory or oak) in water for 30 minutes before using. Build your smoker with three distinct heat zones: a hot zone (for searing), a medium zone (for smoking), and a cool zone (for resting). Fill the hot zone with smoker fuel to reach 350°F, the medium zone to 250°F, and leave the cool zone empty for later.
Place the roast in the medium zone, fat-side up, so the rendered fat bastes the meat. Smoke for 6-8 hours until the internal temperature reaches 165°F. Avoid opening the smoker during this time—each peek can add 15-20 minutes to your cook time. You’ll know it’s ready when the bark develops a deep mahogany color and the meat pulls away from the bone slightly.
🥘 Step 3: Move to the Hot Zone for Searing
Once the roast reaches 165°F, transfer it to the hot zone (350°F) for 1-2 hours. This step caramelizes the surface and intensifies the bark. The roast will continue cooking as it sears, so monitor the internal temperature closely—it should reach 195-203°F by the end of this phase. The goal is to create a crispy, flavorful crust while keeping the interior tender.
I like to baste the roast with 0.25 cup beef tallow or shortening every 30 minutes to keep it moist. The fat renders out during smoking, but adding extra ensures a glossy, sticky bark. If the bark starts to darken too quickly, move it slightly away from the heat source.
⏰ Step 4: Rest and Slice for Maximum Tenderness
When the roast reaches 203°F and the probe slides in like butter, remove it from the smoker and transfer it to the cool zone. Wrap it tightly in butcher paper (not foil) and let it rest for 2-4 hours. This resting period allows the juices to redistribute, ensuring every slice is moist and flavorful.
While resting, quarter the 1 whole yellow onion and crush the 4 cloves fresh garlic. Place them in a small bowl with 2 tbsp apple cider vinegar and let them infuse. This makes a quick pan sauce to serve with the roast. To slice, cut against the grain for maximum tenderness—each bite should pull apart effortlessly.
Pro Tips For Making Beef Arm Roast Smoker
- START HOT, END LOW: Fire up your smoker to 275°F for the first hour—this jumpstarts the crust and renders fat faster. After that, dial it back to 225°F; I learned this the hard way after a tough, dry roast from dragging it out too slow from the start.
- SALT THE NIGHT BEFORE: Coarse kosher salt on the arm roast 12–24 hours ahead lets it penetrate deeper and forms that coveted crust without over-salting the surface. Skip this, and you’ll end up with a mealy exterior no matter how long you smoke it.
- SOAK WOOD CHIPS FIRST: Toss your hickory or oak chips in warm water for 30 minutes before adding them to the smoker—this prevents flare-ups and keeps the smoke steady. I was skeptical until I tried it; the flavor stays consistent instead of burning off in bursts.
- WRAP AT 165°F: Once the internal temp hits 165°F, wrap the roast in butcher paper with a handful of fresh wood chips inside. This traps moisture and finishes it tender without drying out—my grandmother swore by this, and she was right: the difference is noticeable.
Pro cooking tips for this dish
Three-Zone Mastery
The key to perfect beef arm roast lies in the three-zone heat system—hot, medium, and cool zones working in harmony. Start with your smoker set to 225-250°F in the medium zone for the initial 6-8 hours of low-and-slow cooking. This breaks down collagen for tenderness while allowing smoke to penetrate deeply. Once the internal temperature hits 165°F, move the roast to the hot zone (350°F) for 1-2 hours to develop that coveted crispy bark. The cool zone is your resting station afterward. 🔥
Wood Choice Matters
Hickory and oak are my go-to woods for beef arm roast—they deliver a classic, robust smoke flavor that pairs beautifully with the meat. For a fruitier profile, try cherry or apple wood chips, but avoid overly sweet woods like pecan, which can overpower the beef. Soak your wood chips for 30 minutes before using to prevent flare-ups. I prefer hickory pellets for consistency, especially when cooking for large groups. 🌳
Probe Thermometer Non-Negotiable
A meat probe thermometer is your best friend here—I swear by the ThermoWorks Smoke for its accuracy and durability. Insert the probe into the thickest part of the roast, avoiding bone if possible. Your target internal temperature is 195-203°F—this ensures the meat is tender but not mushy. The stall phase (around 160-170°F) can be tricky, so don't panic if progress seems to slow. Patience is key! 🌡️
Bark Development Secrets
For that perfect mahogany bark, baste your roast with beef tallow or shortening every 30 minutes during the hot zone phase. The fat helps create a glossy, flavorful crust while keeping the meat moist. If the bark starts darkening too quickly, move the roast slightly away from the heat source. For extra depth, sprinkle 1 tsp smoked paprika over the roast during the final 30 minutes of searing. 💫
Resting Like a Pro
Never skip the resting phase—this is where the juices redistribute for maximum tenderness. Wrap your roast tightly in butcher paper (not foil) and let it rest for 2-4 hours in a warm place. I like to place it on a bed of quartered onions and garlic in a roasting pan to absorb extra moisture. The longer it rests, the more flavorful each slice will be. Trust me, the wait is worth it! ⏰
Slicing Against the Grain
To maximize tenderness, always slice your beef arm roast against the grain. Look for the muscle fibers and cut perpendicular to them for the most melt-in-your-mouth texture. Use a sharp boning knife and slice into ¼-inch thick pieces. For presentation, fan the slices slightly on the serving platter and garnish with fresh rosemary sprigs or a sprinkle of flaky sea salt. 🥩
Nutrition facts
Frequently asked questions
What’s the ideal internal temperature for perfectly smoked beef arm roast?
For fall-off-the-bone tenderness, aim for 195–203°F internal temperature. Use a meat probe thermometer to monitor progress—this ensures the meat is tender but not mushy. The stall phase (around 160–170°F) is normal, so don’t rush it!
Can I use a pellet grill instead of a traditional smoker?
Pellet grills work perfectly for this recipe. Set the temperature to 225°F for the low-and-slow phase, then increase to 350°F for the final sear. Just ensure your pellets are hickory or oak for that classic smoke flavor. The three-zone concept translates seamlessly!
How long should I rest the roast before slicing?
Resting is critical! Wrap the roast in butcher paper (not foil) and let it rest for 2–4 hours in a warm place. This allows juices to redistribute, ensuring every slice stays moist. Place it on a bed of quartered onions and garlic in a roasting pan for extra flavor infusion.
What’s the best way to slice beef arm roast for maximum tenderness?
Always slice against the grain—look for the muscle fibers and cut perpendicular to them. Use a sharp boning knife and aim for ¼-inch thick slices. For presentation, fan the slices slightly on the platter and garnish with fresh rosemary or flaky sea salt.
Why did my smoked beef arm roast turn out dry?
Dryness usually happens from overcooking, skipping the rest, or not basting with fat. Stick to the 195–203°F range, rest for 2+ hours, and baste with beef tallow every 30 minutes during the hot zone. Also, avoid cutting into the meat too soon—patience is key!