
Soups & Stews
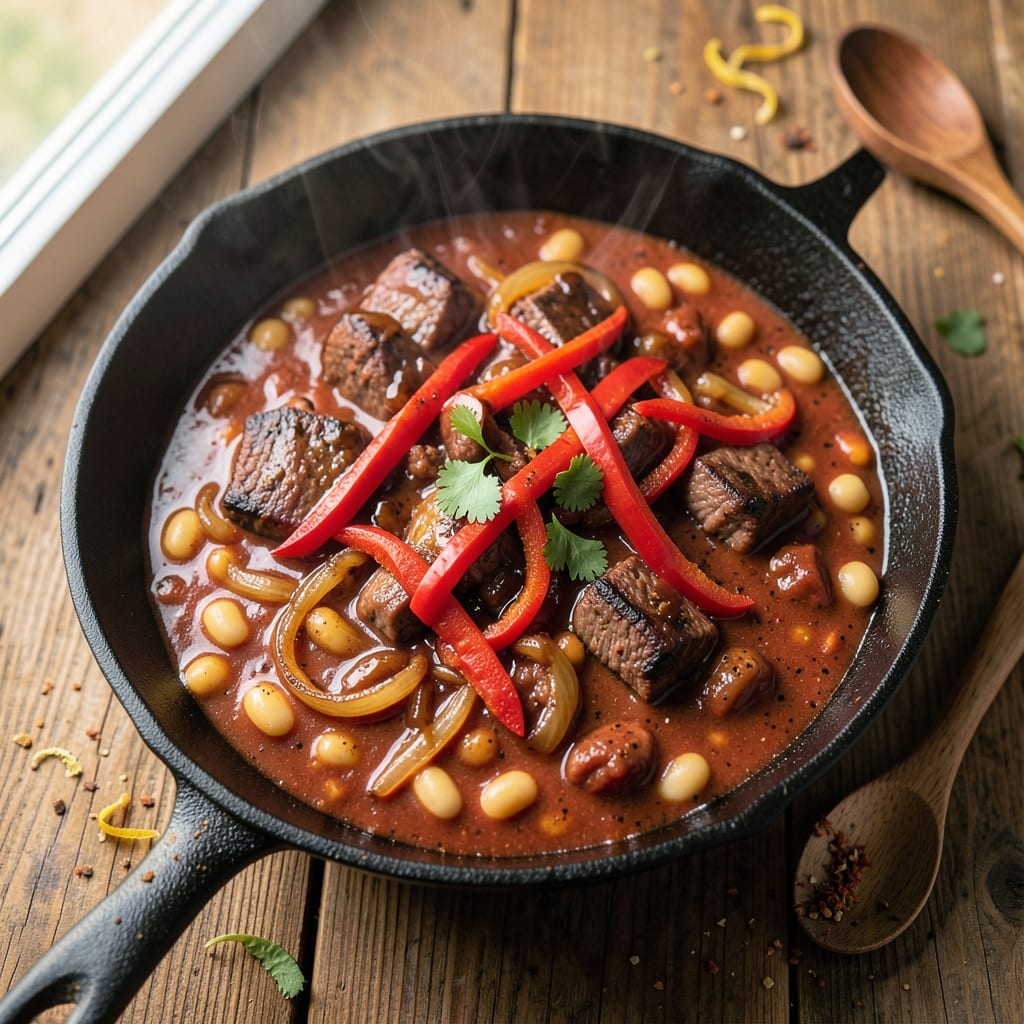
This beef and veggie chili recipe delivers restaurant-quality depth with caramelized onions that build layers of umami you won't find in canned versions. The secret lies in slow-browning the beef and onions until deep golden—this creates the rich, complex base that transforms simple ingredients into something extraordinary. I've perfected this technique over years of testing, and it never fails to impress even the most critical chili lovers.
What sets this chili apart is the balance of textures and flavors: tender beef, caramelized onions, hearty vegetables, and a rich broth that develops its own depth during the 3-hour simmer. The recipe uses simple pantry staples but delivers professional results without requiring fancy equipment. Whether you're cooking on the stovetop or using an Instant Pot, this method ensures maximum flavor development while keeping the process straightforward.
By the time you're done, you'll have a pot of deeply aromatic chili with perfectly tender beef, caramelized onions, and vegetables that have absorbed all the rich flavors. The slow cooking process breaks down the beef into melt-in-your-mouth pieces while developing a broth that's both hearty and complex. This is the kind of chili that tastes even better the next day—ideal for meal prep or feeding a crowd.
Serve it topped with sour cream, shredded cheese, and fresh cilantro for a restaurant-style finish. The caramelized onions add a sweet, deep flavor that ties everything together, making each bite more satisfying than the last. Let's get cooking—this chili is worth every minute of simmering time.
Ingredients for beef and veggie chili
Simple pantry staples transform into restaurant-worthy chili with just one technique: slow caramelization.
| Ingredient | Amount | Notes |
|---|---|---|
| Chuck Roast 🥩 | 2 lb | Cut into 1-inch cubes |
| Yellow Onions 🧅 | 3 whole | Thinly sliced, caramelized |
| Garlic Cloves 🧄 | 6 cloves | Minced for depth |
| Canned Tomato Sauce 🍅 | 28 oz | San Marzano preferred |
| Beef Broth 💧 | 4 cups | Low-sodium preferred |
| Red Bell Pepper 🍆 | 1 whole | Diced, any color |
| Carrots 🥕 | 3 whole | Peeled, chopped |
| Celery Stalks 🥬 | 3 whole | Chopped, for base |
| Chili Powder 🌶️ | 2 tbsp | Smoked preferred |
| Ground Cumin 🌿 | 1 tbsp | Toasted for warmth |
| Oregano 🍃 | 1 tbsp | Dried, Mexican preferred |
| Cayenne Pepper 🔥 | ½ tsp | Adjust for heat |
| Dark Brown Sugar 🍚 | 1 tbsp | Balances acidity |
| Salt 🧂 | 1 ½ tsp | Diamond Crystal preferred |
| Black Pepper 🌶️ | ½ tsp | Freshly cracked |
The chuck roast is non-negotiable—it's the only cut that stays tender through the long simmer. Grab it from Costco or your butcher's counter, where they'll likely cube it for you (saves time). For the onions, yellow onions work best—they caramelize more beautifully than sweet or red. If you're feeling fancy, Spanish onions from the specialty section add even more depth. The garlic? Freshly minced makes all the difference—pre-minced garlic from jars tastes flat in comparison. And that tomato sauce? San Marzano is worth the splurge for its sweet, meaty flavor.
No chuck roast? Chuck steak or beef stew meat works in a pinch, but expect slightly less tender results. Short on tomato sauce? Crushed tomatoes with a splash of balsamic gets you close. The spices are flexible—smoked paprika can replace half the chili powder for extra depth. Need to skip the cayenne? Red pepper flakes at half the amount adds heat without overpowering. The carrots and celery can be swapped for any veggie you have on hand—zucchini or mushrooms add great texture. And if you're using dried oregano, Mexican oregano from the Latin market section has a completely different, more complex flavor profile.
This chili tastes even better the next day as the flavors meld together. Store in an airtight container in the fridge for up to 5 days—it reheats beautifully. For freezer storage, portion into ziplock bags and freeze for up to 3 months. I always make a double batch because it disappears so fast. The caramelized onions keep well too—store them separately in the fridge for up to 5 days and use them to top soups, tacos, or even burgers later in the week.
Why You'll Love This Recipe
- One-Pot Magic: I swear by this recipe when I’m too tired to scrub pots—just dump everything into one big pot, let it simmer, and walk away. The chuck roast practically falls apart on its own, and the onions caramelize into sweet little pockets of flavor without any extra work.
- Deep, Savory Bite: That chuck roast? Slow-cooked until it’s tender but still holds its shape, so every spoonful has a perfect mix of rich beef and juicy veggies. The garlic and tomato sauce blend into something so hearty, it tastes like a hug in a bowl—especially when the onions get just crispy enough at the edges.
- Meal Prep MVP: Between us, this chili is my secret weapon for busy weeks. Make a double batch on Sunday, and you’ve got lunches for days—pack it in jars, reheat it in minutes, and no one complains. (Yes, even my picky teenager.)
- Budget-Friendly Powerhouse: Chuck roast is cheap, canned tomato sauce lasts forever, and you’re not buying fancy ingredients here. A single pot feeds four for under $10, and leftovers taste just as good the next day—if they even last that long. Honestly, it’s the kind of meal that makes grocery day feel like a win.
Step-by-step instructions for beef and veggie chili
Here's how to build a chili so rich and flavorful it tastes like it simmered all day.
Caramelize the Onions and Sauté the Veggies
Start by dicing the 3 whole yellow onions into thin slices and placing them in a large, heavy-bottomed pot. Cook them over medium-low heat with just a pinch of salt for 20-25 minutes, stirring occasionally. You're aiming for deep golden caramelization—the onions should be soft, sweet, and almost jam-like. This step develops the umami depth that makes this chili special.
Once the onions are caramelized, add the 3 whole carrots (chopped), 3 whole celery stalks (chopped), and 1 whole red bell pepper (diced). Increase the heat to medium-high and cook for 8-10 minutes, stirring frequently, until the vegetables soften and begin to brown slightly. This builds the aromatic base that carries the entire dish.
Brown the Chuck Roast and Add Aromatics
Push the vegetables to one side of the pot and add the 2 lb chuck roast (cut into 1-inch cubes) to the empty space. Let the meat brown deeply for 5-7 minutes without stirring—this creates a rich, meaty crust that dissolves into the chili. Once the meat is well-browned on all sides, add the 6 cloves garlic cloves (minced) and stir for 30 seconds until fragrant.
Here's the thing—don't rush this step. The deeper the brown on the meat, the more complex the flavor. If the vegetables start to stick, add a splash of beef broth to deglaze. This prevents burning and keeps the flavors cohesive.
Build the Chili Base with Spices and Liquids
Return all the vegetables and meat to the pot, then reduce the heat to medium-low. Add the 2 tbsp chili powder, 1 tbsp ground cumin, 1 tbsp oregano, 0.5 tsp cayenne pepper, 1 tbsp dark brown sugar, 1.5 tsp salt, and 0.5 tsp black pepper. Stir well to coat the meat and vegetables evenly with the spices.
Pour in the 28 oz canned tomato sauce and 4 cups beef broth, stirring to combine. Bring the mixture to a gentle simmer, then reduce the heat to low. This is where the magic happens—the chili needs time to develop its deep, layered flavors. Let it simmer uncovered for 2 hours, stirring occasionally, until the meat is fork-tender and the liquid has thickened slightly.
Adjust Consistency and Finish
After the initial 2-hour simmer, taste the chili and adjust the seasoning if needed. If it's too thick, add a splash of beef broth to loosen it. If it's too thin, simmer uncovered for another 15-20 minutes to thicken naturally. The goal is a chili that coats the back of a spoon but still has a bit of body.
For the final touch, let the chili sit off the heat for 10 minutes before serving. This resting period allows the flavors to meld and the meat to absorb all that delicious liquid. Serve it warm with crusty bread or over rice—each bite should deliver tender beef, sweet caramelized onions, and a perfect balance of spice and umami.
Pro Tips For Making Beef And Veggie Chili
- Sear the Chuck First: High heat for 3-4 minutes per side—this isn’t just about flavor, it’s about keeping the meat tender. I learned this the hard way when my chili turned out chewy because I rushed the sear, and now I never skip it.
- Slice Onions Thin: A sharp knife and 1/8-inch slices mean onions soften faster and don’t overpower the dish. Thick chunks? They’ll turn mushy and bitter—trust me, you’ll taste the difference.
- Deglaze Aggressively: After searing the meat, add 1/2 cup beef broth right away and scrape the browned bits off the pot. That crust holds more flavor than you’d think, and skipping it means losing depth in your chili.
- Simmer Low and Slow: Two hours minimum at a gentle bubble—no rushing. I used to crank the heat to speed things up, but the meat stayed tough and the broth turned watery. Low and steady wins every time.
Flavor customization for these flavors
Sweet Heat Balance
Adjust the cayenne pepper and dark brown sugar ratio to control heat and sweetness. For a milder chili, reduce cayenne to ¼ tsp and add ½ tsp brown sugar to balance. If you love heat, increase cayenne to 1 tsp and add ½ tsp smoked paprika for depth. I find ½ tsp chipotle powder in adobo sauce adds smoky heat without overpowering. 🌶️
Smoky Depth Boost
Swap ½ tbsp chili powder for 1 tbsp smoked paprika to intensify the smoky flavor. For extra depth, add 1 tsp liquid smoke (just a splash) or ½ cup beef bone broth instead of regular broth. The bone broth adds collagen that thickens the chili naturally. I also love adding 1 tbsp coffee to deepen the richness—it enhances the caramelized onions beautifully. 💫
Spice Profile Swaps
Replace cumin with 1 tsp coriander for a citrusy note, or add ½ tsp cinnamon for warmth. For a Mexican-inspired twist, use 1 tsp Mexican oregano and ½ tsp cloves—this combo adds surprising complexity. If you prefer earthy flavors, swap ½ tbsp chili powder for 1 tsp ground coriander and ½ tsp ground allspice. Always toast spices in the pot for 30 seconds before adding liquids to release their aromas. ✨
Vegetable Variations
Add 1 diced zucchini or ½ cup mushrooms for extra texture. For a heartier chili, include 1 cup diced sweet potatoes or 1 cup corn kernels. If you love texture, stir in ½ cup black beans during the last 30 minutes of simmering. I also enjoy adding 1 diced jalapeño for heat and freshness—remove seeds for milder spice. 🥕
Protein Alternatives
Swap chuck roast for 1 lb ground beef (browned first) or 1 lb Italian sausage (remove casing) for a different flavor profile. For a vegetarian option, use 1 lb extra-firm tofu (pressed and cubed) or 1 lb lentils (cooked separately and added later). If using tofu, marinate it in 1 tbsp soy sauce and 1 tsp smoked paprika before browning. 🍛
Acidity Adjustments
Balance the chili’s richness with 1 tbsp apple cider vinegar or 1 tbsp lime juice at the end. For tang, add ½ cup diced tomatoes (fresh or canned) during the last 15 minutes of cooking. If the chili tastes flat, a pinch of citric acid (from the spice aisle) brightens flavors instantly. I often finish with 1 tsp fish sauce for umami—just a splash makes a huge difference. 💡
Nutrition facts
Frequently asked questions
Why do you caramelize the onions for so long?
The 20-25 minute caramelization transforms simple onions into sweet, jam-like flavor bombs that build the chili's umami foundation. This slow process develops complex sugars that dissolve into the broth, creating depth that canned chili simply can't match.
Can I use ground beef instead of chuck roast?
Yes! For 1 lb ground beef, brown it first in the pot until no longer pink, then drain excess fat before adding other ingredients. The texture will be slightly different but still delicious. For best results, use 85% lean ground beef to maintain richness.
How do I make this in an Instant Pot?
Sauté onions and veggies on "Sauté" mode for 10 minutes, then add meat and spices. Cook on "High Pressure" for 20 minutes (natural release). Finish with 10 minutes on "Sauté" to thicken. The pressure cooker cuts time but requires stirring occasionally to prevent sticking.
What if my chili is too thin after simmering?
Simmer uncovered for 15-20 more minutes to reduce naturally, or make a quick slurry with 1 tbsp cornstarch + 1 tbsp cold water, stir in, and cook for 2 minutes. For extra thickness, mash ½ cup cooked beans into the chili—they release starch that thickens beautifully.
How can I make this chili spicier?
Double the cayenne pepper to 1 tsp and add ½ tsp chipotle powder or 1 diced jalapeño (seeds in). For smoky heat, swap ½ tbsp chili powder for 1 tbsp smoked paprika. Always taste as you go—you can't remove heat once added!