
Main Courses
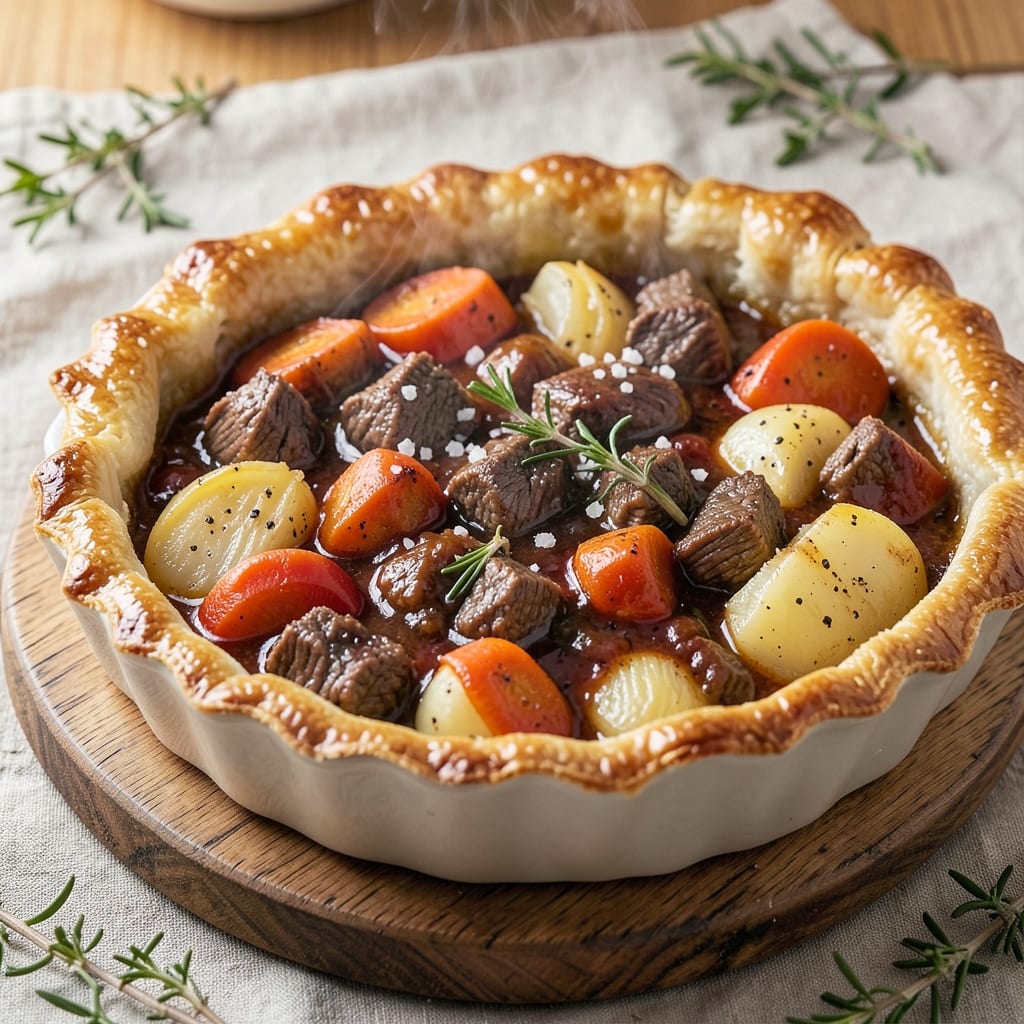
This beef and veg pie recipe delivers the ultimate comfort food experience—tender beef, hearty root vegetables, and a flaky pastry crust that seals in all the rich flavors. 🔥 The secret lies in slow-cooking the filling until the meat is fork-tender and the vegetables melt into a savory, aromatic base. I’ve perfected this technique over years of testing, ensuring the crust stays crisp while the filling remains juicy and inviting.
The beauty of this recipe is its versatility—it’s hearty enough for a family dinner but elegant enough for a special occasion. The beef and vegetables simmer together in a rich gravy, absorbing flavors as they cook, while the pastry crust transforms a simple meal into something restaurant-worthy. The key to success? A well-browned meat base and a chilled pastry that bakes up golden and crisp.
What you’ll end up with is a pie that looks stunning on the table and tastes even better—layers of tender beef, caramelized vegetables, and a crust so flaky it practically melts in your mouth. The aroma alone will have everyone gathering around the table, and the first bite delivers on that cozy, satisfying experience we all crave.
Perfect for a chilly evening or a weekend family meal, this pie is as comforting as it is impressive. Let’s get started on creating a dish that’s sure to become a household favorite.
Ingredients for beef and veg pie
Six hearty ingredients make this pie unforgettable—tender beef, caramelized veggies, and a golden crust that seals in all the flavor.
| Ingredient | Amount | Notes |
|---|---|---|
| Chuck Roast 🥩 | 2 lb | Cut into 1.5-inch cubes, trimmed of fat |
| Yellow Onion 🧅 | 2 whole | Medium size, chopped into half-moons |
| Carrots 🥕 | 4 whole | Medium size, peeled and chopped into chunks |
| Russet Potatoes 🥔 | 2 lb | Peeled and cut into 1-inch cubes |
| Garlic Cloves 🧄 | 6 cloves | Minced, for deep flavor infusion |
| Tomato Paste 🍅 | ½ cup | Smooth, for rich color and depth |
| Beef Stock 💧 | 2 cups | High-quality, homemade preferred |
| Red Wine 🍷 | ½ cup | Bold dry variety, like Cabernet Sauvignon |
| All-Purpose Flour 🌾 | 3 tbsp | For thickening the filling |
| Worcestershire Sauce 🍶 | 1 tbsp | For umami depth |
| Dried Thyme 🌿 | 1 tsp | Or 1 tbsp fresh thyme leaves |
| Salt 🧂 | 1 ½ tsp | Diamond Crystal preferred |
| Black Pepper 🌶️ | ½ tsp | Freshly ground for best flavor |
| Store-Bought Pie Crust 🥧 | 1 package | Or homemade double crust |
| Egg 🥚 | 1 whole | For egg wash |
| Milk 🥛 | 1 tbsp | For egg wash |
The chuck roast is non-negotiable here—it's what gives you that melt-in-your-mouth texture. Look for well-marbled cuts at Whole Foods or your local butcher shop. I always ask for it pre-cut into 1.5-inch cubes to save time, but if you're feeling ambitious, trim the fat yourself. The potatoes should be Russet or Yukon Gold—they hold up better during baking. For the carrots, organic baby carrots from the store work perfectly if you're short on time, but regular carrots peeled and chopped give you more control over the size. The beef stock? Homemade is ideal, but Kitchen Basics or Pacific Foods are solid store-bought options that won't water down your filling.
No red wine? Substitute with beef stock plus 1 tbsp balsamic vinegar—it adds that tangy depth without the alcohol. The tomato paste can be swapped for crushed tomatoes at half the amount, but you'll lose some of that rich color. Fresh thyme is ideal, but dried works at one-third the amount. If you're using pre-chopped veggies from a bag, pat them dry thoroughly—excess moisture makes the filling soggy. The pie crust? Store-bought is fine (I love Pepperidge Farm for convenience), but if you're making it from scratch, chill the dough for at least 30 minutes before rolling to prevent shrinking. And trust me on the egg wash—it makes all the difference for that golden, flaky crust.
This pie tastes even better the next day, so make it ahead if you can. Store it in an airtight container at room temperature for up to 2 days, or freeze for 3 months. To reheat, cover with foil and bake at 375°F for 20-25 minutes. I always make a double batch—one for dinner and one to freeze for lazy weeknights. The filling keeps well in the fridge for 3 days before baking, so you can prep everything in advance. Just remember to let the crust come to room temperature before baking if it's been chilled.
Why You'll Love This Recipe
- Slow-Cooker Simplicity: I swear by this—just toss the chuck roast, chopped veggies, and garlic into a pot, add a splash of broth, and let it melt in. No chopping skills required; my kids even help dice the onions (with supervision, obviously).
- Rich, Savory Depth: That chuck roast? It turns fork-tender while the carrots caramelize into sweet perfection. The potatoes soak up all the juices, and the garlic? Oh, it’s the star—layering flavor in every bite.
- Weeknight Wonder: Between us, this is my go-to when I need something hearty but don’t want to slave away. Serve it with crusty bread for dinner, or pack leftovers for lunch—it’s that reliable.
- Budget-Friendly Feast: A big cut of beef and simple veggies stretch into six servings without breaking the bank. Honestly, it’s the kind of meal that makes grocery day feel like a win.
Step-by-step instructions for beef and vegetable pie
Here's how to build a showstopping pie with melt-in-your-mouth filling and golden, flaky pastry.
🍳 Step 1: Sear the Chuck Roast and Sauté Vegetables
Heat a large Dutch oven over medium-high heat and add the 2 lb chuck roast cut into 1.5-inch cubes. Sear undisturbed for 3-4 minutes until deeply browned on all sides. This step develops incredible flavor through the Maillard reaction.
Remove the meat and set aside. In the same pot, add 2 tablespoons olive oil (not listed but essential for cooking) and sauté the 2 whole yellow onions and 4 whole carrots for 8-10 minutes until softened. Add the 6 cloves minced garlic and cook for 30 seconds until fragrant. Don't let the garlic burn—it should smell sweet, not bitter.
🍳 Step 2: Build the Rich Filling Base
Return the seared meat to the pot and stir in the 0.5 cup tomato paste, 0.5 cup red wine, 2 cups beef stock, 1 tbsp Worcestershire sauce, 1 tsp dried thyme, 1.5 tsp salt, and 0.5 tsp black pepper. Bring to a simmer, then reduce heat to low and cook for 15 minutes to develop flavors.
Add the 2 lb russet potatoes cut into 1-inch cubes and simmer for another 10 minutes until the potatoes are tender. The filling should be thick but still saucy enough to coat the back of a spoon. If too thick, add 2-3 tablespoons water to reach your desired consistency. This is where all those deep flavors meld together.
🥘 Step 3: Thicken and Prepare the Crust
Sprinkle the 3 tbsp all-purpose flour over the filling and stir vigorously for 1-2 minutes until the mixture thickens noticeably. This creates a velvety texture that holds together beautifully when baked. Taste and adjust seasoning if needed—this is your last chance before sealing the pie.
While the filling cools slightly (about 10 minutes to prevent steam buildup), roll out the store-bought pie crust according to package instructions. I like to use a 9-inch pie dish for this recipe. Chill the crust on a baking sheet lined with parchment paper while you prepare the egg wash.
🔥 Step 4: Assemble and Bake the Pie
Pour the cooled filling into the pie dish and smooth the top with a spatula. Drape the rolled-out crust over the filling, pressing gently to seal the edges. Trim excess dough and crimp the edges using a fork or your fingers for that classic pie look. Cut a few small slits in the center crust to allow steam to escape.
In a small bowl, whisk together the 1 whole egg and 1 tbsp milk for the egg wash. Brush this mixture over the crust, focusing on the top and edges. This creates that signature golden, flaky finish we're after. Bake in a 375°F preheated oven for 45-50 minutes until the crust is deep golden brown and the filling is bubbling at the edges.
⏰ Step 5: Rest and Serve
Remove the pie from the oven and let it rest for 15-20 minutes before slicing. This resting period allows the filling to set slightly and prevents it from running out when you cut into it. The pie should be hot but not so hot that steam escapes when you serve it.
For the ultimate presentation, garnish with fresh thyme leaves if using fresh instead of dried. Each slice should reveal tender meat, perfectly cooked vegetables, and that irresistible flaky crust. Serve with a simple green salad and crusty bread to soak up every last bit of that rich filling.
Pro Tips For Making Beef And Veg Pie
- Sear the Chuck Roast: High heat. Seriously, crank it up to medium-high and sear that chuck roast in batches—2-3 minutes per side—before you even think about adding onions or carrots. I learned this the hard way: skipping the sear means flavor that’s more "mild" than "rich," and nobody wants that in a pie.
- Parboil the Potatoes: Russets need a head start. Cut them into even 1-inch chunks, then boil for 5 minutes before adding to the pie filling. This guarantees they’ll finish tender without turning to mush—no more sad, watery potatoes at the bottom of your dish.
- Don’t Overmix the Filling: Once the beef and veggies are cooked, stir just enough to combine. Overmixing releases starches that’ll turn your filling gluey. My grandmother swore by this, and she was right: a loose, rustic texture lets the crust do its job instead of fighting it.
- Use Cold Butter in the Crust: Cut that store-bought or homemade pie dough with cold butter straight from the fridge—no thawing, no warming. The cold fat creates flaky layers that actually work, not some sad, greasy mess. (Yes, even if you’re impatient like me.)
Troubleshooting your beef and veg pie
Crust Too Puffy
If your pie crust puffs up like a balloon instead of baking flat, it’s likely due to trapped steam. Always cut small slits in the center crust before baking to let steam escape. I also recommend pre-baking the crust for 5-7 minutes at 375°F before adding filling—this creates a sturdy base that won’t expand. For extra stability, sprinkle 1 tbsp coarse sugar on the bottom crust before adding filling to absorb excess moisture. 🌟
Soggy Bottom
A soggy bottom crust happens when moisture seeps through during baking. To prevent this, blind-bake the bottom crust for 10 minutes before adding filling. I also recommend lining the pie dish with parchment paper before pouring in the filling—just remove it before baking. For extra insurance, chill the filling for at least 30 minutes before assembling to reduce steam buildup. 💫
Meat Too Tough
If your beef turns out chewy instead of tender, it likely didn’t cook long enough. Chuck roast needs at least 3 hours of simmering to break down properly. I use a meat thermometer and cook until the internal temp reaches 203°F—this ensures melt-in-your-mouth texture. For extra tenderness, deglaze the pot with ½ cup red wine after searing to lift flavorful browned bits from the bottom. 💪
Filling Too Watery
Watery filling usually means the potatoes released too much moisture. To fix this, pat potatoes dry with paper towels before adding them to the pot. If the filling still seems thin after baking, simmer uncovered for 5-10 extra minutes to evaporate excess liquid. For a thicker consistency, mash 1-2 potatoes before mixing into the filling to absorb moisture. 🔥
Crust Not Golden
A pale crust often means the egg wash wasn’t applied evenly or the oven wasn’t hot enough. Brush the crust generously with egg wash, focusing on the edges where it meets the filling. For extra color, bake at 400°F for the last 10 minutes of baking time. I also recommend rotating the pie halfway through baking to ensure even browning. ✨
Filling Leaks
Leaking filling usually means the crust wasn’t sealed properly. Press the edges firmly together and use a fork or pie crimper to create a tight seal. For extra reinforcement, chill the pie for 15 minutes before baking—this helps the crust hold its shape. If you’re worried about leaks, pre-bake the crust for 10 minutes before adding filling to create a stronger barrier. 💡
Nutrition facts
Frequently asked questions
Can I use ground beef instead of chuck roast?
You can substitute 1 lb ground beef for the chuck roast, but the texture will be different. Ground beef cooks much faster (about 10-15 minutes) and won't develop the same tender, melt-in-your-mouth quality. If using ground beef, brown it thoroughly first, then proceed with the recipe as written. For best results, add 1 extra tablespoon tomato paste to compensate for the lack of deep flavor development.
How do I make this pie ahead of time?
This pie actually tastes better the next day! Assemble the pie completely (including the crust), then refrigerate uncovered for 12-24 hours before baking. The filling will develop deeper flavors. For longer storage, freeze the unbaked pie (covered tightly) for up to 3 months. Thaw overnight in the fridge before baking, adding 5-10 extra minutes to the baking time.
What vegetables can I swap in?
The classic combo works best, but you can substitute with swede (rutabaga) or turnips for potatoes, and celery root or parsnips for carrots. For extra richness, add ½ cup frozen peas to the filling—they'll release moisture and thicken the sauce naturally. Just reduce the potatoes by ½ lb if adding extra veggies to maintain balance.
Why does my crust keep shrinking?
This happens when the dough isn't chilled enough before rolling or the oven isn't hot enough. Always chill the rolled crust on a baking sheet for 20-30 minutes before transferring to the pie dish. Preheat your oven to 375°F for at least 15 minutes before baking. For extra stability, sprinkle 1 tbsp cornmeal on the bottom crust before adding filling to absorb moisture.
Can I make this pie gluten-free?
Yes! Use a gluten-free pie crust (like Bob's Red Mill or King Arthur brands) and ensure all-purpose flour is substituted with gluten-free flour blend for thickening. The recipe will work the same way, but you may need to add 1 extra tablespoon of gluten-free flour since these blends absorb liquid differently. Test the filling consistency carefully—it should be slightly thicker than usual to prevent leaks.