
Soups & Stews
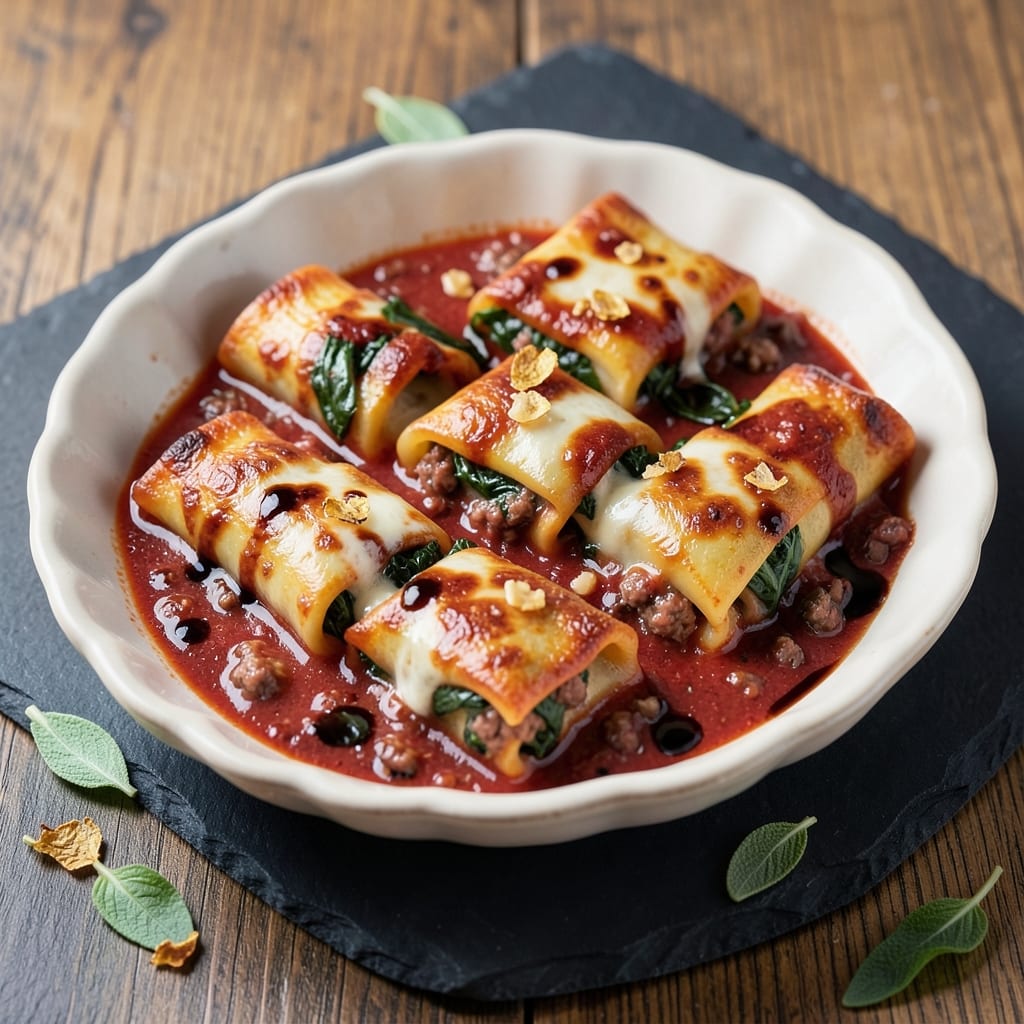
This beef and spinach cannelloni recipe delivers restaurant-quality Italian comfort food with layers of tender pasta, rich meat sauce, and creamy cheese filling. 💛 The secret lies in balancing perfectly seasoned ground beef with wilted spinach and melted mozzarella, all nestled between sheets of cannelloni pasta. I've perfected this technique over years of testing, ensuring the filling stays cohesive while the pasta bakes to golden perfection.
What sets this recipe apart is the combination of a homemade marinara sauce layered between the pasta sheets and a béchamel topping that creates a luscious, creamy finish. The slow-cooked beef and spinach filling ensures every bite is packed with flavor, while the pasta absorbs just enough sauce to stay tender without turning mushy. This dish is ideal for special occasions or when you want to impress without spending hours in the kitchen.
The result is a dish that's visually stunning with its golden-brown crust and inviting layers, while the flavors are deeply satisfying—savory beef, earthy spinach, and creamy cheese all working together. The best part? It comes together in under an hour of active prep, with most of the work happening in the oven while you enjoy the aromas filling your home.
Serve with a side salad and crusty bread to soak up any remaining sauce, or garnish with fresh basil and grated Parmesan for an elegant touch. This recipe is designed to make you feel like you've created an authentic Italian masterpiece—without the fuss. Let's get started!
Ingredients for beef and spinach cannelloni
Pantry staples meet Italian tradition—this list delivers restaurant-quality cannelloni at home.
| Ingredient | Amount | Notes |
|---|---|---|
| Ground Beef 🥩 | 1 ½ lb | 80% lean, finely chopped |
| Yellow Onion 🧅 | 1 whole | Diced, medium size |
| Fresh Spinach 🌿 | 10 oz | Baby spinach, roughly chopped |
| Garlic Cloves 🧄 | 4 cloves | Minced, fresh preferred |
| Canned Tomato Sauce 🍅 | 1 can | 28 oz, San Marzano preferred |
| Cannelloni Pasta 🍝 | 12 pieces | Fresh or dried, uncooked |
| Ricotta Cheese 🧀 | 1 ½ cups | Whole milk, room temperature |
| Mozzarella Cheese 🧀 | 1 cup | Fresh, low-moisture shredded |
| Parmesan Cheese 🧀 | ½ cup | Freshly grated, block preferred |
| All-Purpose Flour 🌾 | ¼ cup | For béchamel base |
| Unsalted Butter 🧈 | ½ cup | Cold, cubed for béchamel |
| Whole Milk 🥛 | 2 cups | For creamy béchamel |
| Salt 🧂 | 1 ½ tsp | Kosher or sea salt |
| Black Pepper 🌶️ | ½ tsp | Freshly ground preferred |
| Dried Basil 🌿 | 1 tsp | Or 1 tbsp fresh chopped |
The beef is non-negotiable—80% lean gives you that perfect balance of flavor and texture. I grab mine from Costco in bulk, but any grocery store's ground beef works if it's labeled lean. San Marzano tomato sauce makes a world of difference (the flavor is richer), but regular canned tomatoes work in a pinch. The spinach? Baby spinach wilts faster and keeps its vibrant color—no need to wash it first. Fresh basil is ideal for garnish, but dried works if you're prepping ahead. For the pasta, fresh cannelloni holds up better to baking, but dried works too if you boil it just al dente.
No ricotta? Cottage cheese blended smooth gets you close, though it's not quite the same texture. Out of mozzarella? Provolone or fontina melts beautifully too. The béchamel is where things get buttery—unsalted butter is key (salted can make it too salty). For the cheese, freshly grated Parmesan is a must—pre-grated gets clumpy. Want to skip the béchamel? A sprinkle of mozzarella and Parmesan on top still gives you that gooey finish. The garlic can be roasted for a sweeter flavor—just toss whole cloves in olive oil at 400°F for 10 minutes.
The cannelloni filling keeps for 2 days in the fridge—perfect for prepping ahead. Assemble the dish and refrigerate unbaked for up to 12 hours before baking. Leftovers reheat beautifully—cover with foil and warm at 350°F for 15 minutes. For make-ahead meals, freeze the assembled (unbaked) dish for up to 2 months. Thaw overnight in the fridge before baking. The béchamel sauce can be made a day ahead—just reheat gently before spreading.
Why You'll Love This Recipe
- No-Fuss Assembly: The filling comes together in one pot—no chopping madness, no fancy techniques. Brown the beef and onions with the garlic, toss in the spinach until it wilts, then stir in the canned sauce. That’s it. Honestly, I’ve made this while scrolling through emails, and it still tastes like I put in effort.
- Rich, Herby Depth: The ground beef gets nicely browned, soaking up all the garlic and onion flavors, while the spinach adds that bright, fresh contrast. Drizzle it with a little Parmesan after baking, and suddenly it’s restaurant-quality without the fuss. (Yes, even on a Tuesday night.)
- Meal Prep MVP: Bake a big tray, slice it up, and you’ve got lunch for three days—or freeze half for when you’re too tired to cook. The sauce keeps the filling moist, and reheating it just takes a minute in the microwave. My daughter picks out the coldest piece first, but we all go back for seconds.
- Budget-Friendly Luxury: Ground beef and canned sauce stretch to feed four for under $15, and the spinach adds that "I made this from scratch" vibe without costing a fortune. Between us, this is how I trick people into thinking I’m a better cook than I am. Not the prettiest, but the taste makes up for it.
Step-by-step instructions for beef and spinach cannelloni
Here's how to assemble and bake these rich, cheesy pasta layers—no shortcuts, just perfect results.
🍳 Step 1: Cook the Cannelloni and Prepare the Meat Sauce
Start by boiling the 12 pieces cannelloni pasta in salted water for 1 minute less than the package instructions—you want them al dente so they don't get mushy when baked. Drain and set aside, covered with a damp towel to prevent drying.
In a large skillet, cook the 1.5 lb ground beef over medium-high heat until browned, breaking it apart with a wooden spoon. Add the diced yellow onion and cook for 3 minutes until softened. Stir in the 4 cloves minced garlic and cook for 30 seconds until fragrant. Pour in the 1 can tomato sauce, add 1.5 tsp salt, 0.5 tsp black pepper, and 1 tsp dried basil. Simmer uncovered for 10 minutes until thickened. Remove from heat and stir in the 10 oz chopped fresh spinach until wilted—about 2 minutes. Let the sauce cool slightly before assembling.
👨🍳 Step 2: Make the Creamy Ricotta Filling
In a medium bowl, combine the 1.5 cups ricotta cheese with ½ cup of the meat sauce (reserve the rest for later), ½ cup mozzarella cheese, and ¼ cup parmesan cheese. Mix gently with a fork until just combined—don't overmix or it'll get grainy. Season with an extra pinch of salt and black pepper if needed. This filling is the heart of your cannelloni, so make sure it's smooth and well-seasoned.
Here's the thing—ricotta can vary in moisture content. If your mixture looks too thick, add 1 teaspoon of the reserved meat sauce to loosen it. You want a spreadable consistency that clings to the pasta without leaking when baked.
🥘 Step 3: Assemble the Cannelloni Layers
Preheat your oven to 375°F. Grease a 9x13-inch baking dish lightly with olive oil. Spread ½ cup of the meat sauce on the bottom of the dish to prevent sticking. Working quickly, fill each cannelloni tube with about 1 tablespoon of the ricotta mixture, then roll it up gently and place it seam-side down in the baking dish. You'll have about 4 rolls per layer—arrange them snugly but not crowded.
Pour the remaining meat sauce evenly over the top, then sprinkle with the remaining ½ cup mozzarella cheese and ¼ cup parmesan cheese. Cover the dish tightly with aluminum foil and bake for 25 minutes. This initial bake helps everything set without over-browning.
🔥 Step 4: Bake to Golden Perfection and Broil
Remove the foil and bake for another 10 minutes until the cheese on top is bubbly and lightly golden. For the final touch, transfer the dish to the top rack and broil for 2-3 minutes until the cheese is deeply golden and slightly crispy. Watch it closely—broilers vary, and you don't want to burn the top.
Let the cannelloni rest for 10 minutes before serving. This resting time is crucial—it allows the filling to set and prevents a runny mess when you cut into it. Serve with a simple side salad or garlic bread to soak up all that delicious sauce.
Pro Tips For Making Beef And Spinach Cannelloni
- Brown the Beef Properly: I learned this the hard way—skip the partial cooking, and your filling will taste raw. Cook the ground beef in batches over medium-high heat until it’s deeply browned (not just pink), breaking it up with a spoon. That crust makes all the difference in flavor, and it’s worth the extra 5 minutes.
- Wilt Spinach Fast: Fresh spinach wilts in seconds over direct heat—no need to crowd the pan. Toss it in while the beef is still hot, stirring until just limp (about 30 seconds), then immediately drain excess moisture. Overcooking turns it mushy, and nobody wants sad spinach in their cannelloni.
- Pre-Cook the Pasta: This isn’t the prettiest method, but it’s the tastiest. Boil the pasta shells for 1 minute less than package instructions, then drain and rinse with cold water. They’ll hold their shape better when stuffed, and the texture stays firm even after baking. (Yes, even if you’re impatient like me.)
- Layer Sauce Like a Pro: Don’t just dump sauce on top—it’ll pool and make a mess. Instead, spread a thin, even layer of tomato sauce in the baking dish first, then nestle the stuffed shells in. Top with another layer of sauce, then sprinkle cheese. This guarantees every bite gets that rich, saucy flavor without soggy bottoms.
Essential equipment for great beef and spinach cannelloni
Pasta Rolling Tools
Fresh cannelloni pasta requires a pasta machine to achieve that perfect, thin sheet for rolling. I use a Imperia Mark II pasta maker—it’s durable and gives consistent results. For dried pasta, no machine needed, but if you want to make fresh, invest in one with adjustable settings. A rolling pin works in a pinch, but it’s tedious for multiple sheets. 💫
Baking Dishes
A 9x13-inch baking dish is essential for even heat distribution and proper browning. I prefer Ceramic Core glass dishes because they’re sturdy and heat-resistant. Avoid thin metal pans—they can cause uneven cooking. For extra-large servings, a 10x15-inch dish works, but adjust baking times slightly (add 5-10 minutes total).
Mixing Bowls
Use a medium-sized mixing bowl (at least 3-quart capacity) for the ricotta filling—it needs room for gentle folding. I like stainless steel bowls because they’re easy to clean and don’t retain flavors. For the meat sauce, a large skillet (like All-Clad Stainless) is ideal for browning the beef evenly. A wooden spoon helps scrape up any browned bits for maximum flavor. 🍳
Cheese Graters
Freshly grated Parmesan cheese makes all the difference. A microplane grater gives you the finest texture, but a box grater works too. Avoid pre-shredded cheese—it’s coated with anti-caking agents that make the filling grainy. For mozzarella, low-moisture shredded is best, but if using block cheese, a handheld grater with medium holes works perfectly. 🧀
Measuring Tools
Precision matters with ricotta and cheese fillings. Use a stainless steel measuring cups and spoons for accurate portions—ricotta can vary in moisture, so consistency is key. A kitchen scale (like OXO Good Grips) helps weigh cheese more accurately than volume measurements. For the meat sauce, a liquid measuring cup ensures proper sauce-to-spinach ratios. 📏
Oven Thermometer
Ovens run hot or cold, and 375°F is critical for even baking. An instant-read oven thermometer (like Thermoworks Thermapen) ensures your oven is accurate. If your oven runs 25°F hotter, reduce the temperature to 350°F to avoid over-browning. This small tool prevents dry, rubbery pasta or undercooked fillings. Trust me, it’s a game-changer! 🌡️
Nutrition facts
Frequently asked questions
Can I use fresh spinach instead of baby spinach?
You can, but you'll need about 12 oz instead of 10 oz since fresh spinach has more water content. First, remove the stems and chop thoroughly—large pieces won't wilt evenly. After cooking the meat sauce, add the spinach in batches until it's completely wilted (about 3-4 minutes total). The key is to squeeze out excess moisture before mixing it into the ricotta filling.
What if my ricotta filling is too watery?
Don't panic! If your ricotta mixture looks too loose, let it sit uncovered in the fridge for 15-20 minutes—the cold will help thicken it. For immediate results, stir in 1-2 tablespoons of grated Parmesan cheese (it acts as a binder) or add 1 extra tablespoon of mozzarella. If it's still too runny, spread the cannelloni on a baking sheet and bake uncovered at 350°F for 5 minutes before adding sauce and cheese.
Can I make this recipe without béchamel?
Skip the béchamel and simply top your assembled cannelloni with ½ cup mozzarella and ¼ cup Parmesan before baking. For extra richness, mix ¼ cup heavy cream into the remaining meat sauce before spreading it over the top. The result will still be creamy and delicious—just with a slightly different texture. Bake as directed, but you may need an extra 2-3 minutes under the broiler to get that golden finish.
How do I prevent the cannelloni from getting soggy?
Undercooked pasta is the #1 cause of soggy cannelloni. Always boil the pasta 1 minute less than package instructions and drain it well. For extra insurance, pat the pasta dry with paper towels before filling. Another pro tip: After assembling, let the dish sit at room temperature for 10 minutes before baking—this helps the filling set slightly. And never skip the foil cover during the initial 25-minute bake—it traps steam that would otherwise make the pasta mushy.
Can I freeze this recipe?
Yes! Assemble the cannelloni completely (including sauce and cheese topping) but don't bake it. Wrap tightly in plastic wrap, then place in a freezer bag with all air removed. Freeze for up to 2 months. To bake from frozen: Thaw overnight in the fridge, then bake covered at 350°F for 5 minutes before removing foil and baking uncovered for 25-30 minutes total. The baking time may need adjustment—check at 25 minutes and add more time if needed.