
Soups & Stews
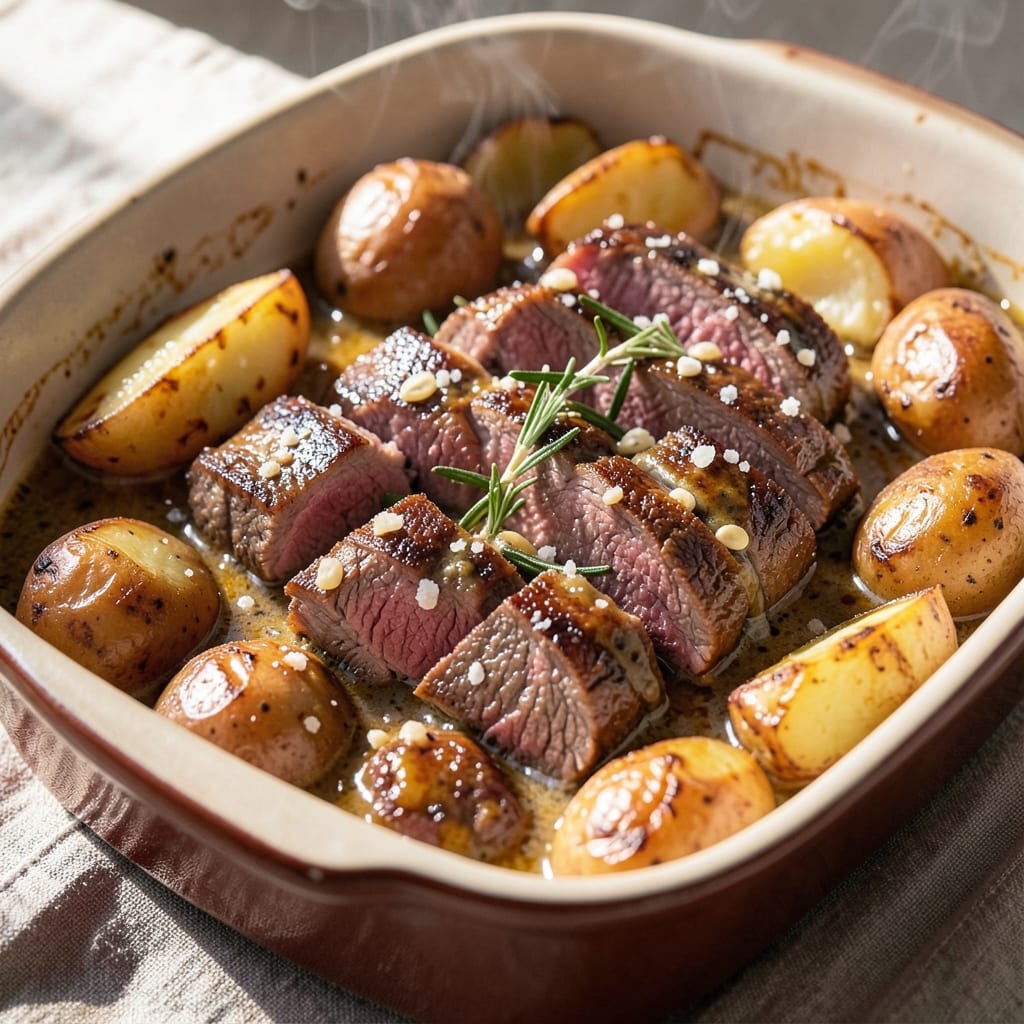
This beef and potato bake recipe delivers the ultimate comfort food experience—where tender beef and fluffy potatoes bake under a golden, crispy cheese layer. 🔥 The magic happens when savory beef and creamy mashed potatoes meet perfectly seasoned layers, creating a dish that's hearty, satisfying, and impossible to resist. It's the kind of meal that transforms a simple weeknight into a cozy, restaurant-worthy dinner.
The secret to success lies in the layers: tender beef simmered in rich gravy, creamy mashed potatoes infused with garlic and herbs, and a final topping of melted cheese that crisps beautifully in the oven. This method ensures every bite is packed with flavor and texture—juicy beef, velvety potatoes, and a crispy, cheesy crust that adds the perfect finishing touch.
What makes this recipe truly special is its versatility. Serve it as a standalone main dish for a hearty family dinner or pair it with a simple green salad and crusty bread to round out the meal. The combination of beef, potatoes, and cheese creates a dish that's both comforting and impressive, making it perfect for gatherings or when you want to treat yourself to something truly indulgent.
With just a few simple ingredients and a little patience, you'll achieve a dish that's foolproof and always delivers. The result is a comforting, layered masterpiece that's sure to become a staple in your recipe rotation. Let's get started on creating this comforting classic that's as delicious as it is satisfying.
Ingredients for beef and potato bake
Six layers of comfort: beef, potatoes, cheese, and crispy magic all in one dish.
| Ingredient | Amount | Notes |
|---|---|---|
| Beef Chuck Roast 🥩 | 2 lb | Cut into 1-inch cubes |
| Russet Potatoes 🥔 | 4 lb | Yukon gold or red potatoes work too |
| All-Purpose Flour 🌾 | 2 tbsp | For gravy thickening |
| Beef Broth 💧 | 2 cups | Low-sodium preferred |
| Heavy Cream 🥛 | 1 cup | Full-fat for creaminess |
| Garlic Cloves 🧄 | 4 cloves | Minced for flavor |
| Yellow Onion 🧅 | 1 whole | Diced, medium size |
| Fresh Rosemary 🌿 | ¼ cup | Chopped, stems removed |
| Salt 🧂 | 1 ½ tsp | Kosher or sea salt |
| Black Pepper 🌶️ | 1 tsp | Freshly ground preferred |
| Shredded Cheddar Cheese 🧀 | 2 cups | Sharp cheddar for best melt |
| Butter 🧈 | ½ cup | Unsalted, melted |
| Panko Breadcrumbs 🍞 | ½ cup | For extra crispy topping |
| Fresh Parsley 🌿 | ¼ cup | Chopped, for garnish |
The beef is the star here—chuck roast gives you that melt-in-your-mouth texture. Grab it from the butcher counter or pre-cubed section at Costco for convenience. Look for good marbling to keep it juicy. Potatoes should be firm and unblemished—the russet variety holds up best to baking, but Yukon golds add creaminess. Fresh rosemary and parsley elevate this from basic to restaurant-worthy (trust me, it’s worth the extra 50 cents at Whole Foods if you’re splurging).
No beef broth? Chicken broth with a splash of Worcestershire works in a pinch. Swap heavy cream for half-and-half if you’re watching fat, but trust me on the full-fat version. Cheese snobs will argue for Gruyère or fontina, but sharp cheddar melts beautifully and won’t break the bank. The breadcrumbs? Panko is non-negotiable—it stays crispy while regular breadcrumbs turn soggy. For extra flavor, toast the panko in butter before adding it to the top layer.
This reheats like a dream—just pop it in the oven at 375°F for 15-20 minutes until bubbly. Keeps for 4-5 days in the fridge, but honestly, it disappears faster than that. For meal prep, assemble the dish but skip the cheese topping—add it fresh before baking. The leftovers? Even better the next day as the flavors meld together. Double the recipe—it’s that good.
Why You'll Love This Recipe
- One-Pot Magic: I swear by this recipe when I’m too tired to wash a million dishes. The beef chuck roast and potatoes go straight from pan to table—no extra bowls, no fuss. Just slice, layer, and bake. Honestly, I’ve made this on nights when I’d rather be watching Netflix than standing at the sink.
- Rich, Deep Flavor: That beef broth and heavy cream combo? It’s where this dish gets its soul. The potatoes soak up all the savory, herby goodness while the beef stays tender and juicy—like a hug in a casserole. Between us, the first bite always makes me pause mid-spoonful.
- Weeknight Workhorse: This feeds my family of four and leaves leftovers that taste just as good reheated. I’ll pack it for lunches or freeze portions for those “I don’t know what to eat” days. (Yes, even on a Tuesday night.) It’s the kind of meal that works for casual dinners or when unexpected company shows up.
- Budget-Friendly Feast: Beef chuck roast stretches farther than you’d think, and russet potatoes are always affordable. The flour slurry thickens the sauce without breaking the bank, and the heavy cream adds richness without requiring fancy ingredients. My wallet and my taste buds thank me every time.
Step-by-step instructions for beef and potato bake
This method delivers that perfect combo: golden, crispy breadcrumb topping and a rich, creamy cheese layer.
🍳 Step 1: Sear the Beef for Deep Flavor
Heat a large skillet over medium-high heat and add 2 tablespoons olive oil. Working in batches, sear the 2 lb beef chuck roast cut into 1-inch cubes until golden brown on all sides—about 3-4 minutes per batch. You'll see those beautiful caramelized edges that pack serious flavor.
As you sear, sprinkle with 1 teaspoon salt and ½ teaspoon black pepper—just enough to season while we'll add more later. Transfer the seared beef to a plate and set aside. Here's the thing—this quick sear creates a flavor base that'll infuse the entire bake. Don't skip it, even if it adds a few minutes.
👨🍳 Step 2: Prep the Potatoes for Perfect Texture
Peel and slice the 4 lb russet potatoes into ½-inch thick rounds. Toss them immediately in a large bowl with ½ teaspoon salt, ¼ teaspoon black pepper, and 2 tablespoons olive oil until evenly coated. The potatoes should look glistening but not soggy—this ensures crispy edges while keeping them tender inside.
Spread the seasoned potatoes in a single layer on two rimmed baking sheets. Roast at 425°F for 20 minutes, flipping halfway through. You're pre-cooking them slightly so they finish perfectly tender in the oven later. They should be just starting to soften at the edges when done—this is the perfect prep stage.
🥘 Step 3: Build the Cheesy Beef Layer
In a large Dutch oven, melt ½ cup butter over medium heat. Add the diced yellow onion and cook for 5 minutes until softened. Stir in the minced garlic cloves and ¼ cup chopped fresh rosemary, cooking for another 30 seconds until fragrant—this builds the aromatic base for your sauce.
Sprinkle the 2 tablespoons all-purpose flour over the onion mixture and stir vigorously for 1-2 minutes until it forms a smooth paste. Slowly whisk in the 2 cups beef broth and bring to a gentle simmer. Let it thicken for 3-4 minutes until it coats the back of a spoon—this will be your rich gravy foundation.
🔥 Step 4: Assemble the Bake for Maximum Flavor
Preheat your oven to 375°F. In the Dutch oven, combine the seared beef with the onion-gravy mixture. Stir in the 1 cup heavy cream, remaining ½ teaspoon salt, and ½ teaspoon black pepper. Arrange the pre-roasted potatoes on top, slightly overlapping them in concentric circles.
Sprinkle the 2 cups shredded cheddar cheese evenly over the potatoes, then top with the ½ cup panko breadcrumbs. The cheese will melt into a creamy blanket while the breadcrumbs create that coveted crispy crust. Bake uncovered for 45-50 minutes until the top is deep golden brown and the potatoes are fork-tender.
🍽️ Step 5: Rest and Garnish for Showstopping Results
Remove from the oven and let the bake rest for 10 minutes before serving. This resting time lets the cheese fully set and the juices redistribute—trust me, it makes all the difference. The internal temperature should reach 165°F in the beef center, and the potatoes should be tender with crisp edges.
Garnish with the ¼ cup chopped fresh parsley just before serving. The contrast of crispy breadcrumbs, creamy cheese, and tender potatoes with rich beef makes every bite magical. Serve with a simple green salad to cut through the richness—this dish deserves a proper accompaniment!
Pro Tips For Making Beef And Potato Bake
- SEAR THE ROAST FIRST: That flour-dusted beef chuck won’t caramelize properly if you just toss it in the oven. Hit it with a screaming-hot pan for 3-4 minutes per side until deep brown—yes, it’ll look like overkill, but that crust is what holds the sauce together later. I learned this the hard way when my first batch tasted like boiled beef instead of a proper bake.
- PARBOIL POTATOES UNTIL FIRM: Russets need a head start—boil them whole for 8-10 minutes until a knife slips in easily but they’re not falling apart. Cold potatoes steam in their own moisture later, turning soggy. Drain well and rough up the skins with your hands; rough edges = more surface area for the sauce to cling to.
- DON’T SKIP THE REST: That roast is done when it hits 145°F internally, but pull it out 5 minutes early. Tent it with foil and let it sit—juices redistribute while you reduce the sauce. I used to cut into it too soon, and the first slice was always dry. (Your future self will thank you.)
- THICKEN WITH FLOUR LAST: Stir the flour into the beef broth after it’s simmered with the roast, not at the start. That way, the natural beef juices and fond from searing get incorporated first—resulting in a richer sauce. Add the heavy cream at the very end, or it’ll curdle from the heat. (I know, I know—it’s tempting to rush, but trust the process.)
Common mistakes when making great beef and potato bake
Skipping the Sear
Here's the thing—I've seen so many cooks rush this step and end up with bland beef. That quick sear in the skillet creates the Maillard reaction, which builds deep, caramelized flavor that infuses the entire bake. If you skip it, your dish will taste more like stew than the rich, layered masterpiece we're going for. Take those extra 5-10 minutes—your taste buds will thank you. 🔥
Uneven Potato Cooking
The biggest texture fail I see is when potatoes end up either mushy or still raw. The trick is pre-roasting them at 425°F for 20 minutes before assembling the bake. This ensures they finish perfectly tender without turning to glue. And for the love of comfort food, don't skip the flipping halfway through—those edges need to get crispy to hold their shape.
Overmixing the Gravy
When you add flour to the beef broth, it's tempting to stir like crazy, but that creates lumps. Instead, whisk vigorously for just 1-2 minutes until you get a smooth paste before adding the liquid. Overworking it turns your rich gravy into a gluey mess. And whatever you do, don't let it boil—just a gentle simmer until it thickens properly. The goal is velvety, not gummy.
Cheese Distribution Issues
Uneven cheese means uneven melting—some spots will be gooey while others stay cold. Sprinkle that 2 cups shredded cheddar evenly over the potatoes in the very last step before adding breadcrumbs. Press it down gently with a spatula to ensure full contact with the potatoes. And pro tip: use sharp cheddar—it melts better than mild varieties. The last thing you want is a cheesy desert on top of your potatoes.
Baking Time Guesses
Every oven behaves differently, so don't rely on just the 45-50 minutes time. The top should be deep golden brown with a crispy crust, while the potatoes should be fork-tender. If you're unsure, check at 40 minutes—if the breadcrumbs aren't golden, give it another 5-10 minutes. The internal temperature of the beef should reach 165°F. Underbaking leaves you with raw beef, and overbaking turns everything dry.
Skipping the Rest
This is where so many people rush and regret it. That 10-minute rest after baking lets the cheese fully set and the juices redistribute throughout the dish. Cutting into it too soon means cheese runs everywhere and the potatoes stay separate. It's tempting to dig in immediately, but trust me—waiting makes all the difference in texture and presentation. The dish will actually taste more cohesive after resting. ✨
Nutrition facts
Frequently asked questions
Can I use ground beef instead of cubed chuck roast?
You can try it, but the texture will be different. Ground beef lacks the tender, melt-in-your-mouth quality of cubed chuck roast. If you must substitute, use 80/20 lean-to-fat ratio and form it into small patties before browning. The key is to keep the pieces large enough to hold their shape during baking. For best results, stick with cubed beef for that classic comfort food experience.
What's the best way to make this dish ahead of time?
Assemble everything except the cheese topping up to 24 hours ahead and refrigerate uncovered. When ready to bake, add the cheese and breadcrumbs, then bake at 375°F for 30-35 minutes (covered with foil for the first 20 minutes to prevent over-browning). The cheese will melt beautifully even when starting from cold. This method works perfectly for meal prep!
How do I prevent the breadcrumb topping from getting soggy?
Use panko breadcrumbs (not regular breadcrumbs) and toast them lightly in butter before adding to the top. Also, make sure your cheese layer is fully melted and bubbly before the breadcrumbs get too brown. For extra insurance, sprinkle a pinch of salt on the breadcrumbs before baking—this helps them crisp up faster. The secret is timing: aim for 45-50 minutes total bake time.
Can I make this dish without heavy cream?
Yes! Substitute with ½ cup sour cream plus ½ cup milk for a lighter version, or use 1 cup whole milk for a less rich but still creamy texture. The dish will still be delicious, though the sauce won't be quite as velvety. For maximum flavor, consider using ½ cup evaporated milk—it adds richness without the same fat content as heavy cream.
What's the best way to reheat leftovers?
Cover loosely with foil and reheat at 350°F for 20-25 minutes until bubbly and heated through. For extra crispiness, broil for 2-3 minutes at the end. Microwaving works in a pinch (just 1-2 minutes covered), but it won't give you that perfect crispy topping. The dish actually tastes better reheated—flavors meld together beautifully!