
Soups & Stews
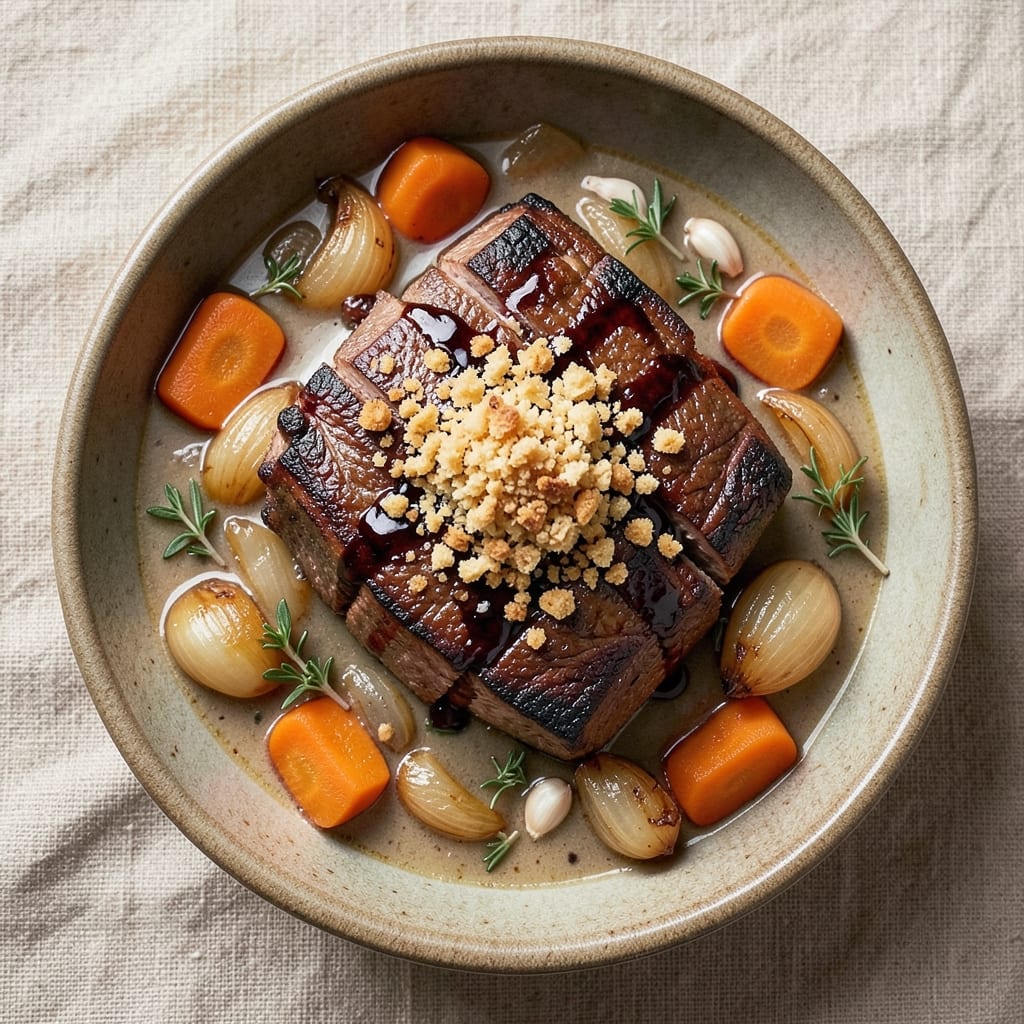
This beef and onion stew recipe transforms tough cuts into melt-in-your-mouth tenderness through slow simmering, creating a rich, aromatic dish that tastes like home. The secret lies in proper browning of the beef and onions—this step develops deep, caramelized flavors that form the foundation of every satisfying bite. What starts as simple ingredients becomes a hearty, comforting meal perfect for chilly evenings or family gatherings.
Professional techniques like searing the beef and deglazing the pan ensure maximum flavor extraction, while the slow simmer allows the onions to soften and meld with the beef into a velvety, savory broth. This method delivers restaurant-quality results without requiring advanced skills—just patience and attention to basic steps. The stew improves with time, making it ideal for meal prep or last-minute dinners when you need something substantial.
By the time you serve this stew, you'll have tender beef chunks swimming in a rich, onion-infused sauce that clings to every bite. The aroma alone will draw everyone to the table, while the perfect balance of sweetness from caramelized onions and savory beef creates a dish that's both comforting and impressive. Serve with crusty bread to soak up every last drop of that flavorful broth.
For an extra touch, garnish with fresh parsley or a sprinkle of grated parmesan just before serving—these small details elevate the presentation without complicating the process. This beef and onion stew proves that simple ingredients, when prepared with care, can create a truly memorable meal. Let's get started on making yours.
Ingredients for beef and onion stew
Transform tough beef into melt-in-your-mouth perfection with these 14 essential ingredients.
| Ingredient | Amount | Notes |
|---|---|---|
| Chuck Roast 🥩 | 2 lb | Well-marbled for tenderness |
| Yellow Onions 🧅 | 3 whole | Sliced into even rounds |
| Carrots 🥕 | 4 whole | Medium size, peeled |
| Garlic Cloves 🧄 | 4 cloves | Minced for depth of flavor |
| Beef Broth 💧 | 4 cups | Low-sodium preferred |
| Red Wine 🍷 | 1 cup | Bold dry variety |
| Tomato Paste 🍅 | 2 tbsp | Smooth for consistency |
| All-Purpose Flour 🌾 | 2 tbsp | For thickening sauce |
| Thyme 🌿 | 1 tbsp | Fresh or dried |
| Bay Leaves 🍃 | 2 whole | For aromatic depth |
| Salt 🧂 | 1 ½ tsp | Kosher or sea salt |
| Black Pepper 🌶️ | 1 tsp | Freshly ground |
| Olive Oil 🫒 | 2 tbsp | For searing beef |
| Fresh Parsley 🌿 | ¼ cup | Chopped for garnish |
The chuck roast is the star—look for good marbling at the butcher counter, which ensures tenderness. Costco or Whole Foods often carry pre-cut chuck roast, saving you time. Onions should be firm and yellow, not sprouting or soft. Carrots can be baby carrots if you prefer convenience, but whole carrots develop deeper flavor. For the wine, any bold, dry red works—Cabernet Sauvignon or Merlot are classic choices. If you prefer not to use alcohol, beef broth with a splash of balsamic vinegar mimics the depth perfectly.
No red wine? Substitute beef broth with 1 tbsp balsamic vinegar for similar richness. Fresh thyme is ideal, but dried thyme at one-third the amount works in a pinch. The tomato paste can be from a tube or can—just make sure it's smooth, not chunky. For a gluten-free version, replace the flour with cornstarch or arrowroot powder. If you're short on time, pre-chopped onions and carrots from the frozen section save steps without sacrificing flavor. The beef broth should be low-sodium to control seasoning.
This stew tastes even better the next day as flavors meld. Store in an airtight container in the fridge for up to 5 days or freeze for 3 months. Portion into individual containers for easy reheating. The parsley garnish adds freshness—chop it just before serving to preserve its vibrant color. For a restaurant-style presentation, serve with a sprinkle of grated Parmesan cheese on top. The crusty bread mentioned in the intro pairs perfectly for soaking up every last drop of that rich, savory broth.
Why You'll Love This Recipe
- Foolproof Simplicity: I swear by this—just sear the chuck roast, toss in chopped onions and carrots, then let the slow cooker do the work. No fancy techniques, no stress, and honestly, I’ve made it while answering emails.
- Deep, Rich Flavor: That slow-cooked chuck roast? It melts in your mouth, while the onions caramelize into sweet, jammy perfection. The garlic and beef broth build layers of warmth that make every bite feel like a hug.
- Weeknight Workhorse: Between us, this is my go-to when I’m feeding the family after soccer practice. It reheats beautifully, stretches over rice or crusty bread, and even my picky teenager asks for seconds—(yes, even on a Tuesday night).
- Budget Magic: A single chuck roast feeds six, and the ingredients cost less than takeout. I’ll be real: it’s not the prettiest, but the taste makes up for it, and the leftovers? Pure satisfaction for lunch the next day.
Step-by-step instructions for beef and onion stew
This method delivers deep, rich flavors through slow simmering and proper layering of ingredients.
Sear the Chuck Roast for Maximum Flavor
Pat the 2 lb chuck roast dry with paper towels to remove all moisture—this ensures a proper sear. Heat 2 tablespoons olive oil in a large Dutch oven over medium-high heat until shimmering.
Place the chuck roast in the pot and sear on all sides for 4-5 minutes per side until deeply browned. The goal is to develop a rich crust that will infuse the stew with deep flavor. I press down gently on the roast during the first minute to prevent curling, which ensures even contact with the pan.
Remove the roast and set it aside on a plate. The browned bits left in the pot will form the base of your stew's flavor foundation—don't scrape them out. Reduce heat to medium and add the 3 whole yellow onions (sliced into even rounds) and 4 whole carrots (peeled and cut into ½-inch thick slices). Cook for 5 minutes, stirring occasionally, until the onions soften slightly and begin to caramelize.
Build the Flavor Base with Aromatics
Add 4 cloves minced garlic, 1 tablespoon thyme, 2 whole bay leaves, 1.5 teaspoons salt, and 1 teaspoon black pepper to the pot. Stir for 30 seconds until fragrant—this releases the essential oils that will permeate the stew.
Next, stir in 2 tablespoons tomato paste and cook for 1 minute to deepen the flavor. Here's the thing—this step prevents the stew from becoming too acidic later. Pour in the 1 cup red wine and scrape up any browned bits from the bottom of the pot. Let it simmer for 2 minutes until the liquid reduces by about half, intensifying the flavors.
Sprinkle 2 tablespoons all-purpose flour over the mixture and stir for 1 minute to distribute evenly. This creates a light roux that will help thicken the stew naturally as it cooks. The flour should be fully incorporated before adding the remaining ingredients.
Simmer the Stew to Perfection
Return the seared chuck roast to the pot. Pour in 4 cups beef broth until the roast is completely submerged. Bring to a gentle simmer over medium-low heat, then reduce to the lowest setting that maintains a barely perceptible bubble—this is crucial for tender meat. Cover and simmer for 2 hours, checking occasionally to ensure the liquid doesn't evaporate completely.
After 2 hours, use tongs to turn the roast over. The meat should be fork-tender but still have some resistance. If it's not quite there, continue cooking for another 30-60 minutes. The roast is done when it easily pulls apart with a fork but still holds its shape. Real talk: Your oven might run hot, so start checking at the 2-hour mark if you're unsure.
Finish and Garnish
Once the meat is tender, remove the roast and let it rest on a cutting board for 10 minutes. Skim any excess fat from the surface of the stew (but leave about ¼ inch for flavor). Return the roast to the pot and simmer for another 10 minutes to allow the meat to absorb the remaining liquid.
Slice the chuck roast against the grain into ¼-inch thick slices and return it to the pot. Stir in the 0.25 cup chopped fresh parsley just before serving. The parsley adds a bright contrast to the rich, deep flavors of the stew and makes it look beautiful when plated.
Serve immediately with crusty bread or over mashed potatoes. The stew should have a thick, velvety consistency with tender beef that falls apart easily. Each bite should deliver layers of caramelized onions, tender carrots, and deep, savory beef flavors—this is the hallmark of a well-made beef and onion stew.
Pro Tips For Making Beef And Onion Stew
- SEAR THE ROAST FIRST: Chuck roast needs a deep, dark crust to stay tender—don’t skip the 8-10 minutes of high-heat searing in oil. I learned this the hard way when my stew turned out mushy because I rushed the browning. Let it get really dark in spots before pulling it out.
- CHOP ONIONS UNEVENLY: Big, irregular chunks of onion caramelize better and stay intact longer than uniform slices. My grandmother swore by this, and she was right: the edges get sweet and jammy while the centers stay tender. No food processor here—use a sharp knife.
- DON’T BOIL THE BROTH: Simmer the stew at a gentle bubble, not a rolling boil, or the broth will turn cloudy and the meat will toughen. After burning three batches, I finally figured out that low and slow is the only way—cover the pot and let it hum, not roar.
- ADD CARROTS LATE: Tossing carrots in at the start turns them to mush. Wait until the meat’s halfway cooked (about 1.5 hours in), then add them with the garlic. They’ll soften just enough to be tender without disappearing—no one wants a stew with ghost veggies.
Essential equipment for perfect results
Dutch Oven Essentials
A 5-7 quart Dutch oven is the workhorse of this recipe—it conducts heat evenly and retains moisture perfectly during the long simmer. I swear by the Lodge 5.5 Quart Dutch Oven for its durable cast iron that develops a natural non-stick patina over time. For non-stick convenience, the Calphalon Nonstick Dutch Oven works well too, though it requires more gentle handling. 🔥
Precision Thermometer
Monitoring internal temperatures ensures perfect doneness without overcooking. A meat thermometer like the Thermoworks Smoke or Instant Read Thermometer lets you check the beef's core temperature without opening the lid, which can disrupt cooking. Aim for 195-203°F—this range guarantees tender, fork-tender beef without drying it out.
Heavy-Bottomed Pot
If you don’t have a Dutch oven, a heavy-bottomed stainless steel pot (like the All-Clad D5) works in a pinch. It distributes heat evenly and prevents hot spots that can burn the onions or caramelize unevenly. Just be patient—these pots take slightly longer to heat up than cast iron.
Wooden Spoon & Tongs
Use a wooden spoon for stirring during the simmering phase—it won’t scratch your Dutch oven like metal utensils. A pair of heat-resistant silicone or metal tongs makes flipping the roast and adjusting onions effortlessly. I keep OXO Good Grips in my kitchen for their sturdy, non-slip handles.
Colander & Fine Mesh Strainer
A stainless steel colander comes in handy for rinsing fresh parsley or draining excess liquid if you need to adjust the stew’s consistency. For straining broth or skimming fat, a fine mesh strainer (like the OXO Good Grips) ensures smooth results without losing flavor. These tools are small but make a big difference in presentation.
Optional: Slow Cooker
For hands-off cooking, a 6-quart slow cooker (like the Hamilton Beach) lets you brown the beef in a skillet first, then transfer everything to cook on Low for 8 hours or High for 5 hours. Just skip the Dutch oven’s tight lid—cover with a vented lid to prevent pressure buildup. This method is ideal for busy weeknights! ⏰
Nutrition facts
Frequently asked questions
Can I use a different cut of beef instead of chuck roast?
For similar tenderness, try stew beef or chuck shoulder. If you have brisket, it works but may need 30-60 extra minutes of cooking. Avoid lean cuts like sirloin—they'll turn tough. For extra flavor, marinate the beef in soy sauce or Worcestershire for 30 minutes before cooking.
How can I make this stew in a pressure cooker?
Sear the beef first in a skillet, then transfer everything to your pressure cooker. Cook on High Pressure for 45 minutes (no need to add extra liquid). Let the pressure release naturally for 10 minutes before opening. The beef will be tender but slightly firmer than stovetop—perfect for sandwiches!
Why did my stew turn out too thin?
This usually happens from one of three things: not enough time to thicken, too much liquid added, or not using enough flour. For next time, simmer uncovered for 10-15 minutes at the end to reduce the sauce. If it's still too thin, mix 1 tbsp cornstarch with 2 tbsp cold water and stir in. The flour should be cooked thoroughly—don't skip that 1-minute stir after adding it!
Can I prepare this stew ahead of time?
This stew tastes even better reheated! Store in an airtight container in the fridge for up to 5 days or freeze for 3 months. Reheat gently on the stove over low heat with a splash of beef broth to restore moisture. The flavors deepen overnight, making it perfect for meal prep. Just add fresh parsley when serving to brighten the dish.
What's the best way to serve this stew?
Classic pairings include crusty bread (for soaking up the sauce), mashed potatoes (to balance the richness), or egg noodles (for a heartier meal). For extra presentation, garnish with grated Parmesan or fresh parsley**. Serve with a simple green salad to cut through the richness. The stew reheats beautifully, so it's perfect for potlucks!