
Main Courses
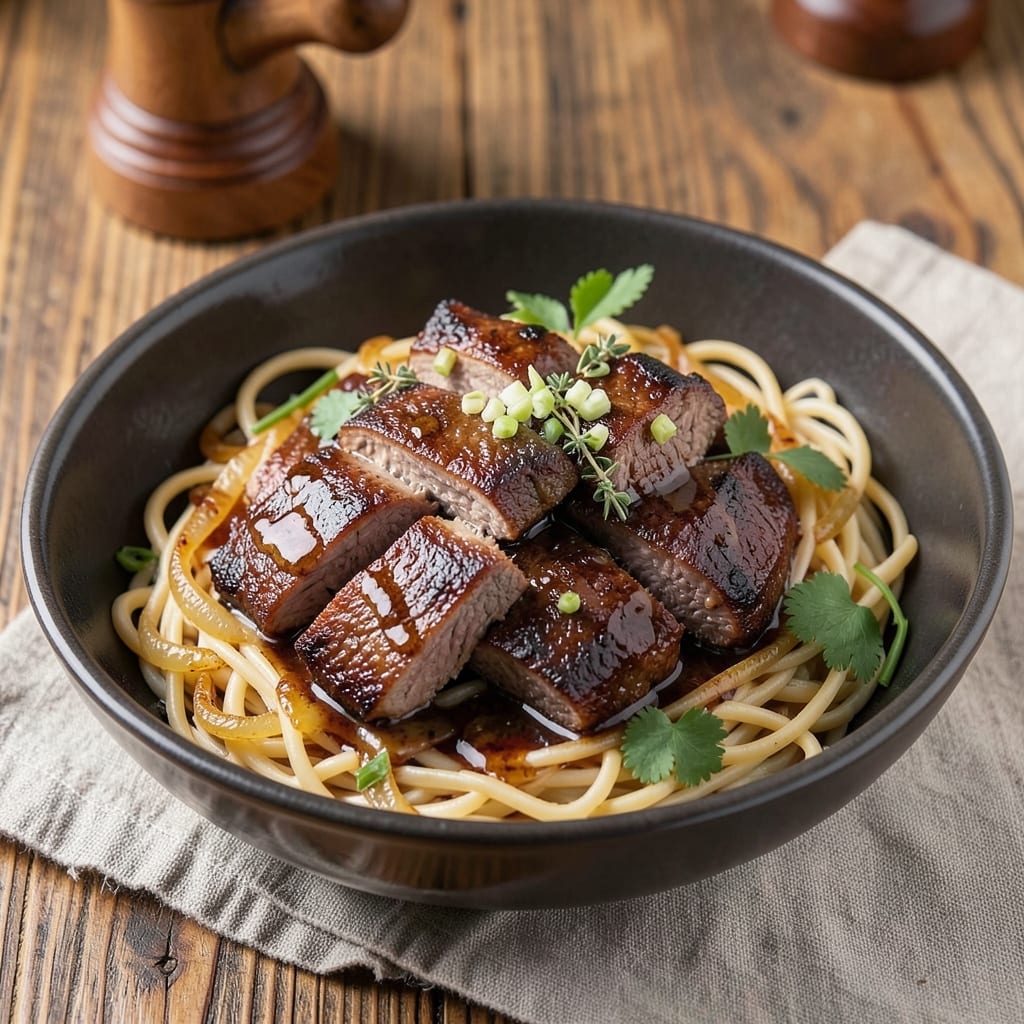
This beef and chuck roast noodles recipe transforms tough cuts into melt-in-your-mouth tenderness through slow braising, creating a deeply flavorful broth that clings to every strand of noodle. The key lies in patience—allowing the chuck roast to break down over hours, developing layers of umami that elevate simple ingredients into something extraordinary. What starts as a humble pot of ingredients becomes a restaurant-worthy bowl of comfort, where each bite delivers rich, savory depth.
The secret to this dish is the braising process, where the chuck roast simmers in a blend of soy sauce, aromatics, and a touch of sweetness until it falls apart effortlessly. Meanwhile, the noodles cook just until al dente, ensuring they hold their shape while absorbing the velvety broth. This method isn’t just about flavor—it’s about texture, too, with tender beef that practically dissolves on the tongue and noodles that offer the perfect bite.
By the time you plate this dish, you’ll have a bowl that’s equal parts hearty and elegant: golden-brown chuck roast shredded over chewy noodles, bathed in a glossy, umami-rich broth. The aroma alone—warm spices, caramelized onions, and deep meaty richness—will have everyone at the table anticipating the first bite. It’s the kind of meal that feels like a hug in food form, perfect for cozy nights or feeding a crowd.
Serve with a sprinkle of green onions or sesame seeds for freshness, and don’t forget the steamed rice on the side if you’re feeling extra generous. The beauty of this recipe is its versatility—it’s simple enough for a weeknight but impressive enough for guests. Let’s get started on creating this deeply satisfying dish.
Ingredients for beef and noodles recipe with chuck roast
Transform tough chuck roast into melt-in-your-mouth beef with these 15 essential ingredients.
| Ingredient | Amount | Notes |
|---|---|---|
| Chuck Roast 🥩 | 2 lb | Well-marbled for tenderness |
| Egg Noodles 🍜 | 12 oz | Fresh or dried, al dente preferred |
| Yellow Onion 🧅 | 1 whole | Large, thinly sliced |
| Garlic Cloves 🧄 | 4 cloves | Minced for aromatic depth |
| Fresh Ginger 🌿 | 1 tbsp | Finely grated, peeled |
| Soy Sauce 🍶 | ½ cup | High-quality, dark variety |
| Dry Sherry 🍷 | ¼ cup | Or substitute with beef broth |
| Brown Sugar 🍯 | 2 tbsp | Light or dark, dissolved |
| Vegetable Oil 🫒 | 2 tbsp | High smoke point for searing |
| Kosher Salt 🧂 | 1 ½ tsp | Diamond Crystal preferred |
| Ground Black Pepper 🌶️ | 1 tsp | Freshly ground for heat |
| Star Anise 🌟 | 2 whole | For aromatic complexity |
| Bay Leaves 🍃 | 2 whole | Fresh or dried |
| Green Onions 🧅 | ¼ cup | Sliced for garnish |
| Toasted Sesame Seeds 🌾 | 1 tbsp | For finishing touch |
The chuck roast is the star here—look for cuts with good marbling. Costco or Whole Foods usually carry high-quality chuck roast, but any reputable grocery store’s butcher section works. Avoid lean cuts, as they won’t break down as beautifully. For the noodles, fresh egg noodles from the refrigerated section hold up better to braising than dried, but dried works in a pinch if you’re short on time. The star anise and bay leaves are non-negotiable—they add layers of warmth that elevate the broth. If you can’t find star anise, a pinch of cinnamon or a dash of cloves can substitute, though the flavor will be subtly different.
No sherry? Beef broth with a splash of balsamic vinegar mimics the depth. Fresh ginger is ideal, but dried ginger at half the amount works if you’re in a hurry. The soy sauce should be dark soy sauce for richer color, but regular soy sauce will do. For the brown sugar, make sure it’s dissolved completely—this prevents graininess in the broth. The green onions and sesame seeds are purely for garnish, but they add a bright contrast to the rich, savory flavors. If you’re feeling adventurous, swap the sesame seeds for crushed peanuts for a Southeast Asian twist.
This dish tastes even better the next day, so plan ahead. Store leftovers in an airtight container in the fridge for up to 5 days, or freeze for 3 months. Reheat gently on the stove with a splash of water or broth to revive the texture. The braising liquid also makes an excellent base for quick stir-fries or rice bowls—just skim off any congealed fat and reheat. If you’re making this for a crowd, double the recipe—the extra effort is worth it for the second helpings.
Why You'll Love This Recipe
- Foolproof Slow Cooker: I swear by this method—just toss the chuck roast in with onions, garlic, and a splash of soy sauce, then walk away. The slow cooker does all the work while you handle actual life.
- Ginger-Garlic Magic: That fresh ginger and minced garlic? They turn this into something ridiculously flavorful—bright, savory, and just a little spicy. The noodles soak up every bit, making each bite taste like a hug.
- Leftovers That Don’t Suck: Between us, most beef and noodle leftovers are sad. Not this one. The chuck stays tender, the broth stays rich, and reheating it is basically instant takeout. Pack it for lunch or freeze it—no regrets.
- Budget Feeds Five: A single chuck roast stretches to feed my family of five (plus my dog, who judges me but still eats it). Egg noodles are cheap, onions are cheap, and you’re left with a meal that costs less than delivery but tastes better. Win.
Step-by-step instructions for beef and chuck roast noodles
Here's the method for creating a deeply flavorful dish with tender beef and al dente noodles.
Sear the Chuck Roast for Maximum Flavor
Pat the 2 lb chuck roast completely dry with paper towels. Heat 2 tablespoons vegetable oil in a large Dutch oven over medium-high heat until shimmering. Add the beef and sear on all sides for 6-8 minutes total, pressing down gently during the first minute to prevent curling. You're looking for deep golden-brown crusts—this develops the rich Maillard reaction that forms the base of your umami broth.
Remove the beef and set it aside. Don't wipe the Dutch oven clean—those browned bits are pure flavor. I like to let the pot rest for 2 minutes while I prep the aromatics, allowing the fond to develop further. This step is crucial; if you skip it, your final dish will lack depth.
Build the Aromatic Base
In the same Dutch oven, add 1 whole yellow onion sliced into ¼-inch strips and 4 cloves garlic cloves minced. Cook over medium heat for 5-6 minutes until the onions soften and turn golden. Add 1 tablespoon finely grated fresh ginger and cook for another 30 seconds until fragrant.
Stir in 2 whole star anise and 2 whole bay leaves, then pour in 0.5 cup soy sauce and 0.25 cup dry sherry. Let this mixture simmer for 3 minutes until the alcohol smell completely dissipates. This aromatic blend forms the foundation of your rich broth, so don't rush this step—proper caramelization creates complex flavors.
Braise the Beef Low and Slow
Return the seared beef to the Dutch oven. Add 2 tablespoons brown sugar (dissolved in ¼ cup hot water if needed), 1.5 teaspoons kosher salt, and 1 teaspoon ground black pepper. Pour in enough water to come ¾ of the way up the beef—about 3 cups total. Bring to a simmer over medium-high heat, then reduce to low heat, cover, and cook for 2.5 hours.
The key here is patience. You'll notice the beef will hit "the stall" around 165°F—this is normal. Continue cooking until the meat is fork-tender and the broth has reduced to a rich, syrupy consistency. The beef should pull apart easily with two forks, indicating perfect tenderness. If the liquid level gets too low, add ½ cup hot water to maintain the braise.
Cook the Noodles and Finish the Dish
While the beef braises, cook 12 oz egg noodles in salted boiling water according to package instructions until al dente (about 8-10 minutes). Reserve 1 cup pasta water before draining. In a separate bowl, toss the drained noodles with 1 tablespoon toasted sesame seeds and 2 tablespoons vegetable oil to prevent sticking.
Remove the beef from the broth and shred it into ¼-inch strips using two forks. Skim any excess fat from the surface of the broth, then return the beef to the pot. Add the cooked noodles and toss gently to combine. If the mixture is too thick, add ¼ cup reserved pasta water to loosen it. Simmer for 2-3 minutes until everything is heated through and coated in the rich sauce.
Garnish and Serve
Ladle the beef and noodles into serving bowls. Garnish each portion with ¼ cup green onions sliced into ¼-inch pieces. The vibrant green color provides a beautiful contrast to the deep brown beef and noodles, while the fresh onion adds a bright, crisp finish.
Serve immediately with extra soy sauce on the side if desired. Each bite should deliver tender beef, al dente noodles, and a complex broth that balances sweet, salty, and umami flavors. The dish tastes even better the next day as the flavors continue to meld—just reheat gently with a splash of water to restore moisture.
Pro Tips For Making Beef And Noodles Recipe With Chuck Roast
- SEAR THE ROAST FIRST: I used to skip this step and just toss the chuck into the pot—big mistake. A quick 3-4 minute sear in a hot pan with oil first adds depth. The crust locks in flavor when you later braise it, and the meat stays juicier. (Yes, even if you're impatient like me.)
- JULIENNE THE GINGER: Fresh ginger can be aggressive if you're not careful. Thinly slice it—about 1/8-inch thick—so it softens properly without turning to mush. If you're worried about bitterness, peel it first, but don’t overcook it. It should melt into the sauce, not fight for space.
- DON’T BOIL THE NOODLES: The noodles will finish cooking in the beef broth, so cook them just al dente—about 1 minute less than the package says. Tossing them straight into the hot broth later keeps them from turning mushy. (Your future self will thank you.)
- REST THE MEAT UNDER FOIL: After pulling the chuck from the pot, tent it with foil and let it sit for 5-10 minutes. This lets the juices redistribute instead of pooling on your plate. I learned this the hard way—dry, stringy beef is a crime, and this simple step fixes it.
Common mistakes when making this dish
Skipping the Sear
This is the most common mistake I see—skipping the sear entirely. That golden-brown crust isn’t just for looks; it’s packed with Maillard reaction compounds that create deep, savory flavor. Without it, your broth will taste flat and one-dimensional. Always take the 6-8 minutes to properly sear your 2 lb chuck roast on all sides before removing it. 🔥
Underestimating Braise Time
Chuck roast needs 2.5 hours of low-and-slow cooking to become fork-tender. I’ve seen people rush this step and end up with tough, stringy beef. Use a meat thermometer—the internal temperature should reach 203°F for perfect tenderness. If you’re in a hurry, consider using a pressure cooker (60 minutes on high pressure), but traditional braising builds more depth.
Adding Noodles Too Early
Cooking the noodles directly in the braising liquid might seem convenient, but it turns them mushy and waterlogged. Instead, cook them separately in salted boiling water until al dente (about 8-10 minutes), then toss them in at the very end. This ensures they maintain their texture while absorbing the rich beef broth. Reserve 1 cup pasta water—it’s your secret weapon for adjusting consistency.
Ignoring the Fond
After searing the beef, those browned bits stuck to the Dutch oven (fond) are flavor gold. Don’t wipe them out! They dissolve into the broth during braising, adding layers of depth. If you’re worried about burning, just let the pot rest for 2 minutes while you prep the aromatics—this helps develop the fond further without risking burning.
Overcrowding the Pot
If your Dutch oven is too small, the beef won’t have enough room to develop that perfect crust, and the braising liquid won’t circulate properly. Use a 5-6 quart Dutch oven for this recipe—it gives the beef space to move and the aromatics room to caramelize. If you’re short on space, consider searing the beef in batches or using a larger pot.
Skipping the Broth Reduction
The magic happens when the braising liquid reduces to a syrupy consistency. If you add too much water initially or don’t let it simmer long enough, your final dish will taste watery. Aim for a broth that coats the back of a spoon—this ensures maximum flavor in every bite. If the liquid gets too low, add ½ cup hot water in small increments to maintain the braise. ✨
Nutrition facts
Frequently asked questions
Can I substitute chuck roast with another beef cut?
Yes, but with adjustments. For similar tenderness, use chuck shoulder or short ribs (braise 3-4 hours). Lean cuts like sirloin won't work—they'll dry out. If using short ribs, remove them after 2 hours and shred, then return to the pot for the final 30 minutes to reabsorb flavors.
How do I make this dish gluten-free?
Replace egg noodles with rice noodles or gluten-free pasta. Check soy sauce labels—use tamari or coconut aminos instead of regular soy sauce. For extra umami, add 1 tablespoon gluten-free fish sauce to the braising liquid. All other ingredients are naturally gluten-free.
Can I prepare this recipe in a slow cooker?
Sear the beef first, then transfer everything (including aromatics) to the slow cooker. Cook on low for 8 hours or high for 5 hours. The noodles should be cooked separately and added just before serving to prevent mushiness. The slow cooker method actually enhances the beef's tenderness.
What's the best way to reheat leftovers?
Gently reheat in a pot over low heat with 2-3 tablespoons water or broth to restore moisture. Avoid microwaving—it makes the noodles rubbery. For best results, reheat just until hot (about 5-7 minutes) and serve immediately. Leftovers taste even better the next day!
How can I make this recipe spicier?
Add 1-2 teaspoons chili flakes or ½ teaspoon cayenne pepper to the braising liquid. For heat with depth, include 1-2 slices fresh red chili (remove before serving). Finish each bowl with ½ teaspoon sriracha or a sprinkle of crushed red pepper flakes. Adjust to taste—spices intensify as the dish sits.