
Main Courses
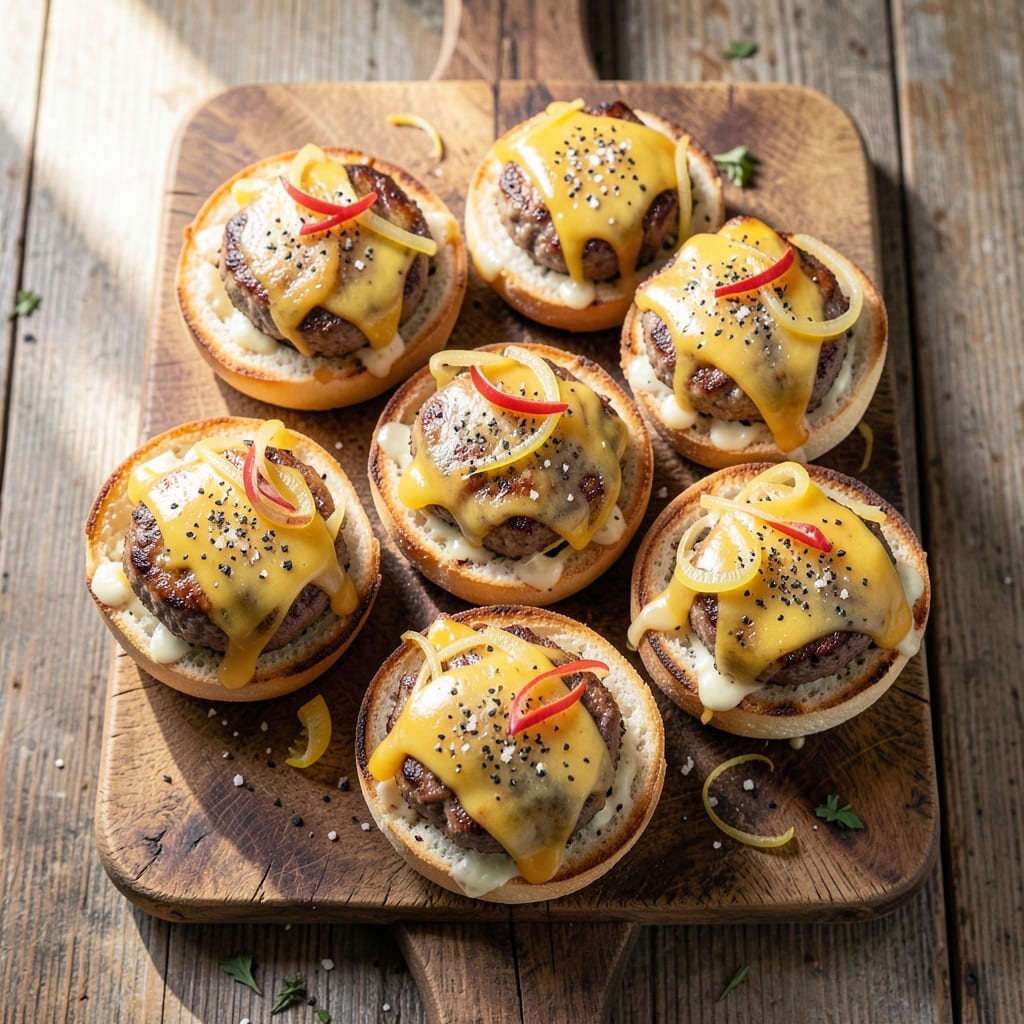
This beef and cheese sliders recipe delivers crispy mini burgers with perfectly melty layers that'll have everyone reaching for seconds. The secret lies in thinly sliced beef patties that cook quickly on the grill, creating a satisfying crunch while keeping the centers juicy. I've perfected this recipe for game day gatherings where you need handheld portions that don't compromise on flavor.
What makes these sliders special is the combination of tender beef, sharp cheddar that melts beautifully, and toasted slider buns that hold up to messy toppings. The recipe uses simple ingredients but delivers restaurant-quality results with minimal effort—ideal for feeding a crowd without spending hours in the kitchen. You'll need just 20 minutes of active prep time, with most of the work happening during cooking.
By the time you're done, you'll have golden-brown sliders with caramelized edges and gooey cheese oozing between each bite. The crispy exterior contrasts perfectly with the tender beef and soft bun, creating a texture combination that's impossible to resist. These sliders work equally well as a main course or appetizer, making them versatile for any occasion.
Serve with classic toppings like caramelized onions, pickles, and your favorite condiments, or keep it simple with just ketchup and mustard. Pair them with crispy sweet potato fries or a fresh garden salad for a complete meal. The leftovers reheat beautifully if you find yourself with seconds—or thirds.
Ingredients for beef and cheese sliders
Simple ingredients for game-day sliders with crispy edges and melty cheese layers everyone will love.
| Ingredient | Amount | Notes |
|---|---|---|
| Ground Beef (80/20) 🥩 | 2 lb | Thinly sliced for even cooking |
| Sharp Cheddar Cheese 🧀 | 1 ½ cups | Shredded, block preferred |
| Slider Buns 🍞 | 12 whole | Hawaiian rolls or potato buns |
| All-Purpose Flour 🌾 | ½ cup | For breading patties |
| Large Eggs 🥚 | 2 whole | Beaten for binding |
| Yellow Onion 🧅 | 1 whole | Thinly sliced for caramelizing |
| Garlic Cloves 🧄 | 4 cloves | Minced for seasoning |
| Kosher Salt 🧂 | 1 ½ tsp | For seasoning beef |
| Ground Black Pepper 🌶️ | 1 tsp | Freshly ground preferred |
| Worcestershire Sauce 🍶 | 1 tbsp | For umami depth |
| Vegetable Oil 🫒 | 2 tbsp | For cooking patties |
| Yellow Mustard 🟡 | ½ cup | For serving |
| Ketchup 🍅 | ½ cup | For serving |
| Dill Pickle Chips 🥒 | ½ cup | For topping |
The beef makes or breaks these sliders. 80/20 ground chuck gives you that perfect fat-to-lean ratio for juicy patties. I grab mine from Costco when I'm feeding a crowd, but any grocery store's pre-ground chuck works. Look for bright red meat with good marbling—it keeps the sliders tender. The cheddar? Sharp, block-style melts best (pre-shredded gets clumpy), and Kraft 2% Milk Sharp is my go-to. For the buns, Hawaiian rolls hold up better than potato buns when stacked with cheese, but either works. Toast them lightly before serving so they don't get soggy.
No sharp cheddar? Pepper jack or Monterey Jack melts well too. Short on Worcestershire? Soy sauce plus a pinch of sugar mimics the flavor. The onion can be swapped for caramelized onions from a jar (like Sweet Baby Ray's), but fresh is worth the 10 minutes of cooking time. The mustard and ketchup are just for serving—use whatever you've got, but French's Classic Yellow and Heinz are crowd-pleasers. For extra crunch, toast the pickle chips in a dry pan for 30 seconds before topping.
These sliders reheat beautifully—just 10 seconds in the microwave with a damp paper towel keeps them crispy. Store leftovers in an airtight container in the fridge for 3 days, or freeze for 2 months. I like to portion them into single-serving bags so they're ready for game day. The patties can be prepped ahead and refrigerated for 8 hours before cooking, which is perfect for feeding a crowd without last-minute stress.
Why You'll Love This Recipe
- One-Bowl Miracle: I swear by this recipe—just mix the ground beef, shredded cheddar, egg, and flour right in the pan. No bowls, no mess, and the cheese melts into the meat while you cook, making it ridiculously hands-off.
- Melty Magic: That sharp cheddar turns gooey in the center while staying crisp at the edges—like a tiny, perfect grilled cheese inside a slider. Honestly, the first time I bit into one, I nearly dropped the plate.
- Tailgate or Tuesday: These sliders work for game day crowds or a lazy night in. Double the batch, freeze half, and thaw for a quick meal later—no one will guess they were made ahead.
- Budget Win: Ground beef and cheddar stretch far, and slider buns cost pennies. I’ve fed six people for under $10, and everyone leaves happy (even my picky son, who usually turns his nose up at beef).
Step-by-step instructions for mini burgers with crispy bites and melty layers
Here's how to craft perfectly crispy beef sliders with gooey cheese and tender bites every time.
Prepare the Beef Mixture for Maximum Flavor
In a large bowl, combine the 2 lb ground beef (80/20) with 1.5 tsp kosher salt, 1 tsp ground black pepper, 1 tbsp Worcestershire sauce, and 4 minced garlic cloves. Use your hands to gently mix everything until just combined—don't overwork the meat or it'll get tough. The high fat content in 80/20 is key here; it keeps the patties juicy while creating that crispy exterior.
I like to add the 1 whole yellow onion, thinly sliced, to the beef mixture for extra moisture and sweetness. The onions will caramelize slightly when cooked, adding depth to each bite. Divide the mixture into 12 equal portions (about 2 ounces each) and flatten them into ¼-inch thick patties. Keep them on a plate in the fridge until ready to cook—this prevents them from spreading too much.
Create the Crispy Breading Station
In a shallow bowl, beat the 2 whole large eggs until fully combined. In another bowl, mix the 0.5 cup all-purpose flour with an extra pinch of salt and pepper. This simple breading creates that satisfying crunch you want in every bite. The secret to crispy sliders is in this step—don't skip it!
Working with one patty at a time, dip it into the beaten eggs, letting any excess drip off, then coat evenly in the flour mixture. Press the flour gently against the patty so it sticks well. Place the breaded patties on a wire rack set over a baking sheet to keep them from getting soggy. You'll want to work quickly here so the breading stays crisp.
Cook the Patties to Perfect Doneness
Heat 2 tbsp vegetable oil in a large skillet over medium-high heat until shimmering. Add the breaded patties in a single layer, leaving space between them—this prevents steaming and ensures crispy results. Cook for 3-4 minutes per side until the breading is golden brown and the edges are crispy. The patties should reach an internal temperature of 160°F when checked with a meat thermometer.
While the patties cook, shred the 1.5 cups sharp cheddar cheese using a box grater or food processor. The finer the shreds, the better they'll melt into creamy layers. Keep the cheese at room temperature so it melts smoothly when added later. If the patties start to brown too quickly, reduce the heat slightly to prevent burning the breading.
Assemble the Sliders with All the Fixings
Lightly toast the 12 whole slider buns in the same skillet for 30 seconds per side until golden. This adds an extra layer of crispiness to each bite. Spread ½ tablespoon of yellow mustard and ½ tablespoon of ketchup on the bottom half of each bun—this keeps the cheese from sliding out when you take a bite.
Place a cooked patty on the bottom bun, then sprinkle ¼ cup of the shredded sharp cheddar cheese on top. Add ½ tablespoon of dill pickle chips for that tangy crunch. Top with the bun halves and press gently to melt the cheese. The cheese should be gooey and stretchy when you cut into one—this is your signal that they're ready to serve!
Serve Immediately for Maximum Enjoyment
Let the sliders rest for 1-2 minutes before serving to allow the cheese to fully melt and the buns to soften slightly. The sliders should be crispy on the outside, juicy on the inside, and packed with melty cheese in every bite. Serve with any remaining mustard, ketchup, or extra pickle chips on the side for customization.
Here's the thing—these sliders are best enjoyed fresh out of the pan. The breading stays crispy, the cheese remains gooey, and the beef stays tender. If you need to hold them for a bit, keep them warm in a 200°F oven for up to 15 minutes, but don't let them sit too long or the breading will lose its crunch. Enjoy your perfectly balanced mini burgers with all the classic flavors!
Pro Tips For Making Beef And Cheese Sliders
- CRANK THE HEAT FIRST: Start your beef patties on high heat for 2 minutes flat—no matter how thick they are. I learned this the hard way after serving dry sliders; searing fast locks in juices before the cheese melts. After that, pull the heat to medium-low to finish cooking evenly.
- GRATE CHEESE FRESH: Skip the pre-shredded cheese—it’s coated with anti-caking agents that make it clump and fail to melt smoothly. Use a box grater or pulse in a food processor right before adding it to the patties. Sharp cheddar should melt into a gooey blanket, not a sad, greasy mess.
- DON’T OVERWORK THE MEAT: Mix the ground beef just until combined—no need to punch and fold like you’re making a meatloaf. Overworking it turns the texture dense, and those sliders will taste like a hockey puck. Keep your hands out of it after that first quick stir.
- TOAST BUNS LAST: Warm the slider buns in the oven at 350°F for 3-4 minutes while the patties cook, but toast them after assembling—just 30 seconds under a broiler. This keeps them soft inside with a crispy crust, and no one wants a soggy slider bun. (Yes, even if you’re impatient like me.)
Dietary considerations for this beef and cheese sliders
Gluten-Free Adaptations
For gluten-free sliders, replace the all-purpose flour breading with ½ cup gluten-free flour blend (like Bob's Red Mill 1:1) mixed with 2 tbsp cornstarch for extra crispiness. Use gluten-free slider buns—I recommend Udi's Gluten-Free Hawaiian Rolls—and ensure your Worcestershire sauce is certified gluten-free. The key is to keep the breading dry and press it firmly onto the patties. 🌾
Dairy-Free Cheese
Swap sharp cheddar for dairy-free shreds like Miyoko's Creamery Smoked Gouda or Violife Just Like Cheddar. These melt beautifully and provide that gooey texture without lactose. For extra richness, add 1 tbsp nutritional yeast to the beef mixture—it adds a cheesy flavor even without dairy. Always check labels for hidden dairy in toppings like mustard or pickle chips.
Low-Carb Options
Skip the buns entirely and serve the patties on lettuce wraps (romaine or butter lettuce leaves work best) or low-carb slider buns like Mission Carb Balance. Use 80/20 ground beef as written, but reduce the portion size to 1 ounce per patty to cut calories. Top with sugar-free mustard and sugar-free ketchup (like Heinz No Sugar Added) to keep carbs in check.
Allergen-Friendly Swaps
For egg-free sliders, replace the egg wash with ¼ cup unsweetened applesauce or aquafaba (chickpea brine) mixed with 1 tbsp dijon mustard for binding. If nut allergies are a concern, avoid pre-shredded cheese with anti-caking agents (often contain soy or dairy derivatives) and opt for freshly grated dairy-free cheese instead. Always double-check all ingredients for cross-contamination warnings.
Keto-Friendly Adjustments
Transform these sliders into a keto-friendly meal by using almond flour instead of regular flour for breading. Mix ½ cup almond flour with 1 tbsp psyllium husk powder to help bind the crumbs. Serve the patties on low-carb slider buns or over cauliflower rice for a heartier option. Skip the ketchup and mustard (even sugar-free versions often contain high-fructose corn syrup) and serve with sugar-free hot sauce instead.
Nutrition facts
Frequently asked questions
Can I make these sliders ahead of time?
You can prep the beef mixture and shape the patties up to 8 hours ahead, storing them in the fridge. For best results, bread and cook the patties fresh before assembling. The buns should be toasted just before serving to maintain crispiness. If making ahead, keep the cheese separate until ready to assemble.
What's the best way to keep the sliders warm?
Place finished sliders in a 200°F oven on a wire rack for up to 15 minutes to maintain crispiness. Avoid covering them with foil as this traps moisture. For larger gatherings, use a slow cooker set to 160°F with a wire rack inside to prevent sogginess.
Can I use ground turkey instead of beef?
Yes, but you'll need to adjust the cooking time. Use 93/7 ground turkey for juiciness and cook for 2-3 minutes per side at medium heat to reach 165°F internally. Add 1 tbsp olive oil to the turkey mixture to prevent dryness. The texture will be slightly leaner but still delicious.
How do I prevent the cheese from sliding out?
Spread condiments only on the bottom bun half and place the patty on top. Add cheese directly to the patty, then press the top bun on firmly. For extra security, lightly toast the top bun before placing it on. The mustard and ketchup act as glue when the cheese melts, keeping everything together.
What's the secret to extra crispy breading?
Pat the breaded patties dry between layers of paper towels before cooking to remove excess moisture. Use a nonstick skillet and maintain medium-high heat without overcrowding. Cook in batches if needed, and avoid flipping too early—wait until you see golden-brown edges forming.