
Soups & Stews
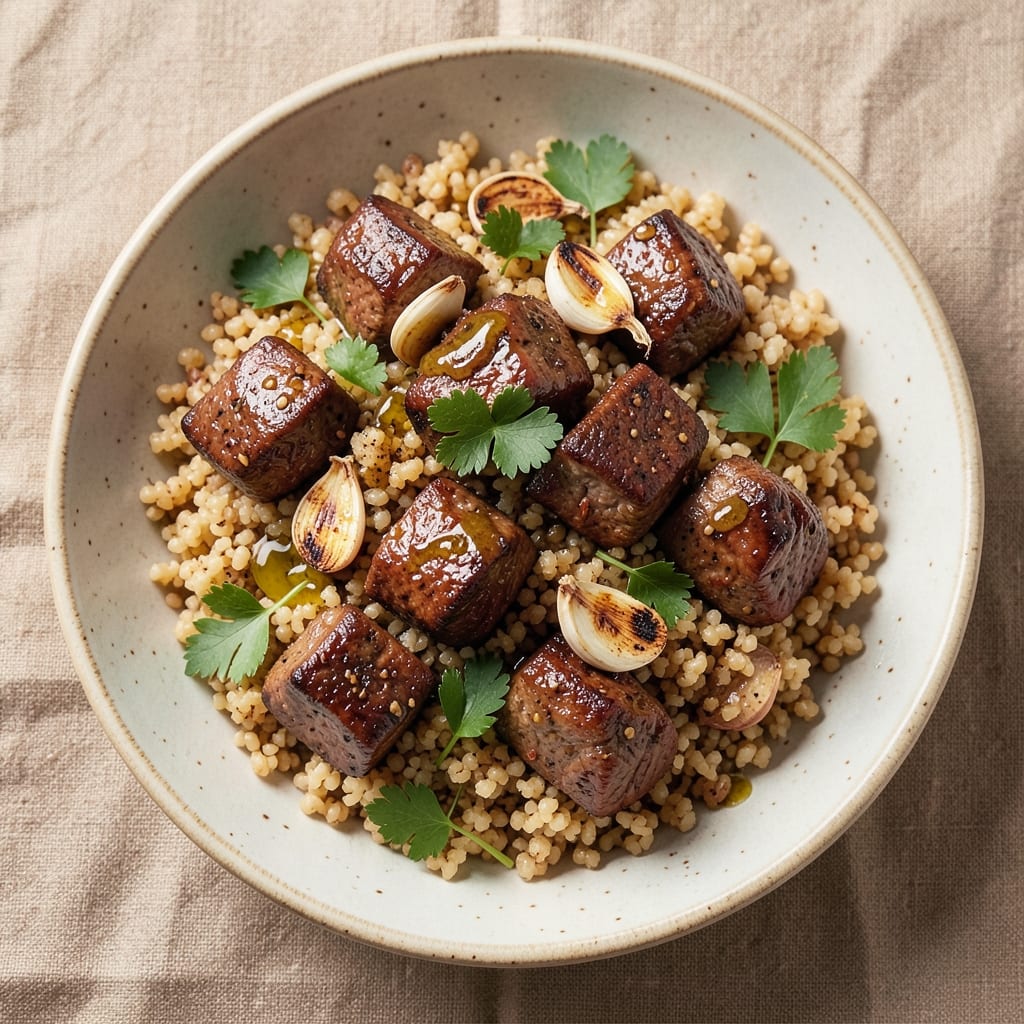
This beef and bulgur recipe delivers a hearty, Middle Eastern-inspired bowl where tender beef meets chewy bulgur in perfect harmony. The secret lies in slow-cooking the beef until fork-tender while toasting the bulgur to unlock its nutty depth—both techniques transform simple ingredients into a restaurant-quality dish. What sets this apart is the balance of textures: the beef's richness contrasts beautifully with bulgur's satisfying bite, all unified by warm spices and bright herbs.
The preparation begins with a simple yet flavorful marinade for the beef—garlic, cumin, and paprika create an aromatic crust that deepens during cooking. Meanwhile, the bulgur soaks just long enough to soften without losing its signature chewiness. Together, they form the foundation of a dish that's both comforting and sophisticated, requiring only basic techniques but delivering professional results. The key is patience: letting the beef develop flavor while the bulgur absorbs the cooking liquid creates a cohesive, deeply satisfying bowl.
When assembled, this dish presents as a vibrant, layered masterpiece—golden-brown beef slices resting atop fluffy bulgur, crowned with fresh herbs and a drizzle of tangy yogurt sauce. The combination of savory, nutty, and creamy elements makes it equally at home on a weeknight table or a special occasion spread. Each bite delivers a perfect balance of textures and flavors, proving that hearty, authentic dishes don't require complicated methods.
For those who want to elevate it further, consider adding a crisp Middle Eastern salad on the side or roasted vegetables for extra color and crunch. The dish scales effortlessly, making it ideal for meal prep or feeding a crowd. With its rich flavors and satisfying textures, this beef and bulgur bowl will quickly become a staple in your weekly rotation.
Ingredients for beef and bulgur
Simple yet transformative ingredients for a restaurant-quality Middle Eastern bowl.
| Ingredient | Amount | Notes |
|---|---|---|
| Beef Chuck Roast 🥩 | 1 ½ lb | Cut into 1-inch cubes, trimmed of fat |
| Fine Bulgur Wheat 🌾 | 1 cup | Rinsed thoroughly before toasting |
| Garlic Cloves 🧄 | 4 cloves | Minced finely for marinade |
| Ground Cumin 🌿 | 1 tbsp | Toasted for deeper aroma |
| Smoked Paprika 🌶️ | 1 tbsp | For smoky depth |
| Ground Coriander 🌿 | 1 tsp | Freshly ground preferred |
| Kosher Salt 🧂 | 1 ½ tsp | Diamond Crystal preferred |
| Black Peppercorns 🌶️ | ½ tsp | Freshly cracked |
| Extra-Virgin Olive Oil 🫒 | ¼ cup | For high heat searing |
| Vegetable Broth 💧 | 2 cups | Low-sodium preferred |
| Plain Greek Yogurt 🥛 | ½ cup | Full-fat for creaminess |
| Fresh Parsley 🌿 | ¼ cup | Chopped finely for garnish |
| Fresh Mint Leaves 🍃 | 0.1 cup | Torn for bright contrast |
| Lemon Juice 🍋 | 1 tbsp | Freshly squeezed |
The beef selection is critical—chuck roast delivers the ideal balance of tenderness and flavor when slow-cooked. Look for cuts with good marbling at specialty butchers or the meat department of Whole Foods for optimal quality. If using pre-cubed beef, pat the pieces dry before marinating to ensure proper browning. The bulgur should be fine-grained for a creamy texture; brands like Bulgur Pilaf from Middle Eastern markets excel here. Toasting the bulgur in olive oil before cooking unlocks its nutty potential—don't skip this step, as it transforms the final texture.
For the spices, Penzeys or bulk bins at natural markets offer the freshest ground cumin and coriander, but pre-ground spices work fine if stored properly. Need a substitution? Turmeric at half the amount adds color if you're missing coriander. The yogurt sauce benefits from a full-fat Greek yogurt—low-fat versions can make the sauce separate. Fresh herbs are ideal, but dried parsley at one-third the amount works in a pinch. The lemon juice should be freshly squeezed; bottled versions often contain preservatives that alter the flavor profile. For extra depth, consider adding a pinch of cinnamon to the bulgur during toasting.
Store the cooked beef and bulgur separately in airtight containers for up to 4 days in the refrigerator. The yogurt sauce keeps for 3 days but tastes best when made fresh. For meal prep, assemble the bowls just before serving to maintain the bulgur's texture. This dish reheats beautifully—simply warm the beef and bulgur separately with a splash of broth. The flavors actually deepen overnight, making this an excellent candidate for leftovers. Freeze portions for up to 3 months by storing components separately in freezer-safe containers.
Why You'll Love This Recipe
- One-Pot Wonder: I swear by this recipe when I’m too tired to deal with multiple dishes. The bulgur soaks up all the juices while the beef slow-cooks—just dump everything in one pot, walk away, and come back to perfectly tender meat and fluffy grains.
- Smoky Depth Magic: That smoked paprika and cumin? They turn this into something restaurant-worthy without trying. The garlic cloves roast right into the beef, giving every bite a warm, aromatic punch—like a cozy hug in a bowl.
- Lunchbox Hero: Between us, this is my go-to for meal prep. The bulgur holds up for days, and the beef stays juicy even reheated. Pack it in containers with a sprinkle of fresh parsley, and you’ve got a lunch that’ll make coworkers ask for the recipe.
- Budget Powerhouse: A beef chuck roast is cheaper than steak, and bulgur costs pennies compared to rice. Honestly, I make this twice a month just to stretch my grocery budget—plus, it feeds four for under $15. Leftovers? They’re even better the next day.
Step-by-step instructions for hearty Middle Eastern beef and bulgur bowl
This method delivers tender beef, perfectly chewy bulgur, and layers of aromatic spices that define Middle Eastern comfort food.
Prepare the Spiced Beef Cubes
Cut the 1.5 lb Beef Chuck Roast into 1-inch cubes, trimming any excess fat. In a small bowl, combine 1 tbsp ground cumin, 1 tbsp smoked paprika, 1 tsp ground coriander, 1.5 tsp kosher salt, and 0.5 tsp freshly cracked black peppercorns. Rub this mixture evenly over the beef cubes, pressing the spices into the meat so they adhere.
Heat 0.25 cup extra-virgin olive oil in a large skillet over medium-high heat until shimmering. Working in batches, sear the beef for 3-4 minutes per side until deeply browned but not fully cooked through. The beef should develop a rich crust while remaining slightly pink inside. Transfer the seared beef to a plate and set aside.
Toast the Bulgur and Build the Flavor Base
In the same skillet, reduce heat to medium and add the 4 minced garlic cloves, cooking for 30 seconds until fragrant but not browned. Immediately add the 1 cup rinsed fine bulgur wheat and toast for 2-3 minutes, stirring constantly, until the grains turn a light golden color and release a nutty aroma.
Pour in the 2 cups vegetable broth and bring to a gentle boil. Reduce heat to low, cover, and simmer for 15 minutes. The bulgur should absorb the liquid and become tender but still retain a slight bite. If it appears dry before the time is up, add 2-3 tablespoons of water to maintain moisture. Remove from heat and let sit covered for 5 minutes to steam fully.
Simmer the Beef to Perfect Tenderness
Return the seared beef to the skillet with the bulgur mixture. Increase heat to medium and bring to a simmer. Partially cover the skillet and cook for 20-25 minutes, stirring occasionally, until the beef is fork-tender and pulls apart easily. The sauce should thicken slightly as the beef releases its juices into the bulgur.
Here's the thing—don't rush this step. The beef needs time to break down and absorb the flavors. You'll know it's done when a knife slides in effortlessly and the meat fibers separate cleanly. If the mixture looks dry, add 2-3 tablespoons of water to maintain the right consistency.
Finish with Bright Herbs and Tangy Yogurt
Remove the skillet from heat and stir in the 0.5 cup plain Greek yogurt, 0.25 cup finely chopped fresh parsley, and 0.1 cup torn fresh mint leaves. The yogurt will create a creamy contrast to the hearty beef and bulgur, while the herbs add freshness. Add the 1 tbsp freshly squeezed lemon juice and mix well to brighten the flavors.
Taste and adjust seasoning with additional kosher salt or black pepper if needed. The dish should balance rich beef flavors with the bright acidity of lemon and the cooling creaminess of yogurt. Let the bowl sit for 5 minutes before serving to allow the flavors to meld completely.
Serve with Confidence
Divide the beef and bulgur mixture evenly among 4 bowls, ensuring each serving has a generous portion of both components. The bulgur should be chewy but not mushy, and the beef should be tender with a satisfying bite. Garnish each serving with an additional sprinkle of fresh parsley and mint leaves for visual appeal.
This dish delivers the perfect balance of textures and flavors—chewy bulgur, tender beef, and creamy yogurt with a bright herbal finish. Serve with warm pita bread or a simple cucumber salad to complete the meal. The leftovers keep well in the refrigerator for 3-4 days, making this a great make-ahead option.
Pro Tips For Making Beef And Bulgur
- SEAR THE ROAST FIRST: Walk away after that first sear—don’t poke or move the beef for 3 full minutes, even if it looks uneven. After burning three batches of chuck roast, I finally realized the crust forms when it’s left alone, and that’s where all the flavor hides. (Yes, even if you’re impatient like me.)
- TOAST THE BULGUR: Dry-toast the fine bulgur in a separate pan with a pinch of salt and smoked paprika for 2 minutes before adding liquid. I was skeptical until I tried it—it adds a nutty depth that plain bulgur just can’t match, and it absorbs the beef broth better.
- BLOOM THE SPICES: Heat the cumin and smoked paprika in the same pot you’ll cook the beef, stirring constantly for 30 seconds until fragrant. Skipping this step makes the spices taste like dust instead of flavor. (Your future self will notice.)
- SIMMER THE BULGUR LOW: Once the beef is done, reduce the heat to a bare simmer when adding bulgur and broth—no boiling. I used to rush it, and the bulgur would turn mushy instead of tender. Low and slow keeps it perfect every time.
Pro cooking tips for this recipe
Sear First, Simmer Slow
For the beef to develop that deep, restaurant-quality flavor, you must sear the cubes first. Heat your skillet to medium-high heat until it's smoking hot—this ensures a perfect crust that locks in juices. I use a 12-inch cast iron skillet from Lodge because it retains heat so well. Work in batches if needed, but don't overcrowd the pan or the beef will steam instead of sear. 🔥
Toast the Bulgur
Skipping the toasting step is a common mistake, but it's what gives bulgur its signature nutty flavor. After cooking the garlic, add the bulgur to the same skillet and toast for 2-3 minutes on medium heat, stirring constantly. You'll know it's ready when the grains turn golden and smell toasty. This step is non-negotiable—it's what transforms bulgur from bland to irresistible. 🌾
Low-and-Slow Beef
The secret to tender beef lies in patience. After searing, simmer the beef with the bulgur on low heat for 20-25 minutes. Use a meat thermometer to check doneness—aim for 195°F internal temperature for fall-apart tenderness. I like the Thermoworks Smoke model because it's accurate and easy to read. Stir occasionally to prevent sticking, but don't over-mix or the beef will turn mushy.
Yogurt Sauce Trick
Adding the yogurt sauce at the end keeps it creamy and prevents it from curdling in the heat. Stir it in just before serving so it stays cool and velvety. For extra brightness, I like to add a pinch of ground cardamom (about ¼ tsp) to the yogurt mixture—it adds a subtle floral note that complements the beef beautifully. Taste as you go and adjust seasonings with lemon juice or salt to balance the flavors.
Rest Before Serving
Let the beef and bulgur rest for 5 minutes after cooking. This allows the juices to redistribute, ensuring every bite is moist and flavorful. I know it's tempting to dig in immediately, but trust me—this small step makes a world of difference. While it rests, use that time to garnish your bowls with fresh herbs and a final drizzle of olive oil for that restaurant-fresh look. ✨
Make-Ahead Magic
This dish actually tastes better the next day! Store the cooked beef and bulgur separately in airtight containers in the fridge for up to 4 days. When reheating, warm them separately with a splash of broth to prevent drying out. The yogurt sauce is best made fresh, but you can prepare it a day ahead and store it in the fridge. Reheat gently before serving to maintain its creamy texture.
Nutrition facts
Frequently asked questions
Can I substitute bulgur with another grain?
Yes, but the texture will change. For a similar chewy bite, try couscous (use half the water) or quinoa (cook separately). If you prefer a heartier grain, farro works well but requires longer cooking. Avoid rice—it absorbs liquid differently and won't provide the same satisfying texture.
What's the best cut of beef for this recipe?
Chuck roast is ideal for its rich flavor and tenderness when slow-cooked. Other good options include stew beef or brisket, both of which develop deep flavor during long cooking. Avoid lean cuts like sirloin—they can dry out. Cut the beef into 1-inch cubes for even cooking.
How do I prevent the bulgur from becoming mushy?
Toast the bulgur in oil for 2-3 minutes before adding liquid—this step is crucial! Use just enough broth (2 cups) to cover the bulgur, then let it sit covered for 5 minutes after cooking. Avoid stirring too much, and never use boiling water—it breaks down the grains too quickly.
Can I make this dish ahead of time?
This recipe actually tastes better the next day. Store the cooked beef and bulgur separately in airtight containers for up to 4 days. Reheat gently with a splash of broth to maintain moisture. The yogurt sauce should be made fresh before serving to keep it creamy, but you can prep the ingredients a day ahead.
What are good sides to serve with this?
This hearty dish pairs beautifully with fresh, bright elements. Try a simple cucumber-tomato salad with lemon dressing, warm pita bread, or roasted eggplant and zucchini. For extra protein, add a side of garlicky white beans. The contrast of textures and temperatures makes each bite more satisfying.