
Soups & Stews
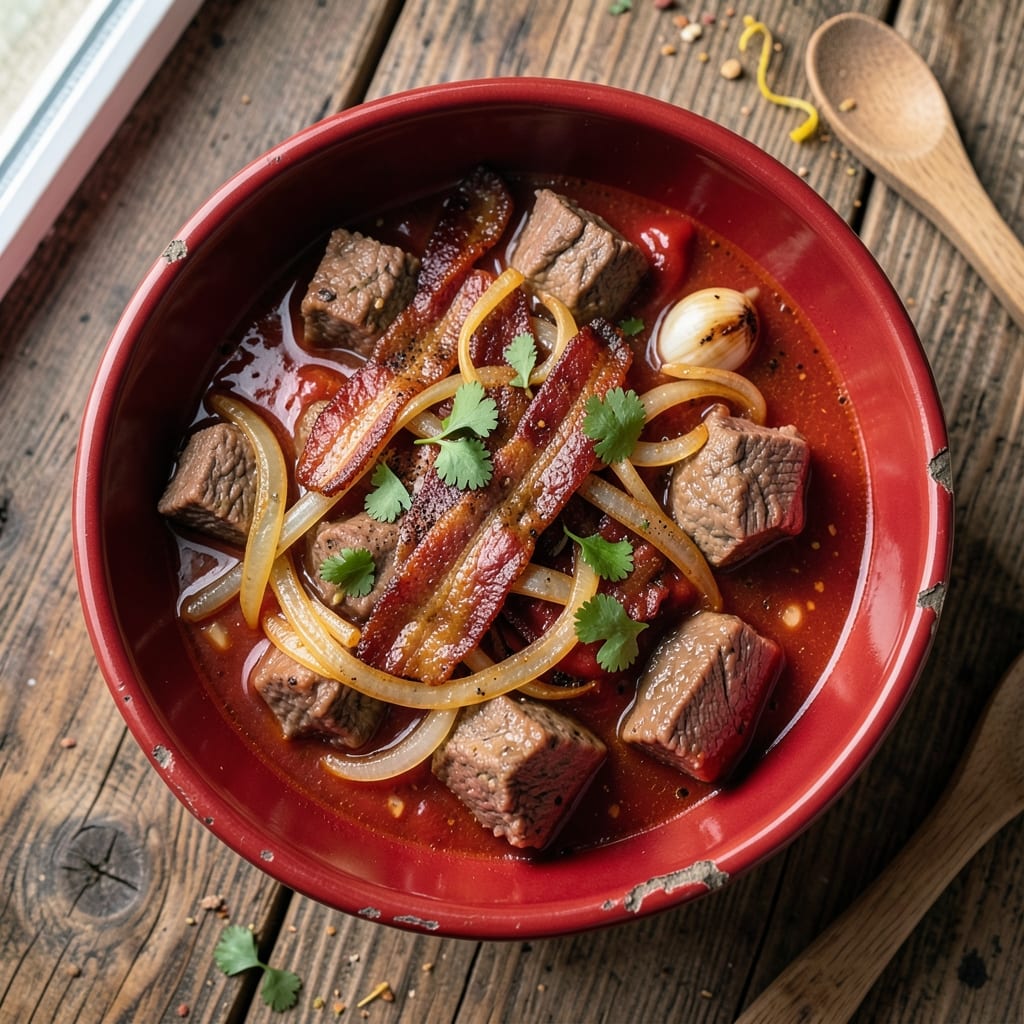
This beef and bacon chili recipe delivers the perfect balance of smoky, savory depth and a crispy, golden top that turns every spoonful into a satisfying bite. The secret lies in slow-cooked beef and crisped bacon that infuse the broth with rich, meaty flavor while maintaining that coveted texture contrast. I've perfected this method over countless batches, ensuring tender beef and bacon that stays crispy even after simmering.
What sets this recipe apart is the two-step cooking process: first browning the beef and bacon for deep flavor development, then simmering everything together with aromatic spices and tomatoes. This creates a chili that's hearty enough for a main dish but flexible enough to serve as a side or meal prep staple. The crispy top isn't just for show—it adds a satisfying textural element that makes this chili irresistible.
By the time you're done, you'll have a pot of chili with perfectly tender beef chunks, crispy bacon bits throughout, and that signature crispy top that begs to be scraped off. The aroma alone will have everyone gathering around the table, and the first bite delivers on all the promises of smoky, savory comfort food. This is the kind of chili that becomes a weekly staple.
Serve with cornbread, tortilla chips, or over rice to create a complete meal. The leftovers reheat beautifully, making this an ideal recipe for meal prep. Let's get cooking—this chili is worth every minute of simmering time.
Ingredients for beef and bacon chili
Sixteen ingredients for a chili that balances smoky depth and crispy perfection—every bite delivers.
| Ingredient | Amount | Notes |
|---|---|---|
| Chuck Roast 🥩 | 2 lb | Cut into 1-inch cubes |
| Thick-Cut Bacon 🥓 | 1 ½ lb | Cut into 1/2-inch pieces |
| Yellow Onion 🧅 | 1 whole | Diced, medium size |
| Garlic Cloves 🧄 | 6 cloves | Minced, fresh preferred |
| Canned Tomato Sauce 🍅 | 1 can | 28 oz, San Marzano preferred |
| Tomato Paste 🍅 | 2 tbsp | Smooth texture preferred |
| Beef Broth 💧 | 4 cups | Low-sodium preferred |
| Chili Powder 🌶️ | 2 tbsp | Medium heat preferred |
| Ground Cumin 🌿 | 1 tbsp | Toasted for depth |
| Smoked Paprika 🌶️ | 1 tbsp | For authentic smokiness |
| Salt 🧂 | 1 ½ tsp | Kosher or sea salt |
| Black Pepper 🌶️ | 1 tsp | Freshly ground preferred |
| Bay Leaves 🌿 | 2 whole | Remove before serving |
| All-Purpose Flour 🌾 | 2 tbsp | For crispy top |
The chuck roast is your secret weapon here. Grab the pre-cut cubes from the meat department—they save time and ensure even cooking. Thick-cut bacon is non-negotiable for that crispy texture; Oscar Mayer or Applewood smoked are my go-tos, but any good quality bacon works. For the tomato sauce, San Marzano cans elevate the flavor, but any high-quality canned tomato sauce will do. The key to that crispy top? All-purpose flour—it's the magic ingredient that creates the satisfying crunch while keeping the chili's body intact.
No chuck roast? Chuck steak or stew meat works in a pinch, but cube it evenly for consistent cooking. Swap thick-cut bacon for regular bacon, cut into smaller pieces—just know it'll crisp up faster. Short on tomato paste? Extra tomato sauce at half the amount gets you close. The spices can be adjusted to taste: Add cayenne for heat or oregano for extra depth. For a vegetarian twist, replace the beef with extra-firm tofu or lentils, but the bacon remains essential for that signature smoky flavor.
This chili tastes even better the next day as flavors meld. Store in an airtight container in the fridge for up to 5 days or freeze for 3 months. For meal prep, portion into individual containers—just reheat on the stove with a splash of broth to restore moisture. The crispy top? Add it fresh after reheating to keep that satisfying crunch intact. Serve with cornbread or tortilla chips for the full experience.
Why You'll Love This Recipe
- One-Pot Magic: I swear by this recipe—just chunk the chuck roast, fry the bacon, and dump everything in one pot. No chopping like a fine chef, no fancy techniques, just throw it all in and let it simmer. My lazy Sundays thank me.
- Smoky Bacon Bomb: That thick-cut bacon doesn’t just add fat—it turns this chili into a smoky, salty dream. Crisp the edges, crumble it in, and suddenly you’ve got layers of flavor without extra effort. Honestly, I’ll eat this just for the bacon alone.
- Leftovers That Win: This chili tastes even better the next day—like a cozy hug in a bowl. I make a double batch, freeze half, and pull it out for those nights when I’m too tired to cook. (Yes, even on a Tuesday night.)
- Budget-Friendly Feast: Chuck roast and bacon stretch for miles, and canned tomato sauce keeps it simple without breaking the bank. It’s the kind of meal that makes me feel like I’m feeding a crowd, even when it’s just me and a sad salad. My wallet approves.
Step-by-step instructions for beef and bacon chili
Here's the method for a rich, smoky chili with a crispy flour-topped finish every time.
🍳 Step 1: Cook the Bacon and Brown the Beef
In a large Dutch oven, cook the 1.5 lb thick-cut bacon over medium heat for 10-12 minutes, stirring occasionally, until the bacon is deep golden brown and crispy. Use a slotted spoon to remove the bacon and set it aside on paper towels, leaving the rendered fat in the pot.
Increase the heat to medium-high and add the 2 lb chuck roast, cut into 1-inch cubes. Brown the beef in batches for 2-3 minutes per side until it develops a deep, caramelized crust. You want the beef to release easily from the pan—this ensures maximum flavor extraction. Remove the beef and set it aside with the bacon.
👨🍳 Step 2: Sauté Onions and Garlic
In the same Dutch oven, reduce the heat to medium and add the diced yellow onion. Cook for 5-6 minutes, stirring occasionally, until the onions soften and begin to caramelize along the edges. This step builds sweetness that balances the smoky flavors.
Add the 6 cloves minced garlic and cook for 30 seconds until fragrant. Be careful not to let the garlic burn—it should smell sweet and nutty, not bitter. If the onions start to stick, add a splash of beef broth to deglaze the pan and scrape up any browned bits from the bottom.
🥘 Step 3: Build the Chili Base
Return the beef and bacon to the Dutch oven. Stir in the 1 can canned tomato sauce, 2 tbsp tomato paste, 4 cups beef broth, 2 tbsp chili powder, 1 tbsp ground cumin, 1 tbsp smoked paprika, 1.5 tsp salt, and 1 tsp black pepper. Add the 2 whole bay leaves and bring the mixture to a gentle boil.
Once boiling, reduce the heat to low and let the chili simmer for 2 hours, stirring occasionally. The chili should reduce slightly, and the flavors should meld together. You'll know it's ready when the beef is fork-tender and the sauce has thickened to a rich consistency. Taste and adjust seasoning if needed.
🔥 Step 4: Create the Crispy Topping
Preheat your broiler to high. Spoon the chili into a 9x13-inch baking dish or similar oven-safe dish. In a small bowl, combine the 2 tbsp all-purpose flour with 1 tsp salt and sprinkle it evenly over the top of the chili. This creates a golden, crispy crust that adds texture and flavor.
Place the baking dish on a baking sheet to catch any drips and broil for 3-5 minutes until the topping is deep golden brown and crispy. Watch it closely—you want it to brown quickly before it burns. Remove the bay leaves before serving.
⏰ Step 5: Rest and Serve
Let the chili rest for 10-15 minutes before serving. This allows the flavors to settle and the crispy topping to set. Serve the chili hot, topped with additional thick-cut bacon if desired. The contrast of the crispy topping with the rich, smoky chili makes every bite satisfying.
This chili delivers deep, smoky flavors with a satisfying texture—crispy on top, tender beef throughout, and a perfect balance of spices. The long simmer ensures the beef is tender, while the crispy topping adds a delightful crunch.
Pro Tips For Making Beef And Bacon Chili
- CRANK THE HEAT FIRST: High heat for the bacon and onions—don’t skimp. I used to simmer them gently, but now I sear the bacon until it’s crackling and the onions turn deep gold. This builds flavor faster than any slow cook later.
- CUT THE BACON THICK: Thick-cut bacon (1/2-inch or more) renders slower and stays crispier longer. Skip the thin slices—they’ll turn greasy and mushy before the chili’s done. If you’re in a rush, pat them dry first.
- SALT THE CHUCK ROAST: Season the chuck roast before browning—at least 30 minutes ahead. I learned this the hard way: dry salt and let it sit on a rack (or plate) so it forms a crust. Wet salt? You’re just making it soggy.
- DON’T DUMP THE FAT: After cooking the bacon, strain out the grease and set it aside. Toss the crispy bits back in later—they’ll add texture and depth. That golden fat? Use it to sauté the onions and garlic. Waste not.
Creative variations of this dish
Spicy Southwest Style
Add 1 tbsp chipotle powder and ½ tsp cayenne pepper to the spice mix for a smoky kick. Top with ¼ cup diced jalapeños and ¼ cup chopped cilantro before serving. Serve with corn tortilla chips and avocado slices for the ultimate Tex-Mex twist. 🌶️
White Bean Upgrade
Stir in 1 can (15 oz) white beans, drained and rinsed, during the final 30 minutes of simmering. The beans soak up flavor while adding creamy texture. I like cannellini beans for their mild taste and hearty bite. Garnish with extra bacon bits for protein-packed satisfaction.
Breakfast Chili Twist
Add 2 scrambled eggs to each serving and top with ½ cup shredded cheddar and 2 tbsp sour cream. The eggs cook through in the residual heat while adding protein and creaminess. Serve with hash browns or biscuits for a hearty morning meal. 🍳
Slow Cooker Adaptation
Transfer all ingredients (except flour) to a 6-quart slow cooker after browning the beef and bacon. Cook on low for 8 hours or high for 4 hours. For the crispy top, transfer to a baking dish, sprinkle with flour, and broil for 3-4 minutes. The slow cooker version stays tender without drying out.
Asian-Inspired Fusion
Swap 1 tbsp chili powder for 1 tbsp hoisin sauce and 1 tsp ginger. Add 1 cup chopped bell peppers and ½ cup sliced mushrooms during the simmer. Garnish with sesame seeds and green onions for an umami-rich twist that surprises everyone. 🥢
Vegetarian Option
Replace beef with 1.5 lb extra-firm tofu, pressed and cubed, and use ½ lb tempeh for extra texture. Keep the bacon as the star flavor anchor. Add 1 tbsp liquid smoke to compensate for the missing meaty depth. The crispy topping remains the same game-changer for texture.
Nutrition facts
Frequently asked questions
Why does this chili need to simmer for 2 hours?
The long simmer time is key for breaking down the tough chuck roast into tender, flavorful chunks. This slow cooking process also allows all the spices and bacon fat to meld together, creating that rich, smoky depth. Skipping this step often results in chewy beef and weaker flavors.
Can I make this chili in a slow cooker?
Brown the beef and bacon first, then transfer everything to a 6-quart slow cooker and cook on low for 8 hours or high for 4 hours. For the crispy top, transfer to a baking dish and broil for 3-4 minutes after cooking. The slow cooker version stays moist and tender.
How do I prevent the chili from getting too thick?
If your chili thickens too much during simmering, simply add ¼ cup beef broth at a time until you reach your desired consistency. The flour topping should be added fresh after cooking to maintain that perfect crispy texture. Stirring occasionally also helps prevent sticking and uneven thickness.
What's the best way to reheat leftovers?
Reheat chili on the stove over medium-low heat with a splash of beef broth to restore moisture. For the crispy topping, add fresh flour after reheating and broil for 2-3 minutes. Never microwave with the flour topping—it won't crisp up properly. The chili tastes even better the next day!
Can I substitute ground beef for chuck roast?
Ground beef works but won't give the same tender texture. If using, brown it well first and simmer for 1 hour instead of 2. For best results, stick with chuck roast—it's designed to become tender when slow-cooked. The flavor difference is worth the extra time!