
Soups & Stews
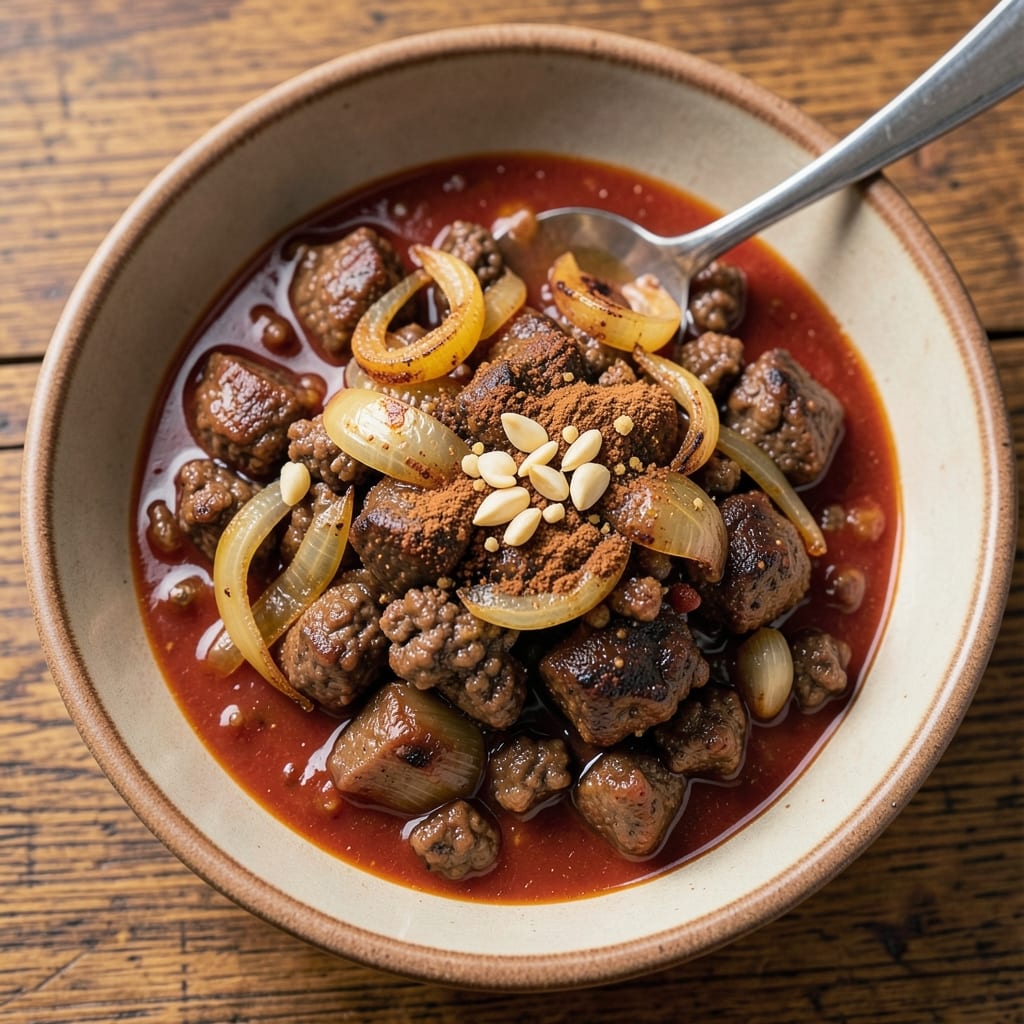
This beanless beef chili recipe delivers bold, umami-rich flavor without relying on beans, perfect for hearty meals that stand up to any chili lover's expectations. The secret lies in slow-browning ground beef and a carefully balanced blend of spices that develop deep, smoky notes as they simmer. What sets this version apart is its rich, meaty texture and concentrated depth—ideal for those who crave traditional chili without the legume base.
Start with high-quality ground beef, browned thoroughly to develop a deep, caramelized crust that forms the foundation of the chili. Aromatic spices like cumin, chili powder, and smoked paprika infuse the broth with layers of warmth, while tomatoes and Worcestershire sauce add tangy complexity. The result is a chili that’s hearty, satisfying, and packed with umami—no beans required.
By the time it’s done simmering, you’ll have a deeply flavorful, restaurant-quality chili with tender beef and a rich, velvety sauce. The spices meld together beautifully, creating a balance of heat and depth that’s impossible to resist. Serve it with classic toppings like shredded cheese, sour cream, and green onions for the ultimate chili experience.
This recipe is designed to be foolproof—ideal for weeknight dinners or meal prep—while delivering the bold, satisfying flavor that makes chili a comfort food staple. Let’s get cooking!
Ingredients for beanless beef chili
High-quality beef and aromatic spices create this deeply flavorful chili without a single bean.
| Ingredient | Amount | Notes |
|---|---|---|
| Ground Beef 🥩 | 2 lb | 80/20 fat ratio preferred |
| Yellow Onions 🧅 | 1 ½ cups | Diced, medium dice preferred |
| Garlic Cloves 🧄 | 6 cloves | Minced for even distribution |
| Canned Tomato Sauce 🍅 | 2 cups | San Marzano preferred for sweetness |
| Chili Powder 🌶️ | 2 tbsp | Smoked variety adds depth |
| Ground Cumin 🌿 | 1 ½ tbsp | Toasted for enhanced aroma |
| Smoked Paprika 🌶️ | 1 tbsp | For authentic smoky flavor |
| Worcestershire Sauce 🍶 | 2 tbsp | Vegan version if needed |
| Beef Broth 💧 | 2 cups | Low-sodium preferred |
| Dark Brown Sugar 🍚 | 1 tbsp | Balances acidity |
| Black Coffee ☕ | ½ cup | Cold brew preferred |
| Bay Leaves 🌿 | 2 whole | Removed before serving |
| Salt 🧂 | 1 tsp | Diamond Crystal preferred |
| Black Pepper 🌶️ | ½ tsp | Freshly ground |
| Olive Oil 🫒 | 1 tbsp | For initial searing |
The beef is non-negotiable here—80/20 fat ratio gives you that rich, caramelized crust when browned. Costco or local butchers often have the best quality ground chuck. If you're using pre-packaged, check the label for fat content. The onions should be diced medium-fine—not too small, or they'll turn to mush. Yellow onions have the perfect balance of sweetness and bite. For the garlic, peel and mince fresh—jarred minced garlic lacks the punch. The San Marzano tomato sauce is worth the splurge for its natural sweetness, but any quality canned sauce works in a pinch.
No Worcestershire sauce? Substitute with 1 tbsp soy sauce plus 1 tsp vinegar. Running low on smoked paprika? Regular paprika plus a pinch of liquid smoke gets you close. The coffee adds depth without bitterness—cold brew is ideal, but instant works too. Want more heat? Add ½ tsp cayenne. For the spices, toast the cumin seeds in a dry pan for 30 seconds before grinding—game changer. The brown sugar balances the acidity from tomatoes, so don't skip it. If you're using a pre-made chili powder blend, reduce to 1 tbsp since it's already balanced.
This chili tastes even better the next day as flavors meld. Store in an airtight container in the fridge for up to 5 days. Freezes beautifully for 3 months—portion into individual containers for easy lunches. For meal prep, double the recipe and freeze half. The spices lose potency over time, so replenish your pantry every 6 months. Bay leaves should be removed before serving, but don't skip them—they add subtle earthy notes. If reheating, add a splash of water or broth to prevent thickening.
Why You'll Love This Recipe
- No-Sweat Simplicity: I swear by this recipe because it’s the kind of dish that lets me actually relax. Brown the beef and onions in one pot, dump in the tomato sauce and spices, and let it simmer—no chopping mountains of veggies or hunting for obscure ingredients. Even on nights when I’m too tired to think, this chili still turns out rich and satisfying.
- Deep, Smoky Richness: That first bite? Chef’s kiss. The ground beef gets properly browned for a meaty depth, while the garlic and chili powder infuse the tomato sauce until it’s got this warm, earthy punch. It’s not sweet or overly tangy—just pure, bold chili flavor that sticks with you.
- Weeknight Workhorse: Between us, this is the dish I make when I’ve got a house full of people and zero time. It’s hearty enough for a tailgate but simple enough for a Tuesday night. Plus, the leftovers? Even better the next day—just reheat and serve, no fuss.
- Budget-Friendly Powerhouse: Honestly, this recipe is my wallet’s best friend. Ground beef and canned tomatoes stretch far, and the spices cost pennies. I’ve fed four people for under $10 with this, and they always ask for seconds. That’s a win in my book.
Step-by-step instructions for beanless beef chili
Here's how to build rich, meat-forward chili with deep umami flavor and perfect texture.
🍳 Step 1: Sear the Ground Beef for Maximum Flavor
Heat the 1 tablespoon olive oil in a large Dutch oven over medium-high heat until shimmering. Add the 2 lb ground beef and break it apart with a wooden spoon, working it into small, even crumbles. Cook undisturbed for 3-4 minutes until the meat loses its raw color and begins to brown deeply.
Here's the thing—don't stir constantly. Let the beef develop a crust in patches first. Once you see those dark brown spots form, gently break up the clumps with your spoon. Continue cooking for another 3-4 minutes until the beef is fully browned and any pink remains are just at the center. This browning creates the Maillard reaction, which builds the deep, complex flavors that make this chili exceptional.
👨🍳 Step 2: Sauté Aromatics Until Fragrant
Push the browned beef to one side of the Dutch oven and add the 1.5 cups diced yellow onions to the empty space. Cook over medium heat for 5-6 minutes until softened and beginning to caramelize at the edges. Add the 6 cloves minced garlic and cook for another 30 seconds until fragrant—you'll know it's ready when the kitchen fills with that irresistible garlic aroma.
Stir the onions and garlic into the beef, scraping up any browned bits from the bottom of the pan. These flavorful bits, called fond, are packed with concentrated taste that will infuse your entire chili. If the onions aren't caramelized enough, don't worry—we'll build more depth in the next steps. The key is to remove all that raw onion flavor before adding liquids.
🥘 Step 3: Build the Chili Base with Rich Liquids
Add the 2 cups canned tomato sauce, 2 tbsp chili powder, 1.5 tbsp ground cumin, 1 tbsp smoked paprika, 2 tbsp Worcestershire sauce, 2 cups beef broth, 1 tbsp dark brown sugar, 0.5 cup black coffee, and 2 whole bay leaves to the Dutch oven. Stir everything together thoroughly to combine all the ingredients and break up any remaining beef clumps.
Bring the mixture to a gentle boil over medium-high heat, then immediately reduce the heat to low. Here's where the magic happens: let it simmer uncovered for 45-50 minutes while you stir occasionally. The coffee and brown sugar will mellow out, the spices will bloom, and the beef will tenderize. You'll notice the chili gradually thicken and develop a rich, deep color—this is the sign of proper reduction and flavor development.
⏰ Step 4: Season and Simmer to Perfection
After 45 minutes, taste the chili and adjust the seasoning. Add the 1 teaspoon salt and 0.5 teaspoon black pepper if needed, remembering that the spices and Worcestershire sauce already contribute significant flavor. Let the chili continue to simmer for another 10-15 minutes until it reaches your desired consistency—it should coat the back of a spoon but still be spoonable.
Real talk: don't rush this final simmering time. The flavors need to meld together completely, and the beef needs to become tender. The chili should be thick enough to hold its shape when you ladle it into a bowl but still have a slightly saucy consistency. If it's too thick, add a splash of water or broth to loosen it. If it's too thin, let it simmer uncovered for another 5-10 minutes to reduce further.
🍽️ Step 5: Rest and Serve with Confidence
Once the chili reaches your desired consistency and the flavors have fully developed, remove it from heat. Let it rest for 10 minutes before serving. This resting period allows the flavors to settle and the chili to thicken slightly as it cools. Remove and discard the bay leaves before serving.
Serve the beanless beef chili hot, with all the rich, meaty goodness you'd expect from a traditional chili, but without the beans. The deep umami flavors from the Worcestershire sauce, coffee, and brown sugar create a complex, satisfying taste that will impress even the most dedicated chili lovers. Pair it with crusty bread, cornbread, or over a bed of rice for the ultimate comfort food experience.
Pro Tips For Making Beanless Beef Chili
- CRISP THE ONIONS FIRST: Ditch the slow cook—sauté the diced yellow onions in oil over medium-high heat until they’re golden brown, not just soft. I used to skip this, and the chili tasted flat; caramelized onions add depth that raw or barely cooked ones can’t match.
- BROWN THE BEEF WELL: Don’t rush the beef—break it into small chunks and cook them until deeply browned in batches if needed. That crust is where the flavor lives, and skipping it means your chili will taste more like stew than chili.
- SALT THE TOMATO SAUCE: Taste that canned tomato sauce before adding it—it’s often bland, and you’ll need to season it aggressively. A pinch of salt now saves you from overpowering the whole dish later with extra chili powder.
- LOW AND SLOW FINISH: After adding the tomato sauce and spices, drop the heat to a simmer and let it cook uncovered for at least 20 minutes. This lets the flavors meld without burning, and the top will thicken naturally—no need to stir constantly.
Troubleshooting perfect results
Underbrowned Beef
If your chili tastes bland or the beef stays rubbery, it likely didn’t brown enough. The key is developing that Maillard reaction—those deep brown spots on the meat. For next time, cook the beef in two batches if needed, and resist stirring too soon. Let it form a crust first, then break it apart. I’ve found using a cast-iron Dutch oven helps create better browning than nonstick pans. 🔥
Mushy Onions
Overcooking onions turns them into a mushy paste that ruins texture. Sauté them over medium heat for just 5-6 minutes until soft but still holding shape. If they start sticking, add a splash of water or broth to deglaze. I like to pull them out when they’re 80% cooked—we’ll finish them later in the simmer. For extra flavor, caramelize them separately before adding to the chili.
Too Thin or Too Thick
If your chili is watery, let it simmer uncovered for 10-15 extra minutes to reduce naturally. For thicker chili, mash a few spoonfuls of cooked beef against the pot sides to release juices. Avoid adding cornstarch—it can make the texture grainy. I’ve had success with 1 tbsp tomato paste to thicken without altering flavor. Always taste as you go!
Bitter or Metallic Taste
This usually means your pot wasn’t clean or you used too much Worcestershire (which can turn bitter when overcooked). Always use a well-seasoned Dutch oven or stainless steel pot. If the taste is off, balance it with 1 tsp apple cider vinegar or a pinch of sugar. I’ve also found that toasting spices before adding them reduces bitterness—just heat them in a dry pan for 30 seconds first.
Spices Too Strong
If your chili tastes overwhelmingly spicy, it’s likely from the chili powder or smoked paprika. Next time, reduce these by ½ tsp and add them gradually. For immediate fixes, stir in 1 tbsp honey or 1 tsp brown sugar to mellow the heat. I keep a small bowl of plain yogurt or sour cream on hand for serving—it’s the perfect counterbalance. 🌶️
Beef Too Tough
Overcooking beef makes it tough, but undercooking leaves it chewy. Aim for low-and-slow simmering—the beef should reach 160°F internal temperature by the end. If it’s still tough, try pre-cooking the beef separately (to 145°F) before adding to the chili. I’ve also had success with adding 1 tsp baking soda to the broth—it tenderizes the meat naturally. Just don’t overdo it!
Nutrition facts
Frequently asked questions
Why does this chili recipe skip beans entirely?
This beanless version focuses on maximizing meaty flavor and texture. The deep umami comes from Worcestershire sauce, smoked paprika, and coffee—all of which create rich, satisfying depth without beans. The 80/20 ground beef provides natural heartiness, while the slow simmer develops intense flavor in every bite.
Can I substitute ground turkey for the beef?
Yes, but expect a leaner texture. Use 93/7 ground turkey and add 1 tbsp olive oil when browning to prevent drying. For extra richness, stir in 2 tbsp tomato paste at the end. The chili will still be flavorful but slightly lighter—balance with extra spices if needed.
How do I adjust the heat level?
Start with the recipe as written for balanced heat. For milder chili, reduce chili powder to 1 tbsp and smoked paprika to ½ tbsp. For extra spice, add ½ tsp cayenne or 1 tsp chipotle powder. Always taste before serving—you can always add more heat, but you can't remove it!
What's the best way to reheat leftovers?
Reheat gently in a pot over low heat with 2 tbsp water or broth per serving to prevent drying. Microwave in 1-minute intervals, stirring between each. For best texture, reheat only until hot—chili continues thickening as it cools. Store leftovers in an airtight container for up to 5 days.
Can I make this chili in a slow cooker?
Brown the beef first in a skillet, then transfer everything to the slow cooker. Cook on low for 6-7 hours or high for 3-4 hours. The slow cooker will develop deep flavors, but check seasoning at the end—slow cooking can intensify spices. Add a splash of broth if it gets too thick during cooking.