
Soups & Stews
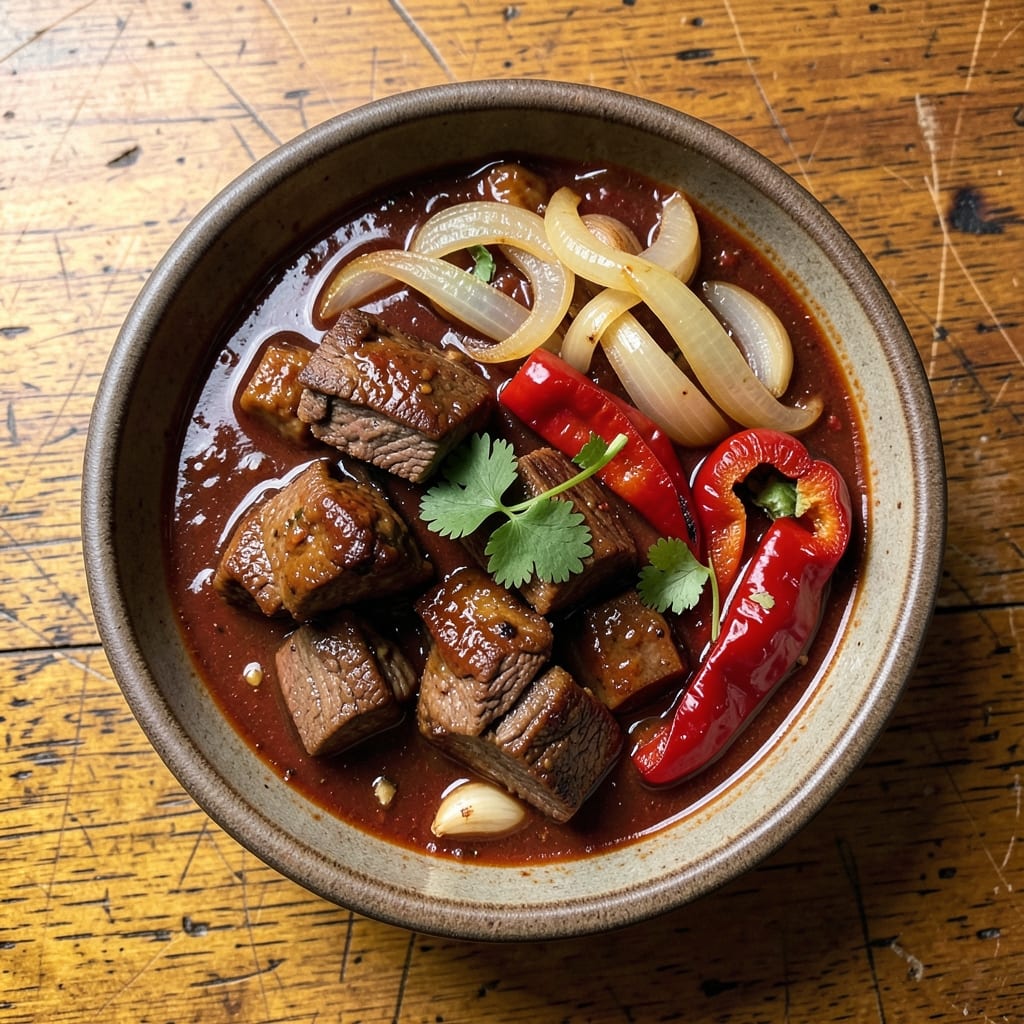
This BBQ beef chili recipe delivers the deep, smoky flavor that turns weeknight dinners into rustic feasts. 🔥 As a pitmaster who grew up surrounded by slow-cooked ribs and spicy rubs, I know the secret to perfect chili starts with tender beef and layers of aromatic spices. The key? Slow-cooking the beef until it practically melts in your mouth while building a rich, smoky base that ties everything together.
What sets this recipe apart is the balance of traditional BBQ techniques with modern twists—think smoked spices and a deep, caramelized chili base that develops over hours. We're talking tender beef, complex flavors, and that signature smoky aroma that fills your kitchen. The beef is slow-cooked to perfection, while the spices and tomatoes meld into a sauce that's both hearty and deeply satisfying.
By the time you're done, you'll have a pot of chili that's rich, smoky, and packed with flavor—every spoonful delivers that perfect combination of tender beef and aromatic chili. The slow-cooking process ensures the beef is fork-tender, while the spices create a depth that makes this chili unforgettable. Serve it with cornbread or crusty bread to soak up every last drop of that smoky goodness.
This recipe is perfect for feeding a crowd, meal prepping for the week, or simply treating yourself to a comforting bowl of chili that tastes like it's been simmering all day. The best part? It's easier than it looks, and the results are restaurant-quality every time. Let's get started!
Ingredients for bbq beef chili
Sixteen ingredients. One smoky, tender chili that'll have everyone begging for seconds.
| Ingredient | Amount | Notes |
|---|---|---|
| Chuck Roast 🥩 | 3 lb | Cut into 1-inch cubes for even cooking |
| Yellow Onion 🧅 | 2 whole | Diced, medium size preferred |
| Garlic Cloves 🧄 | 6 cloves | Minced, fresh preferred |
| Smoked Paprika 🌶️ | 2 tbsp | Key for that smoky BBQ flavor |
| Ground Cumin 🌿 | 1 ½ tbsp | Toasted for deeper aroma |
| Chili Powder 🌶️ | 2 tbsp | Medium heat preferred |
| Coffee ☕ | 1 tbsp | Instant or ground, for depth |
| Brown Sugar 🍯 | 2 tbsp | Lightly packed |
| Tomato Paste 🍅 | ½ cup | High quality, no sugar added |
| Diced Tomatoes 🍅 | 28 oz | San Marzano preferred |
| Beef Broth 💧 | 4 cups | Low sodium preferred |
| Dark Beer 🍺 | 1 cup | Stout or porter for richness |
| Black Beans 🫘 | 1 can | Drained and rinsed |
| Kosher Salt 🧂 | 1 ½ tsp | Diamond Crystal preferred |
| Black Pepper 🌶️ | 1 tsp | Freshly ground |
The chuck roast is non-negotiable here—it's the secret to that melt-in-your-mouth texture. Costco sells it pre-cubed for convenience, but if you're feeling ambitious, grab a whole roast and cube it yourself. Look for good marbling—those little fat pockets melt during cooking and keep the beef juicy. The smoked paprika is what gives this chili that authentic BBQ flavor, so don't skimp. I always grab mine from Penzeys when I'm doing a big batch, but the regular grocery store stuff works fine for weeknight cooking. The San Marzano diced tomatoes make a world of difference—they're sweeter and less acidic than regular canned tomatoes, which is perfect for balancing the smoky flavors.
No smoked paprika? Substitute half the amount with regular paprika plus a pinch of liquid smoke—it's a game-changer. Running low on beef broth? Water plus a bouillon cube works in a pinch, but you'll lose some depth. The beer is optional but adds incredible richness—any dark beer works, even if it's just a cheap stout from the grocery store. Fresh garlic and onion are ideal, but frozen chopped works if you're in a hurry. The black beans? Canned is fine, but if you're prepping ahead, cook your own—they taste fresher and you can control the salt. For the tomato paste, those little squeeze tubes at Trader Joe's are perfect—they're convenient and last forever in the pantry.
This chili tastes even better the next day, so make a big batch. Store in airtight containers for up to 5 days in the fridge, or freeze portions for up to 3 months. The flavors deepen as it sits, so don't be afraid to let it simmer longer. I always double the recipe—one pot for dinner, one for leftovers that turn into lunches. If you're meal prepping, portion it into individual containers so you can grab and go. The chili freezes beautifully too—just thaw overnight in the fridge before reheating. Trust me, that first bowl after a long day is worth every minute of simmering.
Why You'll Love This Recipe
- One-Pot Magic: I swear by this—no chopping, no fuss. Just dump the chuck roast, onions, and garlic into a pot, let it simmer, and the smoked paprika does all the work. My lazy Sunday afternoons just got a whole lot easier.
- Smoky Depth Bomb: That chuck roast turns ridiculously tender, and the smoked paprika? It’s like a slow-cooked hug in a bowl. The cumin ties it all together—warm, earthy, and impossible to resist.
- Meal Prep MVP: Between us, this is my go-to for lunches all week. The flavors only get better after a day in the fridge, and it reheats like a dream. (Yes, even on a Tuesday night.)
- Budget-Friendly Powerhouse: A chuck roast stretches forever, and the spices cost pennies. You’re feeding a crowd for less than takeout, and honestly? The leftovers are just as good as the first bowl.
Step-by-step instructions for BBQ beef chili
This smoky, tender chili delivers melt-in-your-mouth beef every time—let's make it!
🔥 Step 1: Brown the Chuck Roast in Batches
Heat a large Dutch oven over medium-high heat with 1 tablespoon oil. Working in batches (don't overcrowd), add the 3 lb chuck roast cut into 1-inch cubes and sear for 3-4 minutes per side until deeply browned. You want that rich, caramelized crust—it's the flavor foundation!
As you brown, remove cooked meat and set aside. The goal is to develop maximum flavor through browning before we simmer. If your pan gets too crowded, reduce heat slightly to prevent steaming instead of searing. This step is worth the patience—those browned bits are pure umami gold.
👨🍳 Step 2: Build the Flavor Base
In the same Dutch oven, add 1 tablespoon oil and sauté 2 whole yellow onions (diced) for 5 minutes until softened and slightly caramelized. Add 6 cloves garlic cloves (minced) and cook for 30 seconds until fragrant—don't let it burn!
Now stir in the spices: 2 tbsp smoked paprika, 1.5 tbsp ground cumin, 2 tbsp chili powder, 1 tbsp coffee, 2 tbsp brown sugar, 1.5 tsp kosher salt, and 1 tsp black pepper. Toast the spices for 1 minute until aromatic—this activates their flavors. Here's where that deep, smoky BBQ character begins to develop.
🍳 Step 3: Simmer the Chili Low and Slow
Return all the browned beef to the pot. Stir in 0.5 cup tomato paste and cook for 2 minutes to deepen the color. Pour in 28 oz diced tomatoes, 4 cups beef broth, and 1 cup dark beer, scraping up any browned bits from the bottom. Bring to a gentle boil, then reduce heat to low.
Cover and simmer for 2.5 hours, stirring occasionally. The chili should bubble gently—this slow cook transforms tough beef into fork-tender perfection. I like to check it after 1.5 hours to ensure the liquid level is adequate; if needed, add ½ cup water to maintain consistency. The aroma alone will have your kitchen smelling like a BBQ joint!
🥘 Step 4: Finish with Black Beans
After 2.5 hours of simmering, stir in the 1 can black beans (drained and rinsed). The beans add texture and fiber while soaking up all that rich chili flavor. Let the chili cook uncovered for another 15-20 minutes to thicken slightly and develop deeper flavor.
Here's the thing—this is where the magic happens. The beans soften into the chili, creating that perfect balance of hearty meat and creamy bean texture. Taste and adjust seasoning if needed. The chili should be rich, smoky, and just spicy enough to make your taste buds dance. Real talk: if it's not perfect the first time, don't stress—just simmer a bit longer or add a pinch more salt next time.
⏰ Step 5: Rest and Serve
Let the chili rest for 10 minutes before serving. This resting period allows all the flavors to meld together perfectly. The chili will thicken slightly as it sits, and the meat will become even more tender. I like to serve it with shredded cheddar cheese, sour cream, and chopped green onions on top—it's like a BBQ party in a bowl!
This chili tastes even better the next day as the flavors continue to develop. Store leftovers in the refrigerator for up to 5 days or freeze for 3 months. The secret to great chili isn't just the ingredients—it's the patience to let everything come together. Trust the process, and you'll have a chili that'll have everyone asking for seconds!
Pro Tips For Making Bbq Beef Chili
- SEAR THE CHUCK ROAST: Chuck roast loves a good crust, so don’t skip the sear—even if it’s just 3-4 minutes per side in a hot Dutch oven. I used to rush this and end up with bland, gray meat, but now I let it brown deeply before adding anything. High heat. Seriously, crank it up.
- TOAST THE SPICES: Smoked paprika and cumin need to sing, not just sit there. Dry-toast them in the same pot for 30 seconds after searing the meat—just until you smell that deep, toasty aroma. Sounds weird, but it works: the flavors develop right there, and your chili won’t taste like spices floating in beef broth.
- SLOW SIMMER, DON’T BOIL: After adding liquids, keep the heat low enough that you barely see bubbles—no violent rolling. I learned this the hard way when I turned up the heat to speed things along and ended up with a watery, mushy chili. Patience here means tender, rich meat and concentrated flavor.
- SALT THE MEAT FIRST: Chuck roast absorbs salt like a sponge, so don’t wait—generously season it with salt (about 1 tsp per pound) and let it sit for 10 minutes before searing. I was skeptical until I tried it: the seasoning penetrates deeper, and the crust becomes way more flavorful. (Yes, even if you’re impatient like me.)
Make-ahead tips for this dish
Prep Ahead Like a Pro
Start by prepping all your ingredients the night before—dice onions, mince garlic, and cube the beef. Store them in airtight containers in the fridge. This saves 30-45 minutes of prep time the next day. I swear by using quart-sized glass containers from Pyrex because they stack neatly and keep flavors fresh. 💡
Slow-Cooker Shortcut
For a hands-off approach, brown the beef as directed, then transfer everything to a 6-quart slow cooker. Add all remaining ingredients and cook on low for 8 hours or high for 5 hours. The slow cooker maintains consistent heat, ensuring tender beef without constant monitoring. Just stir occasionally and let it work its magic.
Freezer-Friendly Prep
Make a double batch and freeze half for later! Portion the chili into gallon-sized freezer bags, leaving 1 inch headspace for expansion. Seal tightly and label with the date—it'll keep for up to 3 months. When ready to eat, thaw overnight in the fridge, then reheat on the stovetop with a splash of water to restore moisture. ❄️
Make-Ahead Spice Mix
Combine all dry spices—smoked paprika, cumin, chili powder, brown sugar, salt, and pepper—into a jar and store it in your pantry. This pre-mixed blend lasts 6 months and cuts prep time in half. I keep mine in a small mason jar on my spice rack for easy access during cooking.
Day-Old Flavor Boost
This chili tastes even better the next day as flavors meld together. Let it cool completely, then refrigerate in airtight containers. The next day, reheat gently on the stovetop with ¼ cup beef broth to restore richness. The texture improves as the chili thickens slightly, and the smoky flavors deepen. Trust me, your taste buds will thank you!
Portion for Meal Prep
Divide chili into individual 16-ounce portions before freezing or refrigerating. Use glass containers with snap-on lids—they're microwave-safe and keep flavors sealed in. Label each container with the date and reheating instructions. This makes grabbing a quick lunch or dinner effortless, especially on busy days. 💪
Nutrition facts
Frequently asked questions
Can I use ground beef instead of chuck roast for this chili?
You can, but the texture will be different. Ground beef cooks much faster and won't give you that melt-in-your-mouth tenderness. If you're set on using it, brown 1.5 lbs of ground beef (80/20 blend works best) and cook it until no longer pink. Then proceed with the recipe as written, but reduce the simmering time to 1.5 hours instead of 2.5 hours since ground beef doesn't need as long to tenderize.
How do I adjust the heat level in this BBQ beef chili?
This recipe has a medium heat level thanks to the chili powder and smoked paprika. For milder chili, reduce the chili powder to 1 tbsp and omit the coffee. For extra heat, add ½ tsp cayenne pepper or 1 tbsp hot sauce at the end. If you love spicy food, you can even add 1-2 chipotle peppers in adobo with the spices. Always taste as you go!
Can I make this chili in an Instant Pot or electric pressure cooker?
Brown the beef as directed, then add all ingredients except the beans. Seal the lid and cook on high pressure for 45 minutes. Quick-release the pressure, stir in the beans, and cook on sauté mode for 10 minutes to thicken. The pressure cooker cuts the time dramatically while still delivering tender beef. Just be careful with the quick-release—those hot vapors pack a punch!
What's the best way to reheat leftover BBQ beef chili?
For the best results, reheat gently on the stovetop over medium-low heat, stirring occasionally and adding ¼ cup beef broth or water if it gets too thick. Avoid microwaving as it can make the chili rubbery. If using the microwave, cover with a damp paper towel and heat in 30-second intervals, stirring between each. The chili should be steaming hot throughout—never reheat cold chili straight from the fridge.
Can I substitute the dark beer in this recipe?
Yes! If you don't drink alcohol or prefer not to use beer, substitute with 1 cup beef broth plus 1 tbsp apple cider vinegar for acidity. For a non-alcoholic option, try 1 cup non-alcoholic stout or even 1 cup tomato juice in a pinch. The beer adds depth, but these alternatives will still create a rich, flavorful chili. The key is maintaining that balance of liquid and acidity in the recipe.