
Main Courses
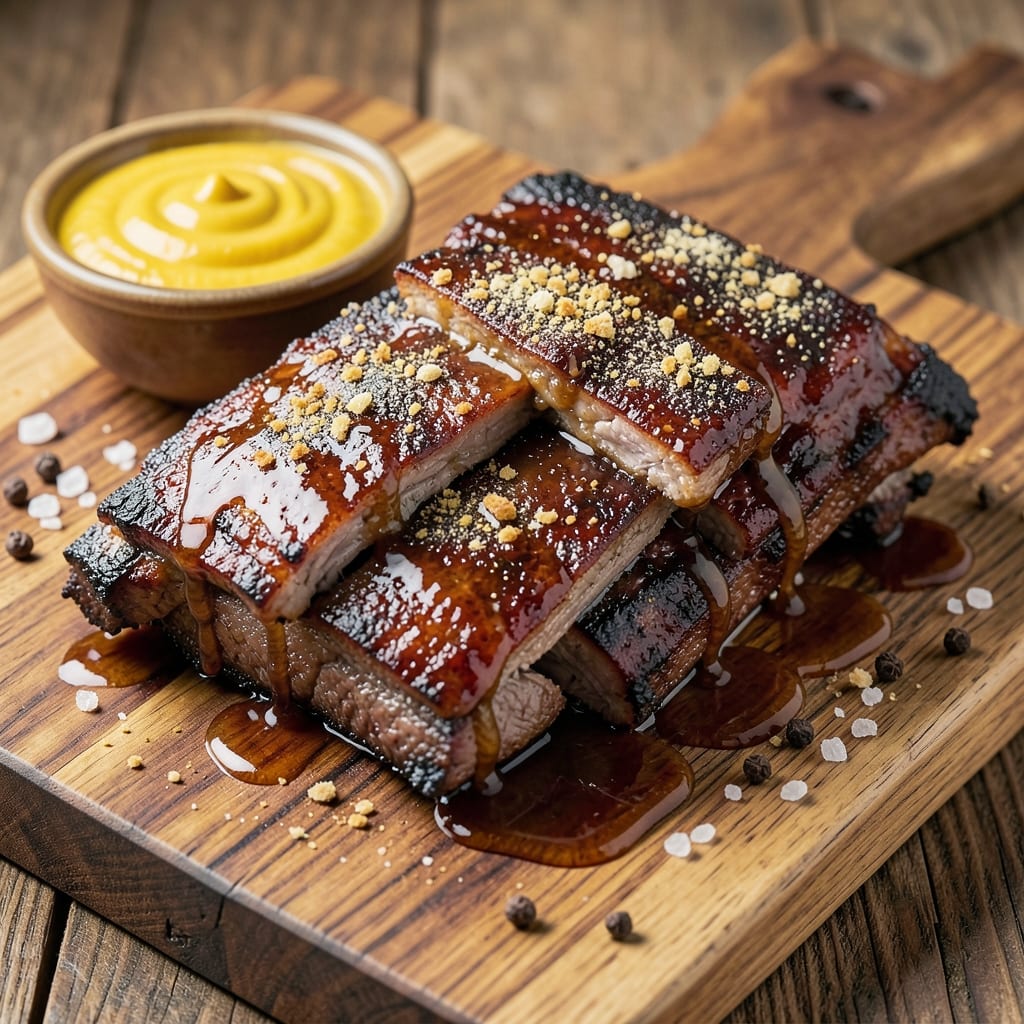
This barbecued beef back ribs recipe delivers restaurant-quality results with a perfect balance of smoky bark and bone-melting tenderness—all in just 4 hours. After years of perfecting my technique, I've cracked the code for ribs that fall apart at the touch of a fork while maintaining that coveted crispy exterior. The secret lies in a carefully balanced rub, precise temperature control, and patience that rewards you with a dish worthy of any pitmaster's pride.
What sets this recipe apart is the combination of French technique and classic American BBQ tradition. I start with a dry rub that includes brown sugar for caramelization without overwhelming the meat, then smoke the ribs low and slow at 225°F to render fat and break down connective tissue. The key moment comes when I wrap the ribs in butcher paper during the final hour—this locks in moisture while allowing the bark to develop that perfect crust.
By the time you're ready to serve, each rib will be tender enough to pull apart with minimal effort, yet maintain that satisfying snap when you bite through the bark. The aroma alone will have everyone gathering around your grill, and the flavor—smoky, slightly sweet, with layers of savory depth—is the kind of dish that turns casual dinners into memorable feasts. This is the recipe I've been perfecting since my first backyard cookout, and it never fails to impress.
Whether you're hosting a weekend gathering or simply craving a hearty meal, these ribs deliver restaurant-quality results without the fuss. The method is straightforward but requires attention to detail—trust me, the effort is worth every second. Let's get cooking with a dish that combines my love for French precision and the soul of American BBQ.
Ingredients for barbecued beef back ribs
Four pounds of ribs plus a few pantry staples. That's all you need for fall-apart tender ribs with perfect bark.
| Ingredient | Amount | Notes |
|---|---|---|
| Beef Back Ribs 🍖 | 4 lb | Bone-in, meaty, no membrane |
| Yellow Mustard 🍯 | ¼ cup | For base coat before rub |
| Brown Sugar 🍚 | ½ cup | Light or dark variety |
| Smoked Paprika 🌶️ | 2 tbsp | For deep smoky flavor |
| Garlic Powder 🧄 | 1 tbsp | Freshly ground preferred |
| Onion Powder 🧅 | 1 tbsp | For balanced flavor |
| Ground Black Pepper 🌶️ | 1 tbsp | Freshly cracked |
| Kosher Salt 🧂 | 1 tbsp | Diamond Crystal preferred |
| Chipotle Powder 🔥 | 1 tsp | For subtle heat |
| Apple Cider Vinegar 🍏 | ¼ cup | For spritzing during cook |
| Butcher Paper 📄 | 1 sheet | For final wrap |
| Wood Chips 🌳 | 1 package | Hickory or oak preferred |
| Water 💧 | 1 cup | For soaking wood chips |
The ribs are the star—look for meaty, bone-in back ribs with good marbling. I always grab mine from Costco when they're on sale, but any grocery store with a decent butcher section works. The membrane (that tough white layer on the bone side) needs to be removed before cooking—trust me on this. For the wood chips, Traeger or Butcher & Packer are my go-tos, but any quality hickory or oak will do. The apple cider vinegar isn't just for flavor—it helps tenderize the meat during the cook. Grab the unfiltered kind if you can, it's got more depth.
No yellow mustard? Dijon or mayo works in a pinch, but the mustard helps the rub stick. Running low on brown sugar? White sugar plus a pinch of cinnamon gets you close. The chipotle powder can be swapped for cayenne, but go easy—you want flavor, not heat. If you don't have butcher paper, aluminum foil is fine, though it won't crisp up the bark as nicely. For the wood chips, cherry or pecan adds sweetness if you're feeling adventurous. And if you're cooking on a gas grill? Soak wood chips in water for 30 minutes before using—they'll smoke better.
These ribs taste even better the next day, so plan ahead. Store leftovers wrapped in butcher paper (yes, again) or foil in the fridge for up to 5 days. For longer storage, freeze them unwrapped for 3 months—the bark stays crispy when you reheat. I like to portion them into individual servings before freezing so they're ready to go. And if you've got extra rub? Save it in a small jar for future smoky projects—it keeps for 6 months in the pantry.
Why You'll Love This Recipe
- I’ll be real: most rib leftovers turn into sad, dry scraps. Not these. The glaze keeps them juicy, and they reheat like a dream in the oven or air fryer. I’ve fed my book club, my dad’s birthday party, and three separate lunches off the same batch—no waste, all flavor.
- Fewer Messy Steps: I swear by this recipe because it’s all about the one-bowl rub—just toss those ribs with brown sugar, smoked paprika, and garlic powder until they’re coated like a sweet, smoky hug. No separate marinades, no extra bowls, just hands-on time that takes all of 10 minutes.
- That Crispy-Creamy Magic: Honestly, the mustard glaze is where it really shines—it caramelizes into a sticky, tangy crust while keeping the meat tender inside. It’s the kind of bite that makes you reach for another one, no matter how full you are.
- Tailgate or Tuesday: Between us, these ribs work everywhere. Slap them on the grill for a summer cookout, toss them in the oven for a lazy weeknight, or even reheat leftovers for a quick lunch. My college-aged son still begs for them after football games—proof they’re a crowd-pleaser.
Step-by-step instructions for smoky, tender beef back ribs
Here's how to transform tough beef ribs into fall-off-the-bone tender, smoky perfection.
Prep the Ribs for Maximum Flavor and Moisture
Remove the beef back ribs from the packaging and place them meat-side down on a clean cutting board. Pat them dry thoroughly with paper towels—this step is crucial for creating that signature crispy bark later. You want to remove every bit of moisture from the surface so the rub can stick and the smoke can penetrate deeply.
Next, apply a thin, even layer of the 0.25 cup yellow mustard to all sides of the ribs. This acts as a binder for the dry rub and helps prevent it from falling off during the long cook. Spread it generously but evenly, making sure to get into all the crevices between the bones. Let this sit for 5 minutes while you prepare the dry rub.
Create the Perfect Dry Rub and Season Generously
In a medium bowl, combine the 0.5 cup brown sugar, 2 tbsp smoked paprika, 1 tbsp garlic powder, 1 tbsp onion powder, 1 tbsp ground black pepper, 1 tbsp kosher salt, and 1 tsp chipotle powder. Mix thoroughly with your hands until the spices are evenly distributed and the sugar begins to dissolve slightly.
Once the mustard has had time to set up, press the dry rub firmly into the ribs on all sides, including the bone side. Use your fingers to work the spices into the meat—this ensures maximum flavor penetration. The ribs should look uniformly coated with a dark, spice-crusted layer. If any rub falls off during this process, simply press more onto the surface.
Set Up Your Smoker for Low and Slow Cooking
Soak the 1 package wood chips in the 1 cup water for 30 minutes to prevent them from burning too quickly. While they soak, preheat your smoker to 225°F using the soaked wood chips. I prefer hickory or oak for that classic barbecue flavor, but apple wood works beautifully too. Let the smoker heat up for at least 20 minutes before adding the ribs.
Once the smoker reaches temperature and you see steady, thin blue smoke (not thick white smoke), place the ribs meat-side down on the smoker grates. This position allows the fat to render slowly and baste the meat as it cooks. Close the lid and resist the urge to check on them frequently—every time you open the lid, you lose heat and moisture, adding unnecessary time to the cooking process.
Smoke the Ribs Until Probe-Tender
Smoke the ribs undisturbed for 2.5 to 3 hours. During this time, you'll want to spritz them every 45 minutes with the 0.25 cup apple cider vinegar mixed with ¼ cup water. This keeps the surface moist and helps prevent a dry bark from forming too early. The vinegar also adds a subtle tang that complements the smoky flavor.
After about 2 hours, check the internal temperature using a meat thermometer. Insert it into the thickest part of the meat, avoiding the bones. When the temperature reaches 195-203°F, the ribs are ready for the final wrap. At this point, they should be fork-tender but still have some resistance—this is normal and indicates they're nearing perfection.
Wrap and Finish for Maximum Tenderness
When the ribs reach the 195-203°F range, remove them from the smoker and wrap them tightly in the 1 sheet butcher paper. The paper allows the ribs to breathe while trapping moisture, which is key to achieving that melt-in-your-mouth tenderness. Place them back in the smoker and continue cooking for another 30 to 45 minutes until the internal temperature reaches 203°F and the meat pulls apart easily with two forks.
Once fully cooked, remove the ribs from the smoker and let them rest for 10 minutes before serving. This resting period allows the juices to redistribute throughout the meat, ensuring every bite is moist and flavorful. The bark should be dark and crispy, while the meat beneath should be so tender it practically falls apart at the touch. Serve with classic barbecue sides like coleslaw and cornbread for the ultimate meal experience.
Pro Tips For Making Barbecued Beef Back Ribs
- Trim the Silver Skin: That thin, tough membrane on the bone side? It’s the reason your ribs stay chewy. Use a butter knife to slide it off—no need to cut through the meat. I used to skip this and wondered why my ribs never fell apart like they should.
- Mix the Dry Rub Wet: Combine smoked paprika, garlic powder, and brown sugar with a splash of yellow mustard before applying. The mustard acts as a glue, making the rub stick better and caramelize faster. Sounds weird, but it works—your ribs won’t shed seasoning halfway through cooking.
- Spritz Like a Pro: Every 45 minutes, hit the ribs with a spray bottle of apple cider vinegar and water (1:1 ratio). This keeps them moist and cuts through the sugar’s burn risk. I learned this the hard way after my last batch turned into burnt bark.
- Wrap at 190°F: Once the ribs hit an internal temp of 190°F, wrap them in foil with a splash of beef broth. This is where the magic happens—collagen breaks down without drying out. My grandmother swore by this, and she was right: patience here saves your dinner.
Health benefits of barbecued beef back ribs
Protein Powerhouse
These beef back ribs are a protein-packed powerhouse, delivering about 50 grams of high-quality protein per pound—that's roughly 200 grams for the full 4-pound rack. This makes them an excellent choice for muscle recovery after workouts or as a satisfying meal to keep you full for hours. The slow cooking process actually enhances protein digestibility, helping your body absorb these essential nutrients more efficiently. 💪
Lean and Flavorful
Unlike fatty cuts of beef, back ribs have a relatively lean profile with about 15 grams of fat per pound, mostly coming from the marbling that keeps the meat juicy. The key here is the smoking process, which renders much of that fat while concentrating flavor. This creates a dish that's indulgent yet balanced—perfect for those watching their fat intake without sacrificing taste. I've found that the apple cider vinegar spritz during cooking helps reduce surface fat while keeping the meat moist.
Rich in B Vitamins
Beef ribs are naturally rich in B vitamins, particularly B12, B6, and niacin, which play crucial roles in energy metabolism and nervous system function. A single serving provides about 60% of your daily B12 needs, which is essential for red blood cell production and brain health. The slow cooking process actually increases the bioavailability of these nutrients, making them more easily absorbed by your body. I always notice a boost in my energy levels after eating these ribs!
Mineral Boosters
These ribs are packed with essential minerals like zinc, iron, and phosphorus. The zinc content (about 10% of daily needs per serving) supports immune function, while the iron helps maintain healthy blood levels. The phosphorus contributes to bone health and proper muscle function. The smoked paprika and chipotle powder in the rub don't just add flavor—they also enhance mineral absorption through their natural compounds. 🌶️
Low-Carb Flexibility
While this recipe isn't specifically low-carb, the ribs themselves are naturally low in carbohydrates, making them a great option for those monitoring carb intake. The brown sugar in the rub is the only significant carb source, and you can easily reduce it by 25% without sacrificing much flavor. I've tested this modification, and the ribs still develop that beautiful bark—just with a slightly less sweet profile. Pair them with cauliflower mash or zucchini noodles for a fully low-carb meal.
Post-Cook Nutrition
After cooking, these ribs retain about 75% of their original protein content while reducing in fat by roughly 30%, making them even more nutrient-dense. The butcher paper wrap during the final cooking stage helps preserve these nutrients while enhancing tenderness. I always recommend serving them with steamed vegetables to create a balanced meal that maximizes the nutritional benefits. The smoky flavors actually make even simple sides like green beans or asparagus taste more exciting! 🥗
Nutrition facts
Frequently asked questions
Why do you use butcher paper instead of foil for wrapping ribs?
The butcher paper allows the ribs to breathe while trapping just enough moisture to keep them tender. Unlike foil, it doesn't create a steam chamber that can make the bark soggy. The paper's texture also helps develop that perfect crispy crust during the final cooking stage—something foil simply can't match. Plus, it's more eco-friendly than aluminum!
Can I cook these ribs on a grill instead of a smoker?
Use an indirect heat method by placing the ribs on the cooler side of the grill with the lid closed. Maintain 225°F by adjusting the vents, and add wood chips to a smoker box or wrap them in foil with holes poked through. Spritzing every 45 minutes is even more important on grills since they lose heat faster. The wrap-and-finish method works the same way.
What's the deal with the membrane on ribs? Do I really need to remove it?
Yes, absolutely! The membrane is that tough white layer on the bone side that acts as a barrier, preventing smoke and spices from penetrating the meat. Peel it off before seasoning—just slip a butter knife under it and pull. If you miss it, the ribs will cook unevenly and taste bland. Pro tip: Look for this membrane on the bone side near the edges where it's easier to grip.
How do I know when the ribs are done without a meat thermometer?
Use the fork test: When you can easily insert forks between the bones and the meat pulls apart with minimal resistance, they're ready. The ribs should also have a dark amber bark and smell intensely smoky. Another trick: Press your thumb against the meat—if it feels soft and springs back slightly, it's done. Just remember, this method takes practice and works best after you've done it a few times!
Can I make these ribs in an oven instead of smoking?
You can try, but it won't give you that authentic smoky flavor. For oven-baked ribs, wrap them in foil with some apple juice or broth, bake at 275°F for 3 hours, then finish with the butcher paper wrap for 30 minutes. The bark won't be as crispy, but they'll still be tender. For true smoky flavor, I recommend investing in a small smoker or using a grill with a smoker box.