
Main Courses
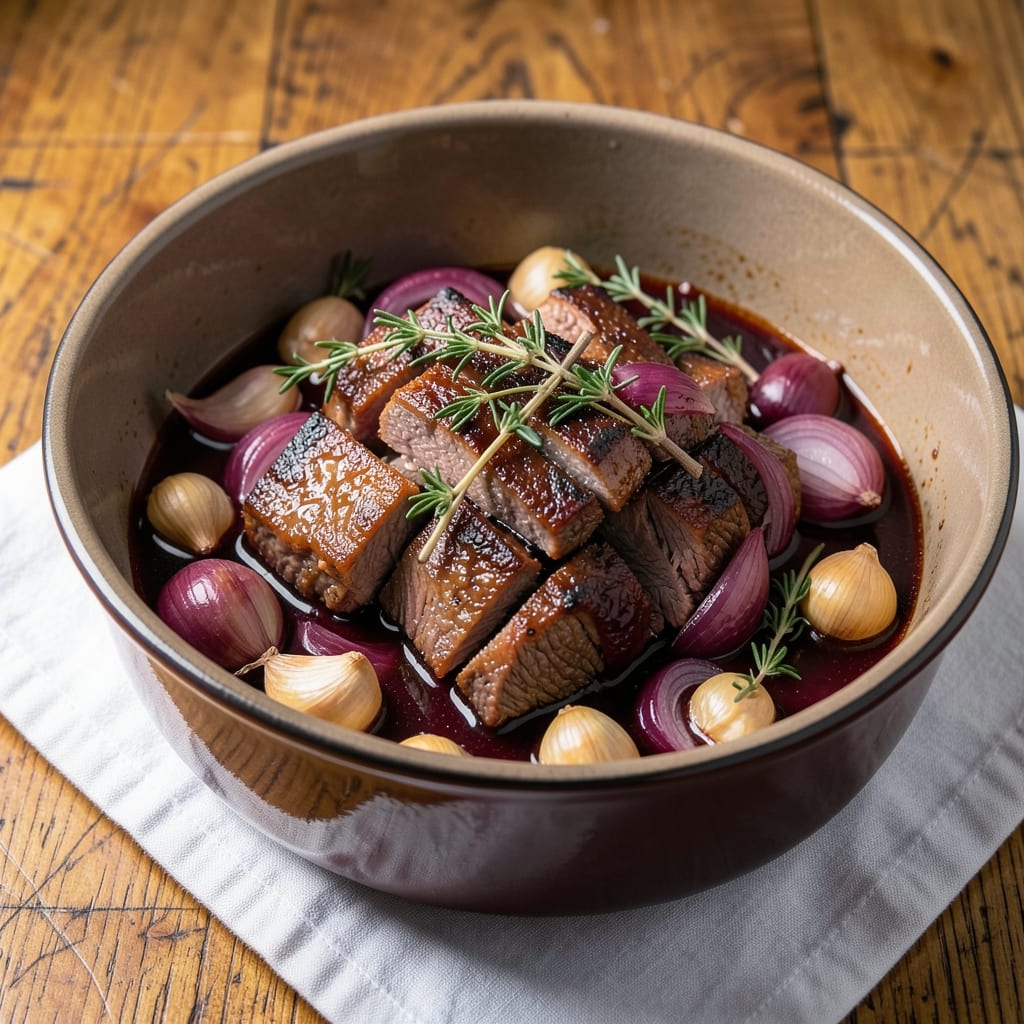
This balsamic braised beef recipe transforms tough cuts into melt-in-your-mouth perfection through slow cooking and deep flavor development. The secret lies in searing the beef first to create a rich crust, then braising it low and slow in a tangy balsamic reduction until fork-tender. I've perfected this technique over years of testing, balancing traditional braising methods with modern shortcuts that deliver restaurant-quality results at home.
The magic happens when caramelized onions and aromatic herbs meld with the beef's natural juices, creating a sauce that's both sweet and savory. This method works beautifully with chuck roast or short ribs, turning inexpensive cuts into something special. The balsamic vinegar adds depth while keeping the dish approachable—no fancy wine reductions required. What you'll end up with is beef that falls apart at the touch of a fork, swimming in a glossy sauce that's perfect for serving over polenta or mashed potatoes.
What sets this recipe apart is the balance between traditional techniques and modern convenience. While classic braised beef often requires hours of simmering, this version delivers tender results in about 3 hours—ideal for weeknight dinners. The caramelized onions add natural sweetness that complements the beef's richness, while fresh herbs brighten the final dish. This is comfort food at its finest: hearty, flavorful, and satisfying enough to feed a crowd or become your new weeknight staple.
The best part? Leftovers actually improve over time as the flavors deepen. Serve with crusty bread to soak up every last bit of that delicious sauce. Here's how to make it—step by step—for beef that's so tender, it practically melts in your mouth.
Ingredients for balsamic braised beef
Pantry staples plus a few fresh herbs create melt-in-your-mouth beef that tastes like a restaurant favorite.
| Ingredient | Amount | Notes |
|---|---|---|
| Chuck Roast 🥩 | 3 lb | Cut into 2-inch cubes |
| Yellow Onions 🧅 | 3 whole | Sliced into 1/4-inch rounds |
| Balsamic Vinegar 🍷 | ½ cup | High-quality, aged variety |
| Beef Broth 💧 | 2 cups | Low-sodium preferred |
| Garlic Cloves 🧄 | 6 cloves | Minced for depth |
| Fresh Thyme 🌿 | 2 tbsp | Leaves only, chopped |
| Fresh Rosemary 🌿 | 1 tbsp | Chopped, stems removed |
| Olive Oil 🫒 | 2 tbsp | Extra-virgin for richness |
| All-Purpose Flour 🌾 | 2 tbsp | For dusting beef |
| Salt 🧂 | 1 ½ tsp | Kosher or sea salt |
| Black Pepper 🌶️ | 1 tsp | Freshly ground preferred |
| Sugar 🍯 | 1 tsp | Balances acidity |
| Tomato Paste 🍅 | 2 tbsp | Smooth, not chunky |
| Bay Leaves 🌿 | 2 whole | Dried, removed before serving |
The beef makes or breaks this dish—chuck roast is ideal for its marbling and tenderness. Costco or Walmart usually have it pre-cut, but if buying whole, look for good marbling and ask the butcher to trim excess fat. The onions? Yellow onions caramelize best here—red would bleed color into the sauce. Fresh herbs are non-negotiable: Trader Joe's sells great bundles, or grab them from the grocery store's produce section. If you're short on time, frozen chopped onions work in a pinch, but fresh gives that unmatched depth.
No balsamic vinegar? Red wine vinegar plus 1 tsp sugar mimics the flavor, though it won't have the same depth. Short on beef broth? Water plus 1 tsp soy sauce gets you close. The tomato paste can be swapped for crushed tomatoes (1/4 cup), but it'll be thinner. For the herbs, dried thyme at half the amount works if you're out of fresh. And if you're worried about the sugar balancing the acidity, trust me—it's worth it. The caramelized onions alone take about 20 minutes, but don't skip this step—it's what makes the sauce sing.
This beef tastes even better the next day, so make extra. Store leftovers in the fridge for up to 5 days or freeze for 3 months. I like to portion it into containers with a little sauce on top—just reheat in the microwave until piping hot. The sauce thickens as it cools, so add a splash of broth or water when reheating. For serving, crusty bread or creamy mashed potatoes are perfect companions.
Why You'll Love This Recipe
- One-Pot Magic: I swear by this recipe—just sear the chuck roast, toss in onions and garlic, then let the balsamic and broth do all the work. No flipping pans, no fuss, and the house smells like heaven while you’re at it.
- Deep, Tangy Richness: That balsamic glaze caramelizes into a glossy, slightly sweet-savory blanket over tender beef—crispy edges, fall-apart center, and a depth of flavor you’d pay $40 for at a restaurant. The onions melt into the broth, so you barely notice they’re there (my kids still pick them out, but they eat it anyway).
- Weeknight Workhorse: This feeds six but costs less than takeout for two. Double the batch, freeze half, and you’ve got a 30-second reheat for lazy days. Honestly, it’s my go-to when I’m too tired to think but still need a meal that feels special.
- Budget Beef Boost: Chuck roast is cheap, but it transforms into something luxurious with just a splash of balsamic and simmer time. I’ve served it at potlucks, date nights, and even my mom’s house—no one ever guesses how little it cost per serving. (Between us, that’s the real win.)
Step-by-step instructions for balsamic braised beef
Here's how to transform tough chuck roast into melt-in-your-mouth perfection with rich, caramelized onions.
Sear the Beef for Deep Flavor
Heat 1 tablespoon olive oil in a heavy Dutch oven over medium-high heat. Working in batches, sear the 3 lb chuck roast cut into 2-inch cubes for 2-3 minutes per side until deeply browned. You're building flavor here - don't rush this step or the meat will steam instead of develop that rich crust.
Transfer the browned beef to a plate as you work. Once all pieces are seared, sprinkle with 1.5 teaspoons salt, 1 teaspoon black pepper, and 2 tablespoons all-purpose flour, tossing to coat evenly. This flour will help thicken our braising liquid later. Return the beef to the pot and set aside while you prepare the aromatics.
Build Layers of Flavor with Caramelized Onions
In the same Dutch oven, add 1 tablespoon olive oil and 3 whole yellow onions sliced into ¼-inch rounds. Cook over medium heat for 15-20 minutes, stirring occasionally, until the onions are deep golden brown and caramelized. This process takes patience - resist the urge to rush or they'll burn before caramelizing properly.
About 5 minutes before the onions finish, add 6 cloves minced garlic, 2 tablespoons chopped fresh thyme, and 1 tablespoon chopped fresh rosemary. Stir for 30 seconds until fragrant. Here's where the magic happens - these aromatics will infuse the beef with incredible depth of flavor as it braises.
Create the Braising Liquid
Push the onions to one side of the pot and add 2 tablespoons tomato paste to the empty space. Stir for 1 minute until it darkens slightly, then pour in 0.5 cup balsamic vinegar and scrape up any browned bits from the bottom. Add 2 cups beef broth, 1 teaspoon sugar, and the 2 whole bay leaves, stirring to combine.
The sugar here balances the acidity of the balsamic while helping create a glossy finish. Bring the liquid to a gentle simmer, then carefully return the beef and any accumulated juices to the pot. The liquid should come about halfway up the beef cubes - if it's too shallow, add a splash of water or broth.
Braise Until Fork-Tender
Cover the Dutch oven and transfer to a 300°F oven. Braise for 3 hours, then carefully flip each piece of beef and continue cooking for another 30-60 minutes until the meat is fork-tender. You'll know it's done when a fork slides in and out with minimal resistance.
About 30 minutes before serving, increase the oven temperature to 375°F to thicken the sauce slightly. Remove the bay leaves before serving - they're great for flavor but can be bitter if left in too long.
Rest and Serve with Pan Sauce
Transfer the beef to a serving platter and tent loosely with foil. Let it rest for 10 minutes before serving - this crucial step allows the juices to redistribute throughout the meat, ensuring each bite is moist and flavorful.
For serving, spoon the rich braising sauce over the beef and serve with the caramelized onions spooned alongside. The onions should be tender but still hold their shape, and the sauce should coat the back of a spoon with a beautiful gloss. This dish tastes even better the next day as the flavors meld further!
Pro Tips For Making Balsamic Braised Beef
- Sear the Roast Hard: The first 5 minutes in the pan make or break the flavor—don’t skimp on heat. After patting the chuck dry, let it sit in a cold skillet for 30 seconds to boost browning, then crank the heat to medium-high. You want deep caramelization, not just a light patina, because that’s what dissolves into the balsamic later and adds layers of richness.
- Slice Onions Paper-Thin: I used to chop onions into big chunks, thinking it would cook faster. Wrong. Thinly sliced onions (almost translucent) melt into the sauce beautifully and cook through without turning mushy. Use a sharp knife or mandoline, and don’t skip the final rinse under cold water—it cuts down on bitterness.
- Deglaze with Cold Broth: After searing the garlic and onions, resist the urge to pour in hot broth right away. Instead, splash in ½ cup of cold beef broth first, then scrape the browned bits off the pan with a wooden spoon. This lifts more flavor into the sauce than hot liquid ever will—trust me, your future self will notice the difference.
- Simmer, Don’t Boil: Low and slow is your friend here. Once everything’s in the pot, bring it to a gentle simmer (tiny bubbles at the edges, not a rolling boil) and cover it. If you let it boil, the balsamic vinegar will turn harsh and the onions will fall apart. I learned this after one disastrous batch where the sauce tasted like vinegar punch.
Troubleshooting perfect results
Beef Not Tender
If your beef isn't fork-tender after 3 hours at 300°F, it likely needs more time or a higher temperature. Try flipping the pieces and increasing the oven to 325°F for another 30-60 minutes. For thicker cuts, extend the braising time to 3.5-4 hours. I also recommend checking your oven's accuracy—many run 25°F hotter or colder than set. 🌡️
Sauce Too Thin
A watery sauce usually means the braising liquid wasn't reduced enough. After the initial 3 hours, uncover the pot and simmer on the stovetop over medium-low heat for 10-15 minutes to thicken. For extra richness, remove the beef, reduce the sauce further, then whisk in 1 tablespoon cornstarch mixed with 2 tablespoons cold water. Return the beef and heat through.
Onions Burn Before Caramelizing
Caramelizing onions takes patience—don’t rush! Cook them over medium heat (not high) and stir occasionally to prevent burning. If they darken too quickly, reduce the heat to medium-low and add a splash of water or broth to deglaze. I’ve found yellow onions work best; red or white varieties may burn faster. 🧅
Balsamic Flavor Missing
If your dish lacks balsamic depth, the vinegar likely didn’t reduce enough. After adding the balsamic, simmer the liquid uncovered for 5-10 minutes before adding broth to concentrate its flavor. For extra tang, add 1 tablespoon balsamic glaze (store-bought or homemade) at the end. Avoid using white vinegar—it lacks the complex notes of aged balsamic.
Beef Too Dry
Overcooking or insufficient liquid causes dry beef. Ensure the braising liquid covers at least halfway up the beef cubes. If needed, add ¼ cup beef broth during cooking. After braising, let the beef rest for 10-15 minutes before slicing—this redistributes juices. For extra moisture, spoon some of the reduced sauce over the beef before serving.
Herbs Lose Flavor
Fresh herbs can fade if cooked too long. Add thyme and rosemary just 5 minutes before the onions finish caramelizing, then remove them before serving. For dried herbs, use half the amount and add them with the bay leaves. If herbs taste bland, boost their flavor by toasting them briefly in the Dutch oven over medium heat** before adding to the onions.
Nutrition facts
Frequently asked questions
Can I use a slow cooker for this balsamic braised beef?
For a slow cooker version, sear the beef first, then add all ingredients except the caramelized onions (they'll get mushy). Cook on low for 6-8 hours or high for 3-4 hours. Stir in the onions and fresh herbs during the last 30 minutes of cooking. The sauce will be thinner, so reduce it on the stovetop afterward or use a cornstarch slurry to thicken it.
What's the best cut of beef for braising?
The ideal cuts are chuck roast or short ribs—they're marbled with fat, which keeps the meat tender during long cooking. Avoid lean cuts like sirloin or filet mignon, as they'll dry out. If you can't find chuck, brisket or shoulder work well too. The key is choosing something with good connective tissue that breaks down beautifully during braising.
How do I make this dish ahead of time?
This recipe tastes even better the next day! Braise the beef as directed, then cool it completely and refrigerate in an airtight container. Reheat gently in the oven at 300°F for 20-30 minutes or on the stovetop with a splash of broth to restore moisture. The flavors deepen overnight, making it perfect for meal prep. Just avoid reheating in the microwave, which can make the sauce watery.
Can I substitute balsamic vinegar with something else?
For a similar tangy-sweet balance, use red wine vinegar plus 1 teaspoon sugar or apple cider vinegar with 1 teaspoon honey. However, balsamic's unique depth comes from its aged flavor—it's worth tracking down a good-quality bottle. If you're short on time, balsamic glaze (the thick, syrupy kind) adds richness without needing to reduce the vinegar.
What sides pair best with this braised beef?
This rich, saucy beef pairs perfectly with creamy polenta, garlic mashed potatoes, or crusty bread for soaking up the sauce. For a lighter option, try roasted root vegetables (carrots, parsnips) or a fresh green salad with a tangy vinaigrette to balance the dish. The caramelized onions in the braising liquid also make a great topping for pasta or toasted bread.