
Main Courses
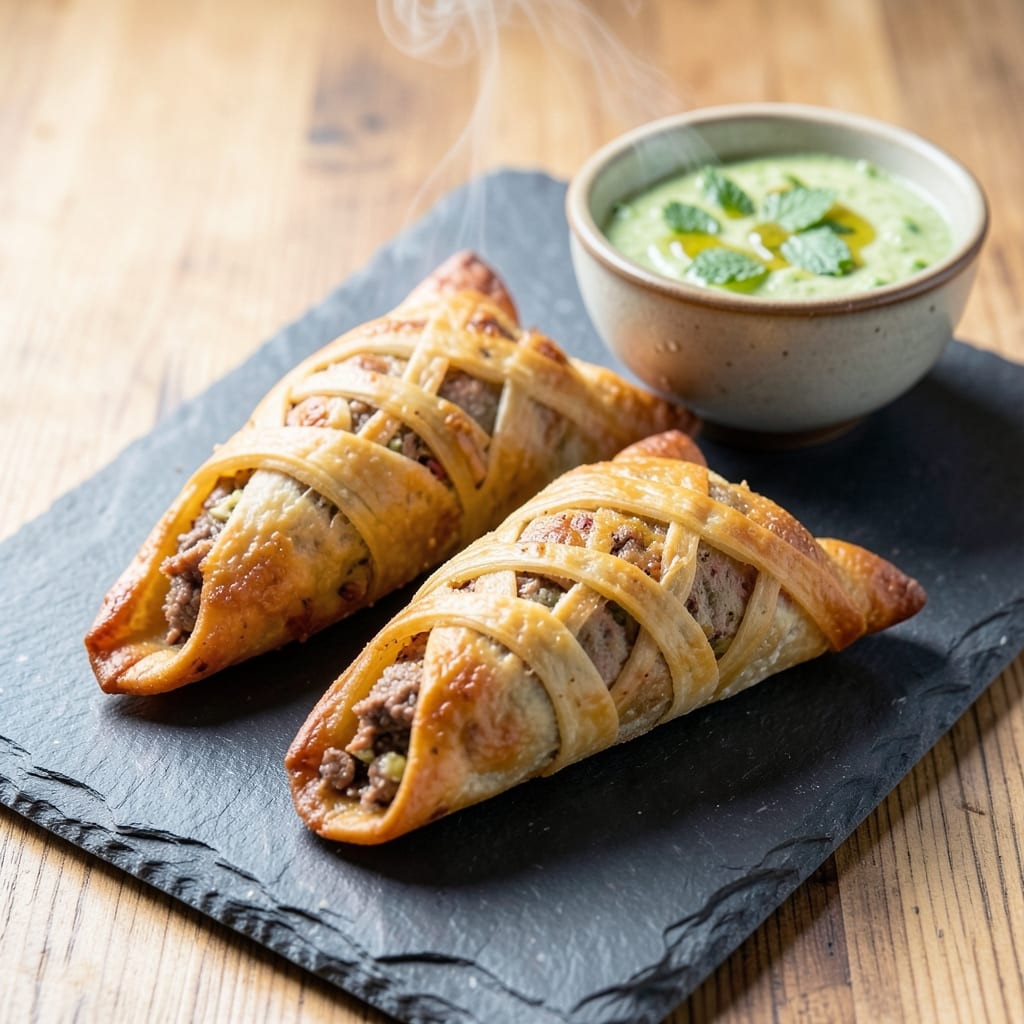
This baked beef samosa recipe delivers all the crispy, spiced magic of traditional samosas—without the deep-frying. 🔥 The secret lies in a golden, flaky pastry encasing a rich, aromatic beef filling that’s tender yet packed with bold flavors. I’ve perfected this technique over years of testing, ensuring every bite achieves that perfect balance of texture and spice.
What sets this recipe apart is the foolproof method for achieving crispy layers without oil. The dough is rolled thin and baked until golden, while the filling—ground beef simmered with garam masala, cumin, and fresh herbs—stays juicy and flavorful. The result? A samosa that’s light yet satisfying, with a satisfying crunch that holds up even after baking.
By the time you’re done, you’ll have samosas that are restaurant-quality at home—crispy on the outside, tender on the inside, and infused with warm spices. Serve them with a cooling mint chutney or tamarind dip to balance the richness, and watch them disappear faster than you can say “more, please.”
This recipe scales beautifully, whether you’re feeding a crowd or prepping for meal prep. The dough can be made ahead, and the filling keeps well in the fridge, making it the ultimate weeknight-friendly Indian-inspired dish. Let’s get started!
Ingredients for baked beef samosa
Golden pastry, spiced beef filling, and crispy layers—this recipe delivers restaurant-quality samosas without deep-frying.
| Ingredient | Amount | Notes |
|---|---|---|
| Ground Beef 🥩 | 1 lb | 80% lean for best flavor |
| All-Purpose Flour 🌾 | 3 cups | Plus extra for dusting |
| Unsalted Butter 🧈 | ½ cup | Cold, cubed for pastry |
| Garam Masala 🌶️ | 1 ½ tbsp | Freshly ground preferred |
| Ground Cumin 🌿 | 1 tsp | Toasted for deeper flavor |
| Fresh Ginger 🧄 | 1 tbsp | Grated, fresh preferred |
| Garlic Cloves 🧄 | 4 cloves | Minced, fresh preferred |
| Medium Yellow Onion 🧅 | 1 whole | Finely diced, about 1 cup |
| Fresh Green Chilies 🌶️ | 2 whole | Slit lengthwise, seeds removed |
| Fresh Coriander Leaves 🌿 | ¼ cup | Chopped, stems removed |
| Lemon Juice 🍋 | 1 tbsp | Freshly squeezed |
| Salt 🧂 | 1 tsp | Diamond Crystal preferred |
| Black Pepper 🌶️ | ½ tsp | Freshly ground preferred |
| Ice Water 💧 | ¼ cup | For dough elasticity |
| Vegetable Oil 🫒 | 2 tbsp | For brushing, not frying |
The ground beef is non-negotiable for texture—80% lean gives you that perfect balance of tenderness and flavor. Costco or Trader Joe's usually carry it pre-ground, but if you're buying whole cuts, ask the butcher to grind it fresh. For garam masala, MDH or Everest are solid brands, but nothing beats freshly toasted whole spices blended yourself. The yellow onion should be sweet and firm—avoid those with sprouting eyes. Fresh ginger and garlic? Buy extra—half goes in the filling, half in the dough for that authentic aroma.
No garam masala? Mix 1/2 tsp each of cinnamon, cardamom, cloves, and coriander for a close substitute. Fresh green chilies too spicy? Swap for 1/2 tsp red chili powder. The dough needs cold butter—cut it into 1/2-inch cubes and chill for 30 minutes before mixing. For extra crispiness, brush the baked samosas with melted ghee or clarified butter while still warm. The coriander leaves can be dried if needed—just use 1/4 tsp dried instead of fresh.
Dough keeps 3 days wrapped in plastic in the fridge or 3 months frozen. Filling stays fresh 2 days in the fridge—freeze portions for up to 1 month. Bake samosas straight from frozen by adding 5-7 extra minutes to the baking time. For meal prep, assemble samosas, freeze unbaked, then bake straight from frozen—add 10 minutes to the recipe time. Store baked samosas in an airtight container for up to 2 days—they reheat beautifully in a 350°F oven for 10 minutes.
Why You'll Love This Recipe
- No-Fuss Filling: I swear by the ground beef—it’s tender but holds its shape, and the garam masala and cumin turn it into something ridiculously flavorful without a single pan to scrub. Honestly, the dough’s just flour, butter, and water, so even if you’re not a baker, you’ll nail it.
- Crispy Without Oil: That golden crust? Pure magic. The butter in the dough gives it a buttery crunch, and baking means no deep-frying mess. I’ll be real: my first attempt was lopsided, but now I just bake them longer—same result, zero guilt.
- Weeknight to Party Fix: Make a batch on Sunday, and you’ve got snacks for game day, potlucks, or lazy nights in. My kids grab them straight from the oven—no plates needed—and my husband’s the first to finish the leftovers. (Yes, even on a Tuesday night.)
- Budget-Friendly Feast: Ground beef and flour stretch further than you’d think, and the spices add depth without costing a fortune. I’ve fed six people for under $10, and they’ve always asked for seconds. Not the prettiest, but the taste makes up for it.
Step-by-step instructions for baked beef samosas
Master the art of creating golden, crispy samosa shells with a richly spiced beef filling—no frying required.
👨🍳 Step 1: Prepare the Spiced Beef Filling
In a large skillet over medium-high heat, add the 1 lb ground beef and cook until it loses its raw color and begins to brown—about 5-6 minutes. Break it apart with a wooden spoon to ensure even cooking. This step develops deep, meaty flavors that form the heart of your samosas.
Once the beef is browned, add the finely diced medium yellow onion and cook for another 3-4 minutes until softened. Stir in the minced garlic cloves, grated fresh ginger, and slit green chilies, cooking for 1 minute until fragrant. Here's the thing—don't rush this step. The aromatics need time to bloom and infuse the beef with their flavors.
Reduce heat to medium-low and add 1.5 tbsp garam masala, 1 tsp ground cumin, 1 tsp salt, and 0.5 tsp black pepper. Stir well to coat the beef evenly. Let the mixture simmer for 5 minutes until the spices deepen in aroma and the filling thickens slightly. Finish with the chopped fresh coriander leaves and lemon juice, stirring gently to preserve the herbs' freshness. Remove from heat and let cool completely before filling the samosas.
👨🍳 Step 2: Make the Samosa Dough
In a large mixing bowl, combine the 3 cups all-purpose flour and 1 tsp salt. Cut in the 0.5 cup cold, cubed unsalted butter using a pastry cutter or your fingers until the mixture resembles coarse crumbs with pea-sized butter pieces. This creates pockets of fat that will make your samosas flaky and crispy.
Gradually add the 0.25 cup ice water, one tablespoon at a time, mixing gently with a fork until the dough just comes together. Avoid overmixing—you want a smooth but slightly rough dough. Knead lightly on a clean surface for 2-3 minutes until it forms a cohesive ball. Wrap in plastic wrap and let rest for 30 minutes at room temperature. This resting period relaxes the gluten, making the dough easier to roll out and preventing cracking.
🥘 Step 3: Roll and Assemble the Samosas
Divide the rested dough into 8 equal portions (about 2 oz each) and roll each into a 6-inch circle on a lightly floured surface. Keep the remaining dough covered to prevent drying. Here's where precision matters: use a rolling pin to achieve even thickness—about 1/8-inch thick. If the dough sticks, dust with a little extra flour, but don't overdo it or your samosas will turn out dry.
Place 2 tbsp of the cooled beef filling near one edge of each dough circle. Fold the dough over the filling to form a half-moon shape, then seal the edges tightly by pinching with your fingers. Press firmly to create a strong seal—this prevents filling from leaking during baking. For extra crispiness, brush the sealed edges with a little vegetable oil using a pastry brush.
🔥 Step 4: Bake to Crispy Perfection
Preheat your oven to 400°F and line a baking sheet with parchment paper. Arrange the assembled samosas on the prepared sheet, leaving 1 inch of space between each. Bake for 20-25 minutes until the samosas are deep golden brown and the dough is crispy to the touch. Real talk: don't open the oven door during baking—this causes temperature fluctuations that can lead to uneven browning.
For the final touch, transfer the baked samosas to a wire rack and let them cool for 5 minutes. The residual heat will help set the crispiness. Serve warm with mint chutney or tamarind sauce for the ultimate experience. Each bite should deliver a perfect balance of crispy, flaky layers and richly spiced beef filling—just like your favorite street-side samosa, but made in your home oven.
Pro Tips For Making Baked Beef Samosa
- CRANK THE OVEN TO 425°F: Baked samosas need that high heat to crisp the pastry properly—don’t skimp. After 10 minutes, drop to 375°F to finish cooking; this two-stage bake gives you a golden crust without burning the filling.
- GRIND THE SPICES FRESH: Store-bought garam masala loses potency fast. If you can’t toast and grind whole spices, at least crush the powdered version between your palms before adding it to the beef—it releases more aroma.
- DON’T OVERWORK THE DOUGH: The second you knead the flour-butter mixture into a shaggy ball, stop. Pressing it too much develops gluten and makes the samosas tough. Roll each one gently—just until it holds shape.
- USE COLD BUTTER IN THE FILLING: Mixing chilled, cubed butter into the cooked beef keeps the filling firm enough to hold its shape when baked. Skip the melted version—it’ll make the samosas soggy faster than you can say "chutney."
Essential equipment for this dish
Pastry Essentials
Start with a stand mixer like the KitchenAid Artisan Series for mixing the dough—it handles the butter and flour perfectly without overworking. I use the dough hook attachment on speed 2 for just 1-2 minutes to combine ingredients evenly. For rolling, a marble rolling pin (like the Nordic Ware) gives you consistent thickness and prevents sticking better than glass or plastic.
Don’t skip the parchment paper—it prevents sticking and makes transferring baked samosas effortless. I line two baking sheets at once to maximize oven space. A pastry brush (like the OXO Good Grips) helps apply oil evenly to the dough edges for extra crispiness. Keep a small bowl of all-purpose flour nearby for dusting while rolling.
Baking Tools
A digital oven thermometer (such as the Thermoworks Oven Thermometer) ensures your oven hits 400°F accurately—critical for even baking. I also recommend a wire cooling rack to set the samosas after baking, which prevents soggy bottoms. For storage, airtight containers (like Rubbermaid Brilliance) keep samosas fresh for up to 2 days—just reheat at 350°F for 10 minutes to restore crispiness.
If you’re prepping ahead, quart-sized freezer bags work best for storing unbaked samosas—lay them flat to freeze, then bake straight from frozen by adding 5-7 extra minutes. A sharp chef’s knife (like the Wüsthof Classic) helps trim excess dough edges neatly before baking.
Spice & Prep Must-Haves
Invest in a microplane for fresh ginger and garlic—it’s faster than grating and yields finer results. A small mixing bowl (like Pyrex 1.5-quart) keeps the beef filling contained while simmering. For measuring spices precisely, a spice scoop (such as Penzeys Spice Scoops) ensures consistent 1.5 tbsp garam masala and 1 tsp cumin every time.
A fine-mesh strainer comes in handy for rinsing fresh coriander leaves before chopping. I also keep a small saucepan (like All-Clad Stainless Steel) for simmering the filling—its even heat distribution prevents burning. For assembling, a bench scraper helps divide dough portions cleanly.
Budget-Friendly Swaps
No stand mixer? Use a hand mixer (like the KitchenAid KHM5210) or even a wooden spoon for mixing dough by hand—just work quickly to avoid overmixing. Swap marble rolling pins for a glass baking sheet (like Pyrex) as a rolling surface, though it requires more flour. A spoon works for spreading filling, though a small offset spatula gives better control.
For crispiness without oil, brush the dough with melted ghee (or even olive oil) using an old toothbrush—it’s a cheap, effective hack. Store-bought garam masala (like MDH) is fine, but toasting whole spices in a dry skillet for 1 minute before grinding boosts flavor dramatically. Use a measuring cup for flour instead of a spoon—spooning compresses flour, leading to denser dough.
Nutrition facts
Frequently asked questions
Can I make these samosas ahead of time?
Assemble the samosas and store them in an airtight container in the fridge for up to 24 hours before baking. For longer prep, freeze unbaked samosas on a tray, then transfer to a freezer bag. Bake straight from frozen by adding 5-7 extra minutes at 400°F. To reheat baked samosas, warm at 350°F for 10 minutes to restore crispiness.
What's the secret to getting them extra crispy?
The key is thin, even dough and proper baking technique. Roll the dough to 1/8-inch thickness and brush the edges with oil before baking. Bake at 400°F until deep golden brown—don't open the oven during baking to prevent temperature drops. For extra crunch, broil for 1-2 minutes at the end if needed.
Can I use ground turkey or chicken instead of beef?
Yes, but the texture will differ slightly. Ground turkey (especially lean) works best—use 93% lean for similar results. Chicken will be lighter but may dry out faster. Adjust cooking time by 1-2 minutes less for poultry. For extra moisture, add 1 tbsp yogurt to the filling. The spice blend remains the same.
How do I prevent the filling from leaking?
Seal the edges tightly by pinching firmly with wet fingers—this creates a strong bond. Don't overfill (use 2 tbsp per samosa) and press the filling toward the center. For extra security, brush the sealed edges with a thin layer of oil before baking. If you see leaks during baking, cover with foil for 5 minutes to finish cooking.
What's the best way to serve these?
Serve warm with classic accompaniments like mint chutney, tamarind sauce, or yogurt dip. For a complete meal, pair with basmati rice or a simple cucumber raita. These samosas also make great appetizers—arrange on a platter with toothpicks for easy serving. The crispy texture holds up well, so they're perfect for buffet-style gatherings.