
Main Courses
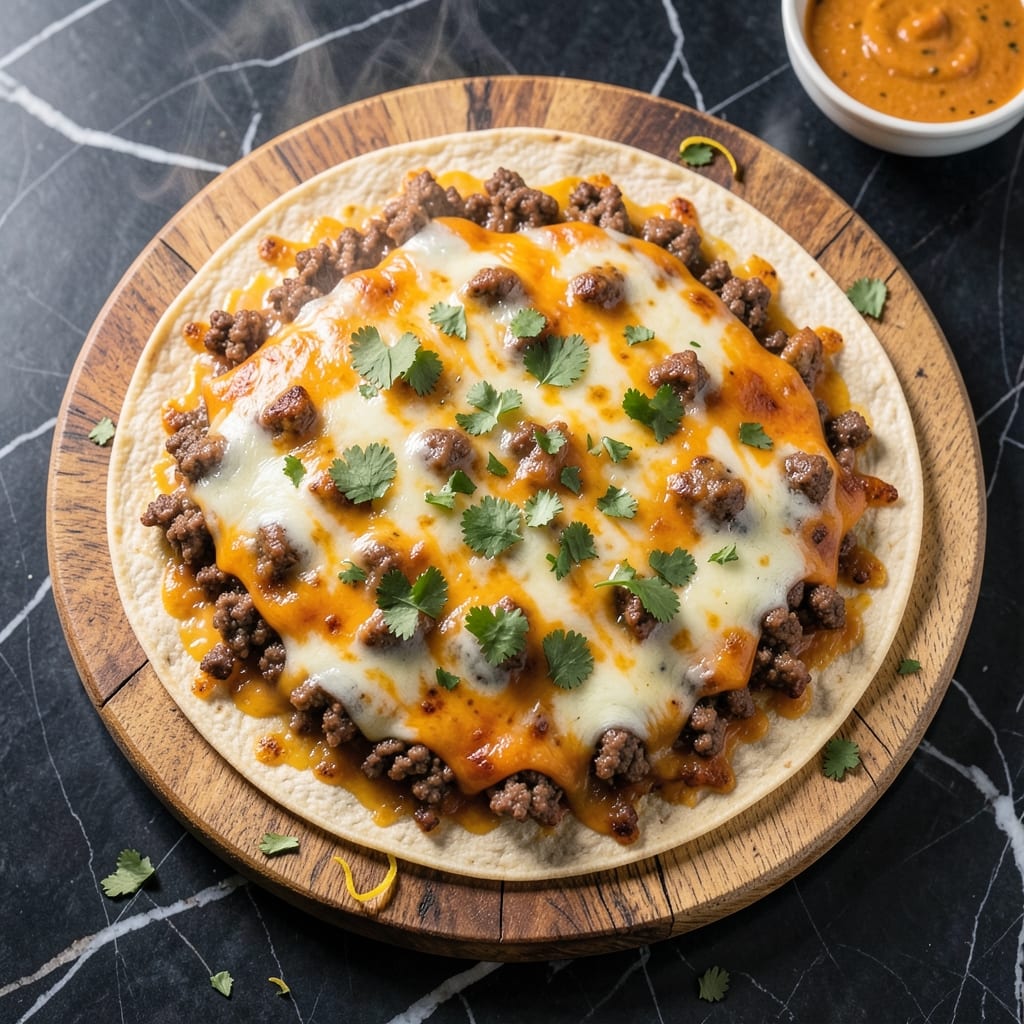
This baked beef quesadilla recipe delivers crispy tortilla edges and rivers of melted cheese that make every bite irresistible. 🔥 The secret lies in browning the beef first—this creates deep, savory flavor that transforms a simple filling into something restaurant-worthy. With just 15 minutes of active prep and 10 minutes in the oven, you'll have a dinner that feels indulgent without requiring hours of effort.
What sets this recipe apart is the foolproof technique for achieving that perfect crunch: baking at high heat with a light spray of oil on the tortillas. The beef mixture—seasoned with cumin, chili powder, and garlic—adds layers of warmth that complement the sharp cheddar and Monterey Jack perfectly. Even picky eaters can't resist the combination of textures: crispy shell, gooey cheese, and tender beef all working together.
By the time it emerges from the oven, your quesadilla will have golden-brown edges that shatter with each bite, while the cheese inside stretches into glossy, molten rivers. The aroma alone will have everyone gathered around your table, and the first forkful delivers that satisfying contrast of textures. This is the kind of dish that turns a simple weeknight into a memorable meal.
Serve with sour cream, salsa, or guacamole for dipping, or pair it with a simple side salad to balance the richness. The recipe scales easily too—double the ingredients for a crowd, or make individual-sized quesadillas for a fun, interactive meal. Let's get started on creating this crowd-pleasing favorite.
Ingredients for baked beef quesadilla
Four crispy tortillas, tender beef, and rivers of melted cheese await—just 15 minutes to restaurant-quality perfection.
| Ingredient | Amount | Notes |
|---|---|---|
| Flour Tortillas 🌯 | 4 whole | Large (10-inch) for extra crispiness |
| Ground Beef 🥩 | 1 lb | 80/20 fat ratio for juiciness |
| Cheddar Cheese 🧀 | 1 ½ cups | Sharp variety, freshly shredded |
| Monterey Jack Cheese 🧀 | 1 cup | Mild, freshly shredded |
| Cooking Oil Spray 🫒 | 2 tbsp | Light olive oil preferred |
| Garlic Cloves 🧄 | 3 cloves | Minced for beef seasoning |
| Ground Cumin 🌿 | 1 tbsp | Toasted for deeper flavor |
| Chili Powder 🌶️ | 1 ½ tbsp | Medium heat preferred |
| Salt 🧂 | 1 tsp | Diamond Crystal preferred |
| Black Pepper 🌶️ | ½ tsp | Freshly ground |
| Sour Cream 🥛 | ½ cup | For serving (optional) |
| Salsa 🍅 | ½ cup | Medium heat preferred |
| Guacamole 🥑 | ½ cup | Freshly made preferred |
| Lime Wedges 🍋 | 2 whole | For serving |
The tortillas are non-negotiable for that signature crunch. Mission brand flour tortillas from the store's international aisle deliver the best texture—thick enough to hold up but pliable enough to fold. If you can't find them, La Tortilla Factory is a solid backup. Look for tortillas with minimal preservatives; the fresher, the better for crisping. The beef should be 80/20 fat ratio—this ensures juicy, flavorful bites that won't dry out during baking. Pre-shredded cheese is convenient, but freshly grating your own prevents clumping and melts more smoothly. For the cheeses, Kraft sharp cheddar and Monterey Jack from the deli section strike the perfect balance of sharpness and creaminess.
No cumin? Smoked paprika at double the amount works in a pinch, though it won't have the same earthy depth. Chili powder varies wildly—Penzeys brand is my go-to for consistent medium heat, but any labeled 'medium' should suffice. The beef mixture can be prepped up to 2 days ahead and stored in the fridge; just reheat gently before assembly. For a vegetarian twist, swap the beef for crumbled tempeh or spiced black beans. The cooking oil spray is critical—Misto brand gives the most even, light coating. If you're short on time, a pastry brush with melted butter works too, though it's less crispy. The sour cream, salsa, and guacamole are all about freshness—store-bought will work, but homemade elevates the dish dramatically.
Assembled quesadillas keep for 1 hour at room temperature before baking, but don't leave them longer than that or the tortillas will soften. Baked quesadillas reheat beautifully—30 seconds in a dry skillet over medium heat restores that crispy edge. Leftovers? 3 days in the fridge or 1 month frozen between parchment paper. For freezing, bake first, then store—this preserves the texture better than freezing raw. The cheese rivers are at their peak immediately after baking, so serve with your toppings ready. Lime wedges should be freshly cut for serving—Mexican Key limes add a brighter tang than regular limes.
Why You'll Love This Recipe
- No-Fuss Assembly: I swear by this recipe because it’s the kind of meal where you can still have a conversation while cooking. Brown the beef, shred the cheese, slap it all between tortillas—no flipping, no frying mess, just a quick spray of oil and into the oven. Honestly, my kids think it’s "fancy" because it’s not the same old stove-top quesadilla they’ve seen a hundred times.
- Melty Magic: That combo of cheddar and Monterey Jack? It’s where the magic happens. The cheddar gets sharp and gooey while the Monterey Jack stays just creamy enough—like a hug in every bite. And the beef? Seasoned simply with salt, pepper, and maybe a pinch of cumin, so it doesn’t overpower the cheeses. (Yes, even on a Tuesday night.)
- Double-Duty Dinner: Make a big batch of beef filling and you’ve got lunch for tomorrow or a quick snack for the kids after school. I like to cut the baked quesadillas into triangles and pack them with a side of sour cream or salsa—no reheating needed. It’s my go-to for game days, lazy Sundays, or when I’m too tired to think but still need to feed everyone.
- Budget Win: Ground beef and tortillas are cheap staples, and this recipe stretches them further than you’d expect. A single pound of beef makes four quesadillas, and the cheeses stretch thin but still taste indulgent. I’ll be real: it’s the kind of meal that makes grocery money last longer without feeling like you’re sacrificing flavor. (My wallet thanks me every time.)
Step-by-step instructions for baked beef quesadilla recipe
Achieve that perfect crispy tortilla crunch with gooey cheese rivers using these precise techniques.
🍳 Step 1: Season and Cook the Ground Beef
Heat a large skillet over medium-high heat and add the 1 lb ground beef (80/20 fat ratio). Let it brown undisturbed for 3-4 minutes until the meat loses its raw color and begins to crisp at the edges. This initial sear develops deep flavor.
Push the beef to one side of the pan and add the 2 tbsp cooking oil spray. When the oil shimmers, add the 3 minced garlic cloves and cook for 30 seconds until fragrant. Sprinkle in the 1 tbsp ground cumin, 1.5 tbsp chili powder, 1 tsp salt, and 0.5 tsp black pepper, stirring to coat the beef evenly. Cook for another 2-3 minutes until the spices bloom and the beef is fully cooked through. Drain any excess fat if needed, but leave about 1 tablespoon in the pan for flavor.
👨🍳 Step 2: Assemble the Quesadillas
Preheat your oven to 400°F and line a baking sheet with parchment paper. Lay out the 4 large flour tortillas on a clean surface. Divide the cooked beef evenly among them, spreading about ¼ lb per tortilla. Sprinkle ½ cup cheddar cheese and ¼ cup Monterey Jack cheese over each half of the beef.
Fold each tortilla in half, pressing gently but firmly to create a neat half-moon shape. The cheese should be evenly distributed between the tortilla layers. Place the assembled quesadillas on the prepared baking sheet, seam-side down. Lightly spray the top of each quesadilla with ½ tbsp cooking oil spray to promote browning. This step ensures the tortillas crisp up perfectly without becoming soggy.
🔥 Step 3: Bake Until Golden and Crispy
Bake the quesadillas for 12-15 minutes, flipping them once halfway through at the 7-minute mark. You're looking for tortillas that are deep golden brown with crisp edges and cheese that's melted into rivers. The key is patience—if you peek too early, they'll steam instead of crisp.
Watch carefully after 10 minutes as ovens vary. You'll know they're done when the tortillas release easily from the baking sheet and the cheese has fully melted. If any spots seem undercooked, return them to the oven for 1-2 minutes more. The cheese should be bubbly and the tortillas should have a satisfying crunch when you press the edges.
🍽️ Step 4: Serve with Toppings
Transfer the quesadillas to a cutting board and let them rest for 2-3 minutes before slicing. This resting period helps the cheese set slightly, making them easier to cut into neat wedges. Cut each quesadilla into 4 equal wedges and arrange them on a serving platter.
Serve immediately with the 0.5 cup salsa, 0.5 cup guacamole, and 0.5 cup sour cream on the side. Squeeze the 2 lime wedges over the top just before serving to brighten the flavors. The contrast of cool toppings against the warm, crispy quesadillas creates the perfect balance of textures and temperatures.
Pro Tips For Making Baked Beef Quesadilla
- Preheat Pan to 375°F: I learned this the hard way—starting at 350°F makes your quesadillas sweat instead of crisp. That temperature locks in the cheese melt while toasting the tortillas evenly. (Yes, even if your oven runs hot—check with a thermometer if you’re skeptical.)
- Drain Beef Fat: After cooking the ground beef, spread it on paper towels and press gently. That extra fat keeps your quesadillas greasy and soggy. Trust me, the flavor stays just as rich—it’s just drier in the best way.
- Layer Cheese Evenly: Skip the lazy pile in the center. Spread the cheddar and Monterey Jack in a thin, even layer all the way to the edges. This guarantees every bite has that perfect melty pull, not just the middle.
- Spray Tortillas Before Stacking: A quick spray of oil on both sides before folding prevents sticking and helps the cheese crisp up. (Pro move: Use a light hand—too much oil makes them greasy instead of golden.)
Creative variations of this baked beef quesadilla
Spicy Chipotle Twist
For a smoky, spicy kick, mix 1 tbsp adobo sauce from canned chipotles into the beef seasoning. The smoldering heat from chipotle pairs perfectly with the cumin and chili powder, adding depth that lingers on your palate. I like to use Penzeys brand adobo sauce for its balanced heat and smokiness. Serve with extra sour cream to cool the spice if needed. 🌶️
Breakfast Quesadilla
Transform this into a morning meal by swapping the beef for crumbled breakfast sausage and adding ½ cup scrambled eggs mixed into the cheese. I use Johnsonville brand breakfast sausage for its mild, herby flavor. Top with sautéed bell peppers and crumbled bacon for a hearty start to your day. The crispy tortilla adds a satisfying crunch that balances the soft eggs perfectly.
Vegetarian Black Bean
Swap the beef for 1.5 cups cooked black beans (drained and slightly mashed) mixed with 1 tsp smoked paprika and ½ tsp cumin. Add ½ cup corn kernels for sweetness and texture. The beans hold up beautifully in the oven, and the smoky spices create a flavorful vegetarian alternative. Serve with avocado crema (mix guacamole with sour cream) for extra richness. 🌱
Buffalo Chicken
Shred 1.5 cups cooked chicken breast and toss with ¼ cup buffalo sauce and 1 tbsp melted butter. Mix this into the cheese layer for a tangy, spicy kick. The heat from the buffalo sauce cuts through the richness of the cheese, creating a flavor explosion. Serve with ranch dressing and blue cheese crumbles for dipping. This version is a game-changer for game day gatherings.
Sweet Potato Stuffed
Add ½ cup mashed sweet potato to the cheese layer for a touch of natural sweetness. The sweet potato soaks up the spices beautifully and adds a creamy texture that pairs wonderfully with the beef. Roast the sweet potatoes ahead of time with ½ tsp cinnamon and ¼ tsp nutmeg for extra warmth. This variation is perfect for fall and winter meals, offering a cozy twist on the classic quesadilla.
Extra Cheesy Bacon
Add 4 slices cooked bacon, crumbled, to the beef mixture for smoky depth. Top each quesadilla with an extra ¼ cup pepper jack cheese before baking. The bacon adds a salty crunch that contrasts beautifully with the gooey cheese. I like to use Oscar Mayer bacon for its consistent quality. This version is a crowd-pleaser, especially for bacon lovers. 🥓
Nutrition facts
Frequently asked questions
Why does my quesadilla turn out soggy instead of crispy? Soggy quesadillas usually happen when the tortillas steam instead of crisp.
Can I make these ahead of time?
Assemble the quesadillas up to 1 hour ahead and refrigerate them. When ready to bake, add 2-3 extra minutes to the cooking time since they'll be colder. For freezing, bake first, then wrap tightly in foil. Reheat in a 350°F oven for 5-7 minutes or until crispy again. The cheese may lose some of its gooeyness but will still taste delicious.
What's the best way to warm up leftovers?
For that perfect crispy texture, place leftover quesadilla wedges in a dry skillet over medium heat for 1-2 minutes per side. The dry heat helps restore the crunch without making them soggy. If using the oven, bake at 375°F for 5-7 minutes on a baking sheet lined with parchment paper. Microwaving works in a pinch but will make them rubbery.
Can I use corn tortillas instead of flour?
Corn tortillas will work but won't give the same crispy texture as flour. They tend to be more delicate and may tear when folded. If you prefer corn tortillas, try using slightly larger ones (like 6-inch) and bake them at 375°F instead of 400°F to prevent burning. They'll be softer but still tasty—just not as crispy as flour tortillas.
How do I make these gluten-free?
Swap the flour tortillas for gluten-free corn tortillas or certified gluten-free flour tortillas like Mission brand gluten-free. For the beef filling, check that your spices (like chili powder and cumin) are certified gluten-free. The cheese and other ingredients are typically safe, but always verify labels. The texture will be slightly different but still delicious.