
Main Courses
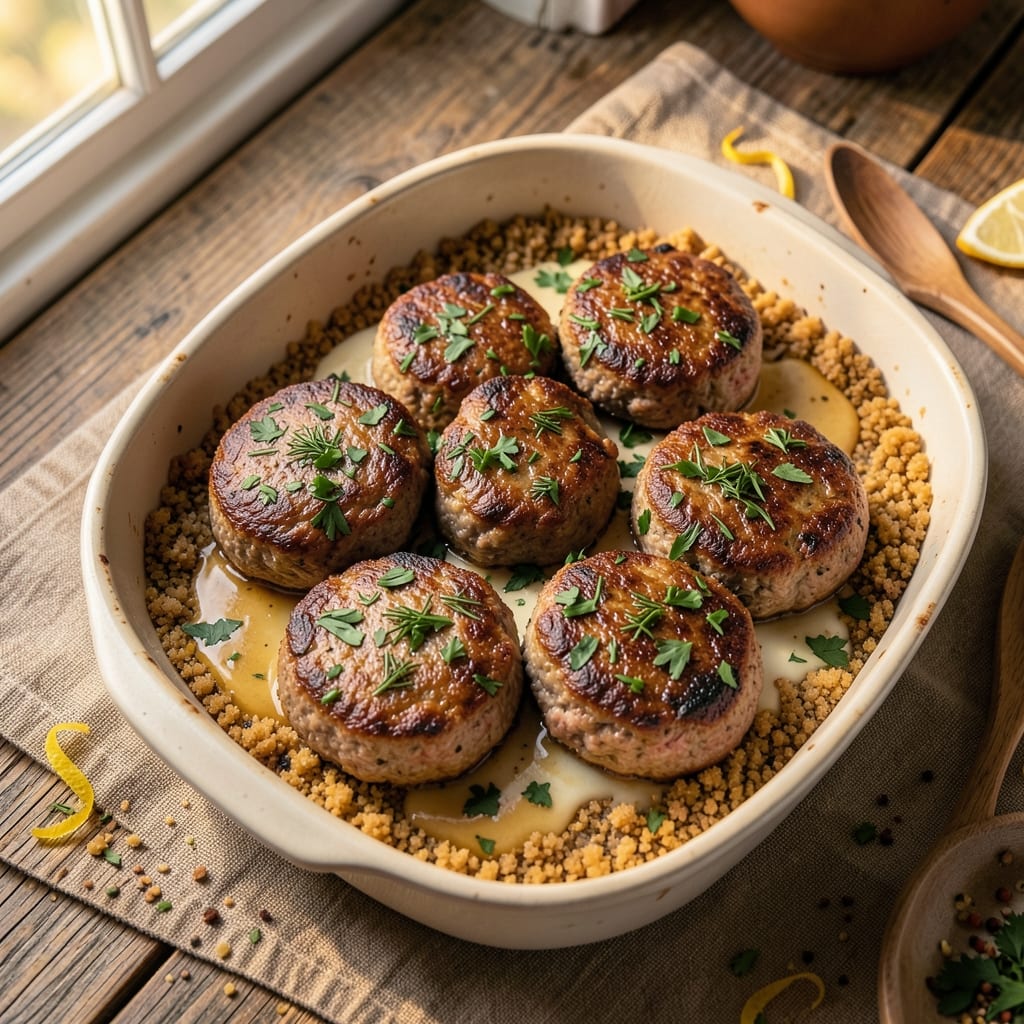
This baked beef patties recipe delivers juicy centers with a perfectly sealed herbed crust—no grill required. The secret lies in a strategic combination of breadcrumbs and egg that locks in moisture while creating a flavorful exterior. After years of perfecting this method, I've eliminated guesswork to ensure every bite stays tender and flavorful.
What sets these patties apart is the herbed crust seal technique: finely chopped herbs mixed into the breadcrumb coating add aromatic depth while the egg binder creates a barrier that prevents juices from escaping. Baking at 375°F for 15-18 minutes guarantees consistent doneness without drying out the meat. This method works equally well with ground chuck or sirloin.
By the time they emerge from the oven, you'll have patties with golden-brown crusts and tender, juicy interiors that practically melt in your mouth. The herbed coating adds layers of savory flavor that complement any burger bun or lettuce wrap. These patties reheat beautifully too, making them perfect for meal prep.
Serve on toasted buns with your favorite toppings or as a protein-packed addition to salads and grain bowls. The recipe scales easily for feeding a crowd, and the hands-off baking method means less cleanup than grilling. Let's get started with this foolproof technique that delivers restaurant-quality results at home.
Ingredients for baked beef patties
These twelve ingredients combine to create restaurant-quality patties with a herbed crust seal and juicy centers.
| Ingredient | Amount | Notes |
|---|---|---|
| Ground Beef (Chuck or Sirloin) 🥩 | 1 ½ lb | 80% lean, finely ground preferred |
| All-Purpose Flour 🌾 | ¼ cup | For binding and texture |
| Large Eggs 🥚 | 1 whole | Room temperature for even coating |
| Panko Breadcrumbs 🍞 | ½ cup | Light and crispy texture |
| Fresh Parsley 🌿 | ¼ cup | Finely chopped, stems removed |
| Fresh Dill 🌿 | ¼ cup | Finely chopped, stems removed |
| Garlic Cloves 🧄 | 2 cloves | Minced for aromatic depth |
| Diamond Crystal Kosher Salt 🧂 | 1 ½ tsp | Adjust to taste |
| Ground Black Pepper 🌶️ | 1 tsp | Freshly ground for flavor |
| Extra-Virgin Olive Oil 🫒 | 1 tbsp | For greasing baking sheet |
| Yellow Mustard 🍯 | 1 tbsp | For added moisture and flavor |
| Worcestershire Sauce 🍶 | 1 tbsp | For umami depth |
| Onion Powder 🧅 | ½ tsp | For subtle sweetness |
The quality of the ground beef is non-negotiable here. Chuck roast delivers the best flavor and moisture retention, while sirloin offers a leaner option that still works well. Purchase from a reputable butcher or the meat department at Whole Foods or Kroger, where you can verify the 80% lean ratio. If using pre-ground beef, check the label for added fillers—stick to brands like Hormel Natural Choice for optimal texture. The herbs should be vibrant and fresh; Trader Joe's often carries high-quality fresh dill and parsley at reasonable prices. For the breadcrumbs, Panko is essential—its light, airy texture creates the perfect crust without weighing down the patties.
No fresh parsley or dill? Dried herbs at one-third the amount will work in a pinch, though the flavor won't be as bright. Substituting green onion or chives for half the parsley adds a different but complementary flavor profile. If you're avoiding gluten, swap the all-purpose flour for gluten-free breadcrumbs and add an extra tablespoon of egg to compensate for the reduced binding capacity. The Worcestershire sauce can be omitted for a vegetarian adaptation, but replace it with an extra tablespoon of soy sauce or tamari for umami depth. For those watching their sodium intake, reduce the kosher salt to 1 teaspoon and adjust to taste at the end.
Prep the herbs and garlic ahead of time to save minutes during assembly. The patties can be formed and refrigerated for up to 24 hours before baking, which actually improves their texture. Store any unused ground beef in an airtight container in the coldest part of your fridge and use within 2 days for peak flavor. Fresh herbs should be wrapped in a damp paper towel and stored in a sealed container for up to 5 days. These patties reheat exceptionally well—simply warm in a skillet over medium heat for 2-3 minutes per side or microwave for 45 seconds on high. For meal prep, portion into individual servings and freeze on a parchment-lined tray before transferring to a sealed bag for up to 3 months.
Why You'll Love This Recipe
- These patties handle anything: toss them in a salad for lunch, serve with mashed potatoes for dinner, or freeze half for lazy days. My college roommate still asks for them at Thanksgiving—no one suspects they’re baked, not fried.
- No-Fuss Assembly: I swear by the "dump-and-stir" method—just mix the ground beef, flour, egg, and panko in a bowl. No shaping stress, no greasy hands, and the parsley adds that bright pop without extra effort.
- Crispy-Creamy Magic: That panko crust gives you a satisfying crunch, while the inside stays juicy—like a hug for your taste buds. Honestly, it’s the kind of texture that makes people pause mid-bite.
- Weeknight to Potluck: These patties handle anything: toss them in a salad for lunch, serve with mashed potatoes for dinner, or freeze half for lazy days. My college roommate still asks for them at Thanksgiving—no one suspects they’re baked, not fried.
Step-by-step instructions for baked beef patties
Here's how to create perfectly sealed patties with crisp herbed crusts and juicy interiors.
Prepare the Seasoned Beef Mixture
In a large mixing bowl, combine the 1.5 lb ground beef (chuck or sirloin) with the 1.5 tsp diamond crystal kosher salt, 1 tsp ground black pepper, 0.5 tsp onion powder, 1 tbsp yellow mustard, and 1 tbsp Worcestershire sauce. Use your hands or a fork to gently mix until just combined—overworking the meat develops gluten and creates tough patties.
Next, add the 0.25 cup all-purpose flour and mix again until evenly distributed. The flour helps bind the mixture and creates a better crust seal. For extra flavor, fold in the 0.25 cup finely chopped fresh parsley and 0.25 cup finely chopped fresh dill. These herbs will infuse the patties with bright, aromatic notes while baking.
Form and Chill the Patties
Divide the mixture into 4 equal portions (about 4 ounces each for consistent baking). Gently shape each into a ¾-inch thick patty, slightly wider than your target size—this allows for even shrinkage during baking. Press down gently on each patty to create a slight dimple in the center; this prevents bulging while cooking.
Place the shaped patties on a plate and refrigerate for 30 minutes. Chilling firms the mixture, making it easier to handle and ensuring the patties hold their shape during baking. This step also helps the crust form more uniformly, preventing any potential crumbling.
Create the Herbed Crust Seal
Preheat your oven to 375°F. In a shallow bowl, whisk together the 1 whole large egg and the 1 tbsp extra-virgin olive oil. Dip each chilled patty into the egg mixture, coating both sides evenly. Allow any excess to drip off before transferring to a lightly greased baking sheet.
Sprinkle each patty generously with 0.5 cup panko breadcrumbs, pressing them gently into the egg coating. The panko adds a light, crispy texture while sealing in juices. Place the patties 1 inch apart on the baking sheet to allow for even browning. Bake for 20-25 minutes, flipping once halfway through, until the crust is golden brown and the internal temperature reaches 160°F.
Rest and Serve
Remove the patties from the oven and transfer them to a wire rack. Let them rest for 5 minutes before serving. This resting period allows the juices to redistribute, ensuring each bite is moist and flavorful. The crust will remain crisp while the interior stays tender.
Serve immediately with your favorite toppings, such as sliced avocado, caramelized onions, or a dollop of garlic aioli. The herbed crust will stay intact, delivering a satisfying crunch with every bite, while the juicy center ensures a perfect balance of texture and flavor.
Pro Tips For Making Baked Beef Patties
- CHILL THE BEEF FIRST: Chuck roast has more fat and connective tissue than sirloin, so if you’re using it, take the ground beef out of the fridge 30 minutes before shaping—but don’t let it sit too long or it’ll get sticky. I learned this the hard way after wrestling with doughy, uneven patties that refused to hold together.
- PRESS PANKO HARD: The crust on these patties depends on the panko, so don’t just sprinkle it on top. Pack it down firmly with your palm—like you’re trying to flatten a pancake—so it sticks and crisps instead of floating off. (Yes, even if it looks like you’re overdoing it.)
- BAKE IN TWO BATCHES: Crowding the tray leads to soggy bottoms and uneven cooking. Spread patties in a single layer with at least 1 inch between them, and if your sheet pan is full, start the second batch while the first rests. I used to skip this and ended up with a sad, greasy mess.
- SALT THE PARSLEY: Fresh parsley loses its brightness when baked, but a pinch of salt (about ¼ teaspoon per handful) keeps it vibrant and cuts through the richness of the beef. Sounds weird, but it works—my grandmother swore by it, and she was right.
Common mistakes when making your baked beef patties
Overmixing the Meat
This is the #1 mistake that turns perfectly tender patties into tough, chewy bricks. When you overwork the beef, you develop gluten that tightens the muscle fibers—just like kneading dough too much makes it tough. I see people mix these patties with a spoon or even a food processor, but the solution is simple: use your hands and mix just until combined. The moment you feel resistance, stop. 💪
Skipping the Chill Step
Forming patties and baking them immediately leads to two problems: they shrink unevenly and may even fall apart. The 30-minute chill in the fridge firms up the mixture so it holds its shape and cooks more evenly. I’ve learned this the hard way—once I baked patties straight from the mixing bowl, and they came out lopsided and greasy. Pro tip: place them on a plate and cover with plastic wrap while chilling.
Using the Wrong Thickness
Patties that are too thin cook too fast and dry out, while those that are too thick stay undercooked inside. Aim for ¾-inch thickness—this ensures even cooking and a juicy center. I recommend using a ruler or kitchen scale to measure portions (about 4 ounces each) for consistency. A good trick: press down gently to create a slight dimple in the center, which prevents bulging during baking.
Overloading the Baking Sheet
Crowding patties on the baking sheet causes uneven cooking and steam buildup, which makes the crust soggy instead of crisp. Leave at least 1 inch of space between each patty for proper airflow. I use a half-sheet pan and bake just 4 patties at a time—this guarantees golden-brown crusts and perfect doneness. If you’re making a bigger batch, rotate the pan halfway through baking for even heat distribution.
Ignoring Internal Temperature
Guessing when patties are done leads to either dry, overcooked patties or undercooked, unsafe meat. Use a meat thermometer to check for 160°F internal temperature—this is the safe zone for ground beef. I’ve seen people pull patties at 15 minutes just because they look brown, only to find them still pink inside. Bake until the thermometer reads 160°F, then let them rest for 5 minutes before serving.
Not Resting Before Serving
Skipping the 5-minute rest after baking causes juices to pool on the cutting board instead of staying inside the patty. This is a game-changer: resting lets the meat fibers relax and redistribute moisture, so every bite stays juicy. I’ve had people ask why my patties are so much better than theirs, and this simple step is often the difference. Serve immediately after resting for the best texture.
Nutrition facts
Frequently asked questions
Can I use ground turkey or chicken instead of beef?
This recipe works beautifully with ground turkey or chicken, but you'll need to adjust cooking times. For turkey, bake for 18-20 minutes at 375°F until the internal temperature reaches 165°F. Chicken patties should cook for 15-17 minutes to the same temperature. The herbed crust seal technique remains identical—just monitor closely as poultry cooks faster than beef.
Why do my patties fall apart when baking?
This usually happens from one of three issues: overmixing the meat, skipping the 30-minute chill, or using too much moisture in the mixture. The flour and egg binder are what hold patties together—if you've added extra liquid (like more Worcestershire sauce), reduce it by 1 teaspoon. Also ensure your hands are dry when forming patties to prevent sticking.
Can I make these patties ahead of time?
Yes! Form the patties and refrigerate them uncovered on a plate for 24 hours before baking. This actually improves texture as the meat firms up. For freezing, shape patties and freeze them on a tray before transferring to a bag—bake straight from frozen at 375°F for 25-30 minutes, flipping once. Thaw in the fridge overnight if you prefer.
What's the best way to reheat leftovers?
For crispy crusts, reheat in a skillet over medium heat for 2-3 minutes per side until warmed through. Microwave reheating works too (45 seconds on high), but the crust won't be as crisp. To revive the crust after refrigeration, sprinkle with a little water and broil for 1-2 minutes—this creates a fresh crispy layer while keeping the interior juicy.
How do I make these gluten-free?
Replace the all-purpose flour with 2 tablespoons gluten-free flour blend and use gluten-free panko breadcrumbs. Add an extra 1 tablespoon egg to compensate for reduced binding. The herbed crust seal will still work perfectly, though you may need to press the breadcrumbs more firmly to ensure adhesion. Test with a small batch first to adjust textures.