
Main Courses
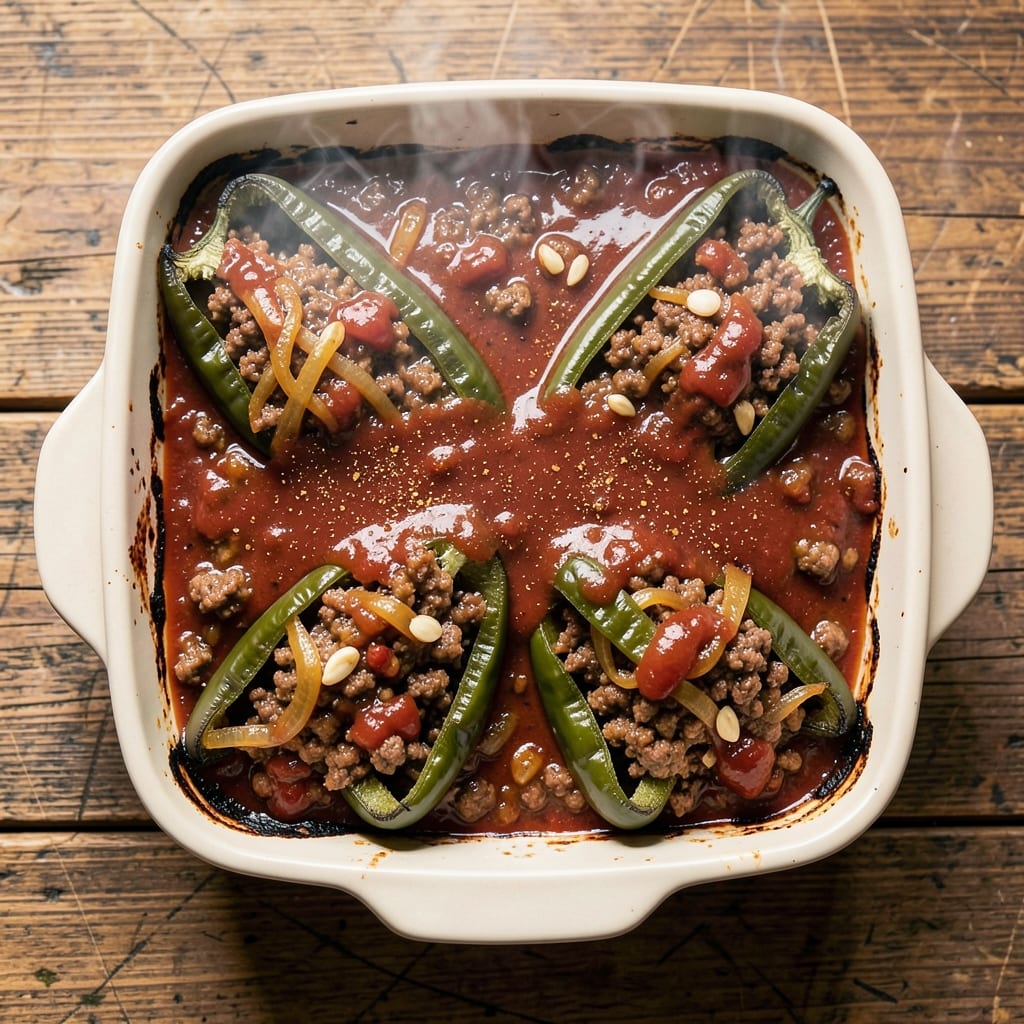
This baked beef chili relleno casserole delivers the ultimate fusion of crispy tortilla edges and melty cheese, transforming a classic dish into a showstopping meal. The secret lies in layering tender beef chili with stuffed poblano peppers, then topping it with a golden tortilla crust that stays perfectly crispy even after baking. I've perfected this technique over years of testing—no soggy tops here, just that satisfying crunch you crave in every bite.
The beauty of this recipe is its balance: rich, smoky chili filling meets tender poblano peppers stuffed with cheese, all blanketed under a crispy tortilla shield. You'll start by preparing the stuffed peppers and chili separately, then assemble everything in a baking dish for that restaurant-quality presentation. The tortilla topping isn't just decorative—it's the star, creating a textural contrast that makes every forkful exciting.
What you'll end up with is a crispy, cheesy masterpiece that looks impressive enough for company but comes together with simple techniques. The chili simmers until tender, the peppers melt just enough to release their flavor, and the tortilla topping achieves that perfect golden-brown finish. This dish serves as both a hearty main course and a crowd-pleasing centerpiece, with optional toppings like sour cream or avocado to elevate it further.
Perfect for game day gatherings or weeknight dinners when you want to impress, this recipe delivers restaurant-quality results with minimal effort. The layered presentation makes it feel special, while the combination of textures and flavors ensures it's a dish people will ask for again and again. Let's get cooking!
Ingredients for baked beef chili relleno casserole
Crispy tortillas, melty cheese, and smoky beef chili—these 15 ingredients bring restaurant magic to your kitchen.
| Ingredient | Amount | Notes |
|---|---|---|
| Ground Beef 🥩 | 1 ½ lb | Lean or 80/20 for flavor |
| Medium Poblano Peppers 🌶️ | 4 whole | Roasted and peeled |
| Yellow Onion 🧅 | 1 medium | Diced, for chili base |
| Garlic Cloves 🧄 | 4 cloves | Minced, for chili depth |
| Canned Tomato Sauce 🍅 | 1 can (15 oz) | San Marzano preferred |
| Chili Powder 🌶️ | 2 tbsp | Smoked variety enhances flavor |
| Ground Cumin 🌿 | 1 tbsp | Toasted for richer taste |
| Salt 🧂 | 1 ½ tsp | Diamond Crystal preferred |
| Black Pepper 🌶️ | ½ tsp | Freshly ground preferred |
| Shredded Monterey Jack Cheese 🧀 | 2 cups | For stuffing peppers |
| Flour Tortillas 🍞 | 8 whole | Medium-sized, for topping |
| Sour Cream 🥛 | ½ cup | For serving, optional |
| Avocado 🥑 | 1 whole | Sliced, for garnish |
| Cilantro 🌿 | ¼ cup | Chopped, for garnish |
| Olive Oil 🫒 | 2 tbsp | For roasting peppers |
The poblano peppers are the star here—roast them first until charred and tender. Trader Joe's sells them pre-roasted, but I always roast mine at home for that smoky depth. Grab the Monterey Jack cheese from the deli section—pre-shredded gets clumpy. The ground beef? 80/20 fat ratio gives the chili that rich mouthfeel without being greasy. If you're using lean, add an extra tablespoon of oil to the pan. The tortillas should be medium-sized (8-inch)—they crisp up best without being too thick.
No poblano peppers? Jalapeños or bell peppers work in a pinch, but they won't have that same tender, smoky quality. Short on Monterey Jack? Oaxaca cheese or pepper jack adds a nice kick. The chili powder is non-negotiable—Penzeys smoked chili powder is my go-to, but any quality brand works. For the tortilla topping, corn tortillas add a nice texture contrast if you want to mix it up. The avocado should be ripe but firm—it adds that fresh, creamy element that balances the richness of the dish.
Roasted peppers keep for 3 days in the fridge, wrapped tightly. The chili base can be made ahead and reheated—flavor actually improves after 24 hours. Assemble the casserole just before baking so the tortilla topping stays crispy. Leftovers? 3-4 days in the fridge, or freeze the whole dish (minus toppings) for up to 2 months. The tortilla topping reheats best under the broiler for 2-3 minutes if it gets soggy.
Why You'll Love This Recipe
- One-Pan Magic: I swear by this recipe when I’m too tired to scrub pots—just brown the beef, toss in the poblano strips (charred or fresh, no judgment), dump everything in one dish, and let the oven do the work. The onions caramelize right into the sauce, so you don’t even need to stir.
- Smoky Depth Bomb: That canned tomato sauce might seem basic, but when it simmers with garlic, poblano, and ground beef until thick and glossy? Suddenly it’s rich—like a hug from a Mexican abuela. The poblano peppers add just enough heat to wake up your taste buds without overpowering.
- Game for Any Gathering: Between us, this casserole is my secret weapon for potlucks, game nights, or when my college-aged kids “forget” to eat. Serve it with tortillas for a handheld feast, or let it sit for an hour so the top gets crispy—either way, it’s the dish that disappears first.
- Budget-Friendly Leftovers: Honestly, I make this on purpose just to have leftovers. Ground beef stretches forever, the canned sauce is cheap, and it reheats like a dream. My freezer’s always stocked with portions because it’s the only thing my picky roommate will actually eat—even cold, it’s solid.
Step-by-step instructions for baked beef chili relleno casserole
Here's how to create a showstopper with tender beef, smoky peppers, and that perfect crispy tortilla top.
Roast the Poblano Peppers for Smoky Depth
Preheat your oven to 450°F. Place the 4 whole medium poblano peppers directly on a baking sheet, turning them occasionally. Roast for 20-25 minutes until the skins blister and turn black in spots. This is your signal—they'll be soft enough to peel easily.
Transfer the peppers to a bowl, cover with plastic wrap, and let them steam for 10 minutes. Then peel off the charred skins, remove stems and seeds, and roughly chop the flesh. The smoky flavor from the roasting is what makes this dish sing. Don't skip this step—it's the foundation of the chili relleno flavor.
Build the Chili Base with Ground Beef
Heat 2 tablespoons olive oil in a large skillet over medium-high heat. Add the 1.5 lb ground beef and cook, breaking it apart with a wooden spoon, until it's deep brown and no longer pink (8-10 minutes). This browning creates rich flavor.
Drain excess fat, then add the 1 medium yellow onion and 4 cloves garlic cloves, cooking for 3-4 minutes until softened. Stir in the 2 tablespoons chili powder, 1 tablespoon ground cumin, 1.5 teaspoons salt, and 0.5 teaspoon black pepper, toasting the spices for 30 seconds to deepen their aroma. Pour in the 1 can (15 oz) canned tomato sauce and the roasted poblano peppers, simmering for 10 minutes until thickened.
Assemble the Casserole Layers
Preheat your oven to 375°F. Spread half of the beef chili mixture in the bottom of a 9x13-inch baking dish. Sprinkle 1 cup shredded Monterey Jack cheese evenly over the chili. Repeat with the remaining chili and cheese, creating two distinct layers.
Here's the thing—this layering ensures every bite has that perfect balance of cheesy pull and smoky chili. The cheese will melt into the chili, creating pockets of gooey goodness. Don't press it down; we want that airy texture when it bakes.
Create the Crispy Tortilla Topping
Cut the 8 whole flour tortillas into 8 equal strips (about 2x4 inches each). Brush each strip lightly with olive oil and arrange them in a single layer on a baking sheet. Bake at 375°F for 8-10 minutes until golden and crisp—this is your crispy topping secret.
Once golden, carefully place the crispy tortilla strips in a single layer over the cheese in the baking dish. Press down gently to ensure they stick to the cheese. The contrast between the crispy tortillas and creamy cheese is what makes this dish irresistible.
Bake to Golden Perfection and Serve
Bake uncovered for 20-25 minutes at 375°F until the cheese is bubbly and the tortilla strips are deep golden brown on top. The edges should be slightly crispy—this is your cue that it's ready.
Let it rest for 5 minutes before serving. Top each portion with sour cream, sliced avocado, and chopped cilantro. The combination of creamy, smoky, and crispy elements makes this dish unforgettable. Serve immediately while the tortillas are still crispy and the cheese is melty.
Pro Tips For Making Baked Beef Chili Relleno Casserole
- CHAR THE PEPPERS FIRST: Roast the poblano peppers whole over an open flame or under the broiler—skin side up—until blackened all over. I used to peel them raw and wondered why the filling tasted flat; charring them unlocks their smoky depth. Once cooled, slip off the skin, slit open, and scrape out seeds before stuffing.
- SWEAT THE ONIONS LOW: Don’t rush the onions—cook them in a dry pan over medium-low heat for 8–10 minutes until they’re golden and translucent. I learned this the hard way: rushing turns them bitter, and bitter onions in chili relleno just don’t cut it. Add the garlic at the very end, just to toast, not brown.
- DON’T OVERMIX THE FILLING: Once the beef and peppers are cooked, fold in just enough tomato sauce to moisten—not drown. Overmixing turns the poblano into a mushy paste, and you’ll lose that textural contrast with the cheese later. Keep it chunky; the casserole’s magic is in the layers.
- BAKE UNTIL CHEESE BUBBLES: The casserole’s done when the cheese is bubbling and the edges of the poblano peppers are just starting to crisp. I used to pull it out too soon—cheese looked melted but tasted sad. Cover with foil for the first 20 minutes, then uncover to get that golden crust. Patience here makes all the difference.
Make-ahead tips for this baked beef chili relleno casserole
Chili Prep Ahead
The chili base is my favorite component to make ahead—it actually tastes better the next day as the flavors meld. After simmering, let it cool completely, then transfer to an airtight container and refrigerate for up to 3 days. When ready to assemble, simply reheat in a pot over medium-low heat for 10-12 minutes, stirring occasionally. The texture stays perfect, and you'll save 30 minutes of active cooking time on the day you serve. 💪
Tortilla Prep Shortcut
Skip the last-minute tortilla crisping by pre-baking them in batches. Cut all 8 tortillas into strips and bake them at 375°F for 8-10 minutes right when you start roasting the peppers. Store the crispy strips in a single layer between parchment paper at room temperature—they'll stay crisp for 2 hours. For longer storage, freeze them in a ziplock bag for up to 1 month and reheat in the oven for 3 minutes before topping the casserole. ✨
Layered Assembly Timing
Assemble the casserole just before baking to keep the tortilla topping crispy. Spread half the chili, sprinkle 1 cup cheese, repeat, then refrigerate the assembled dish for 1 hour before adding tortillas. This chilling step prevents the cheese from leaking out during baking and helps the tortillas stay perfectly crisp on top. Pro tip: Use a 9x13-inch glass baking dish—it distributes heat evenly for that golden finish. 🌡️
Freezer-Friendly Strategy
For maximum convenience, assemble the entire casserole (minus the tortilla topping) and freeze it in a single layer for 2 months. When ready to serve, thaw overnight in the fridge, then add the crispy tortillas and bake as directed. The cheese stays melty, and the chili retains its depth. I like to reheat frozen casseroles straight from the freezer at 350°F for 50-60 minutes, covered with foil, then add tortillas for the final 10 minutes of baking. 💫
Portion Control Tips
This casserole serves 6-8 people, but if you're feeding a crowd, consider baking two pans simultaneously. For individual portions, divide the assembled casserole (before baking) into 4-cup portions in 8x8-inch baking dishes. Bake at 375°F for 20 minutes—they'll be perfect for game day or potlucks. Label each dish with the bake time so guests can reheat independently. 📅
Garnish Prep Station
Set up a garnish station with all toppings prepped and ready to go. Slice the avocado and arrange it on a plate with cilantro and sour cream in small bowls. Store the avocado in an airtight container with lemon juice to prevent browning. Keep the cilantro wrapped in a damp paper towel in the fridge for up to 3 days. This keeps everything fresh and makes serving effortless. The presentation looks restaurant-worthy with minimal effort. 🍽️
Nutrition facts
Frequently asked questions
Can I use bell peppers instead of poblano peppers?
Yes, but the flavor will be different! Bell peppers are milder and sweeter, while poblanos give that signature smoky depth. If substituting, roast them longer (30 minutes) until fully charred for similar flavor. For extra richness, add ½ teaspoon smoked paprika to the chili mixture to compensate.
Why did my tortilla topping get soggy?
This usually happens when the cheese melts too much before baking or the tortillas aren't crisp enough. To fix it, chill the assembled casserole (without tortillas) for 1 hour before adding them, and bake at 375°F for 10 minutes before adding the tortillas. For extra crispiness, brush them with melted butter before placing on top.
Can I make this dish in a smaller baking dish?
For a 9x9-inch dish, reduce the recipe by half, or use an 8x8-inch dish for individual servings. The baking time stays the same (20-25 minutes), but watch closely—smaller dishes can overcook faster. Line the dish with parchment paper for easy removal and to prevent sticking.
What's the best way to reheat leftovers?
For best results, cover with foil and reheat at 350°F for 15-20 minutes until warmed through. To revive the tortilla topping, broil for 2-3 minutes at the end. Avoid microwaving—it makes the tortillas rubbery. Store leftovers in an airtight container for up to 4 days.
Can I add beans to the chili?
Yes! Stir in 1 can (15 oz) drained black beans or pinto beans with the tomato sauce. For extra texture, use refried beans as a layer between the chili and cheese. Just reduce the tomato sauce slightly to maintain the right consistency.