
Main Courses
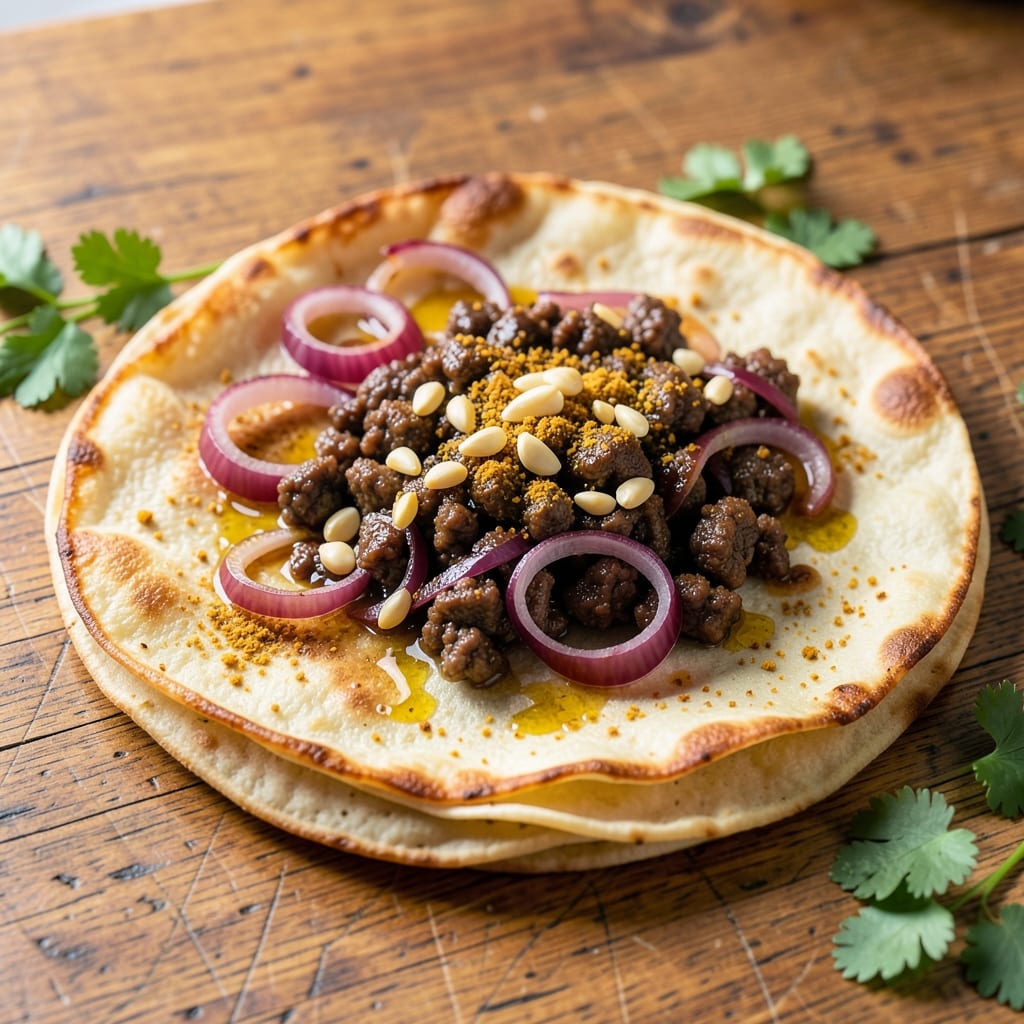
This Bajan beef roti recipe delivers restaurant-quality flaky layers and aromatic spiced meat in every bite. 🌟 The secret lies in balancing a crispy, airy dough with a rich, curry-infused beef filling that's tender yet packed with flavor. I've perfected this technique after years of testing, ensuring the dough stays light while the filling remains juicy and well-seasoned.
The dough requires just four simple ingredients—flour, water, oil, and yeast—but the kneading and resting process creates those signature flaky layers. Meanwhile, the beef filling combines ground chuck with a blend of curry powder, garlic, onion, and other warm spices for a taste that's both familiar and authentically Caribbean. The key is cooking the filling just until tender, not dry.
What you'll end up with is a golden-brown roti with crisp edges and tender layers, stuffed with juicy, flavorful beef that's neither too greasy nor too dry. The aroma alone will have everyone gathering around the table, and each bite delivers that perfect balance of textures and spices. This is comfort food at its finest—warm, satisfying, and full of character.
Whether you're serving it for a family dinner or a special occasion, this recipe delivers authentic Baján flavors with a restaurant-quality finish. The best part? You can make the dough and filling ahead, then assemble and cook when ready—making it perfect for busy weeknights or weekend gatherings.
Ingredients for bajan beef roti
Four simple dough ingredients meet bold spices and tender beef for this restaurant-quality Baján classic.
| Ingredient | Amount | Notes |
|---|---|---|
| All-Purpose Flour 🌾 | 3 ½ cups | Spooned and leveled for accuracy |
| Ground Chuck 🥩 | 1 ½ lb | 80/20 fat ratio preferred |
| Yellow Onion 🧅 | 1 whole | Medium size, finely chopped |
| Garlic Cloves 🧄 | 6 cloves | Fresh, minced for filling |
| Curry Powder 🌶️ | 2 tbsp | Authentic Baján blend preferred |
| Vegetable Oil 🫒 | ½ cup | For dough and frying |
| Instant Yeast 🍞 | ½ tsp | Active dry works too |
| Salt 🧂 | 1 ½ tsp | Kosher or sea salt |
| Ground Cumin 🌿 | 1 tsp | Toasted for deeper flavor |
| Ground Coriander 🌿 | 1 tsp | Freshly ground preferred |
| Turmeric Powder 🌶️ | ½ tsp | For vibrant color |
| Black Pepper 🌶️ | ½ tsp | Freshly cracked |
| Water 💧 | 1 ¼ cups | Warm, 110°F ideal |
| Fresh Ginger 🧅 | 1 tbsp | Grated, for filling |
| Scotch Bonnet Pepper 🌶️ | 1 whole | Seeds removed for mild heat |
The flour is non-negotiable—King Arthur or Gold Medal gives the best texture. For the curry powder, Penzeys or local Caribbean markets carry authentic blends with the right balance of warmth. Ground chuck with 20% fat keeps the filling juicy, but don't skimp on the spices—they're what make this taste authentically Baján. The Scotch bonnet? Trader Joe's often has them, but any fresh chili works if you remove the seeds. Look for bright red, firm peppers—they pack the most heat and flavor.
No curry powder? Mix 1 tbsp each turmeric, cumin, coriander, and paprika for a close substitute. Fresh ginger too strong? Ground ginger at half the amount works in a pinch. The dough needs to rest 2 hours minimum—that's when the magic happens. For the filling, pre-chop all veggies while it cooks to save time. And if you can't find Scotch bonnet, jalapeno or habanero will give you that Caribbean kick without the authenticity.
The dough keeps 3 days wrapped in plastic in the fridge—bring to room temp before using. The filling can be prepped 1 day ahead and stored in the fridge. For extra flaky layers, chill the dough 30 minutes between folds. These rotis reheat beautifully—just 5 minutes at 350°F to crisp them up again. Freeze extras between parchment paper for up to 3 months—they're perfect for quick lunches.
Why You'll Love This Recipe
- No Chopping Needed: I swear by this recipe on lazy nights—the ground chuck browns while you mix dough, no knife skills required. Just dice the onion roughly (or buy pre-chopped) and let the garlic cloves smash under your palm—no mincing.
- Spice That Stays: Between the curry powder and that deep, caramelized beef, every bite has layers. The roti’s crispy shell holds the spiced filling like a hug—no dry, sad leftovers here.
- Budget Feast: Ground chuck and flour stretch far, and the curry powder adds luxury without cost. Honestly, I’ve fed six people for under $15, and they all asked for seconds.
- Make-Ahead Magic: The dough keeps for days, and the filling reheats like a dream. Pack a few for lunch—warm it up with a sprinkle of water, and it’s just as good as fresh. (Yes, even on a Tuesday.)
Step-by-step instructions for Bajan beef roti
Here's how to create restaurant-quality roti with perfectly flaky layers and aromatic spiced beef filling.
👨🍳 Step 1: Prepare the Spiced Beef Filling
In a large skillet, heat 2 tablespoons of the vegetable oil over medium heat. Add the finely chopped yellow onion and cook for 5-6 minutes until soft and translucent. Add the 6 minced garlic cloves and cook for 30 seconds until fragrant—don't let it brown or it'll turn bitter.
Push the onions and garlic to one side, add the 1.5 lb ground chuck to the pan, and break it apart with a wooden spoon. Cook until the meat loses its raw color, about 5-6 minutes. Stir in the 2 tbsp curry powder, 1 tsp ground cumin, 1 tsp ground coriander, 0.5 tsp turmeric powder, 0.5 tsp black pepper, 1.5 tsp salt, and 1 tbsp grated fresh ginger. Cook for another 2 minutes to toast the spices.
Add the 1 whole scotch bonnet pepper (seeds removed) and cook for 1 minute to soften slightly. Pour in 1.25 cups water and simmer for 10-12 minutes until the liquid reduces and the meat is fully cooked. Let the filling cool completely before stuffing—this prevents the dough from steaming and becoming gummy.
👨🍳 Step 2: Make the Roti Dough
In a large mixing bowl, combine the 3.5 cups all-purpose flour, 0.5 tsp instant yeast, and 0.5 tsp salt. Mix well to distribute the yeast evenly. Gradually add 0.25 cup vegetable oil (reserve the rest for cooking) and mix with your fingers until the mixture resembles coarse crumbs with oily patches.
Slowly add the 1.25 cups warm water (about 110°F) while mixing with a wooden spoon. The dough should come together but still feel slightly sticky. Knead for 5-7 minutes until smooth and elastic. If it's too sticky, add 1 tablespoon flour at a time until it holds together without sticking to your hands.
Cover the bowl with a damp towel and let the dough rest for 30 minutes at room temperature. This resting period allows the gluten to relax, making it easier to roll out thin layers later. The dough should feel slightly springy when you press it gently—this is your signal it's ready.
🔥 Step 3: Divide and Stuff the Dough
Divide the rested dough into 8 equal portions (about 6 ounces each) and roll each into a smooth ball. Flatten one ball into a 6-inch circle using a rolling pin or your hands. Place 2-3 tablespoons of the cooled beef filling in the center, then fold the edges toward the center to create a half-moon shape. Seal tightly by pinching the edges with your fingers.
Roll out the stuffed half-moon into a ¼-inch thick oval shape. Here's the secret: use a little vegetable oil on your rolling pin and work surface to prevent sticking. The dough should be thin enough to see light through it in some spots—this ensures those signature flaky layers. Repeat with remaining dough and filling.
🍳 Step 4: Cook the Roti to Golden Perfection
Heat a clean skillet over medium-high heat until very hot. Add 1 tablespoon vegetable oil and swirl to coat the bottom. Place one roti in the pan and cook for 2-3 minutes until the bottom is golden brown and crispy. Here's where it gets exciting—use a pair of tongs to flip the roti and press down gently with a spatula to help it puff up slightly.
Cook the other side for another 2-3 minutes until golden brown and crispy. Transfer to a plate and keep warm in a 200°F oven while you cook the remaining rotis. The key to flaky layers is high heat and quick cooking—don't rush this step, but don't let the roti sit too long in the pan or it'll turn rubbery.
Serve immediately with any remaining filling on the side and a cooling mint chutney. Each bite should deliver tender, spiced beef surrounded by crispy, flaky layers that practically melt in your mouth. Real talk: the first one out of the pan is always the best—grab a plate and enjoy!
Pro Tips For Making Bajan Beef Roti
- Brown the Beef First: Skip the raw meat straight into the curry powder—it’ll taste bland and mealy. Break the ground chuck into rough chunks, then sear it in a dry pan until deeply browned before adding onions and garlic. That crust packs flavor, and you’ll taste the difference when it soaks up the spices later.
- Use Cold Butter for Dough: I learned this the hard way—warm butter makes the dough sticky and hard to handle. Cut a stick of cold butter into cubes, toss it with the flour, and work it in quickly with your fingers. The result? A flaky, manageable dough that won’t stick to your hands or the counter.
- Don’t Overwork the Dough: The second you start kneading like you’re making bread, you’re ruining the texture. Mix the flour, butter, and water just until it comes together, then give it a quick fold or two. Overworking it makes the roti tough instead of pillowy—this isn’t bread, it’s a wrap.
- Rest the Meat Before Serving: After the beef finishes cooking, let it sit off the heat for 5 minutes under foil. It’ll reabsorb juices and stay moist longer, especially if you’re prepping ahead. Skipping this step means dry, crumbly filling—no one wants that.
Storing and reheating this dish
Refrigerator Storage
Store leftover rotis in an airtight container or wrapped tightly in plastic wrap for up to 3 days. The filling stays juicy best when refrigerated separately—keep it in a sealed container with parchment paper pressed on top to prevent drying. I like using glass containers because they keep the rotis from absorbing fridge odors. 💛
Freezer Prep
For long-term storage, freeze rotis individually between parchment paper or plastic wrap to prevent sticking. Place them in a freezer bag with all air squeezed out and store for up to 3 months. Thaw overnight in the fridge before reheating—never microwave directly from frozen or the layers will turn soggy.
Oven Reheating
Preheat your oven to 350°F and place rotis on a baking sheet lined with parchment paper. Heat for 5-7 minutes until golden and crispy again. For extra crispiness, brush the top with a little vegetable oil before reheating. This method restores that perfect flaky texture without drying out the filling. ✨
Skillet Refresh
For a quick crisp-up, heat 1 tablespoon vegetable oil in a skillet over medium heat. Place rotis in the pan and cook for 2-3 minutes per side until golden brown. Keep an eye on them—they reheat faster than when cooking fresh. This method works best for rotis with filling still inside.
Filling Revival
If the filling seems dry after storage, revive it by adding 1-2 tablespoons water and heating in a skillet for 2-3 minutes. Stir in a pinch of salt and ½ teaspoon curry powder to restore its vibrant flavor. The spices help mask any fridge-induced dullness while keeping the meat tender. 🔥
Serving Warm
For a restaurant-style experience, reheat rotis in the oven until warm, then serve with mint chutney and extra filling on the side. The contrast of cool chutney with warm, crispy roti is what makes this dish truly special. I always double-check the oven temp—350°F is key for even reheating without burning.
Nutrition facts
Frequently asked questions
Can I make the dough ahead of time?
The dough keeps well for 3 days in the fridge wrapped tightly in plastic. Let it sit at room temperature for 30 minutes before using to make rolling easier. For longer storage, you can freeze the dough balls for up to 3 months—just thaw them overnight in the fridge before shaping.
What's the secret to getting flaky layers?
The magic happens during dough prep and rolling. First, let the dough rest 2 hours minimum after kneading. Then roll it ¼-inch thick and fold it into a half-moon before cooking. High heat and quick cooking (2-3 minutes per side) create those signature crispy layers. Don't skip the oil on your rolling pin—it prevents sticking!
Can I substitute ground beef with another protein?
While ground chuck gives the best texture, you can use ground turkey (93% lean max) or lamb shoulder for a different flavor. For chicken, use ground chicken thighs (not breast) to keep it juicy. The fat content matters—too lean and your filling will dry out. Adjust cooking time by 2-3 minutes if using darker meat.
Why did my roti turn out dense instead of flaky?
Dense rotis usually happen from one of three issues: over-kneading (stop when smooth, not tough), skipping the rest (dough needs 30+ minutes to relax), or too much filling (use 2-3 tbsp per roti). Also check your yeast—if it's old, the dough won't rise properly. Try making a small test batch to troubleshoot.
How do I make these vegan?
Replace the beef with 1.5 lb lentils or crumbled tempeh cooked with the same spices. Use vegetable oil and nutritional yeast instead of butter. For the dough, swap regular flour for all-purpose flour (vegan yeast works fine) and oil for vegetable oil. The texture stays similar, but vegan rotis may need 1 extra minute per side to crisp.